Dr Virago Pete's 3-D Printer
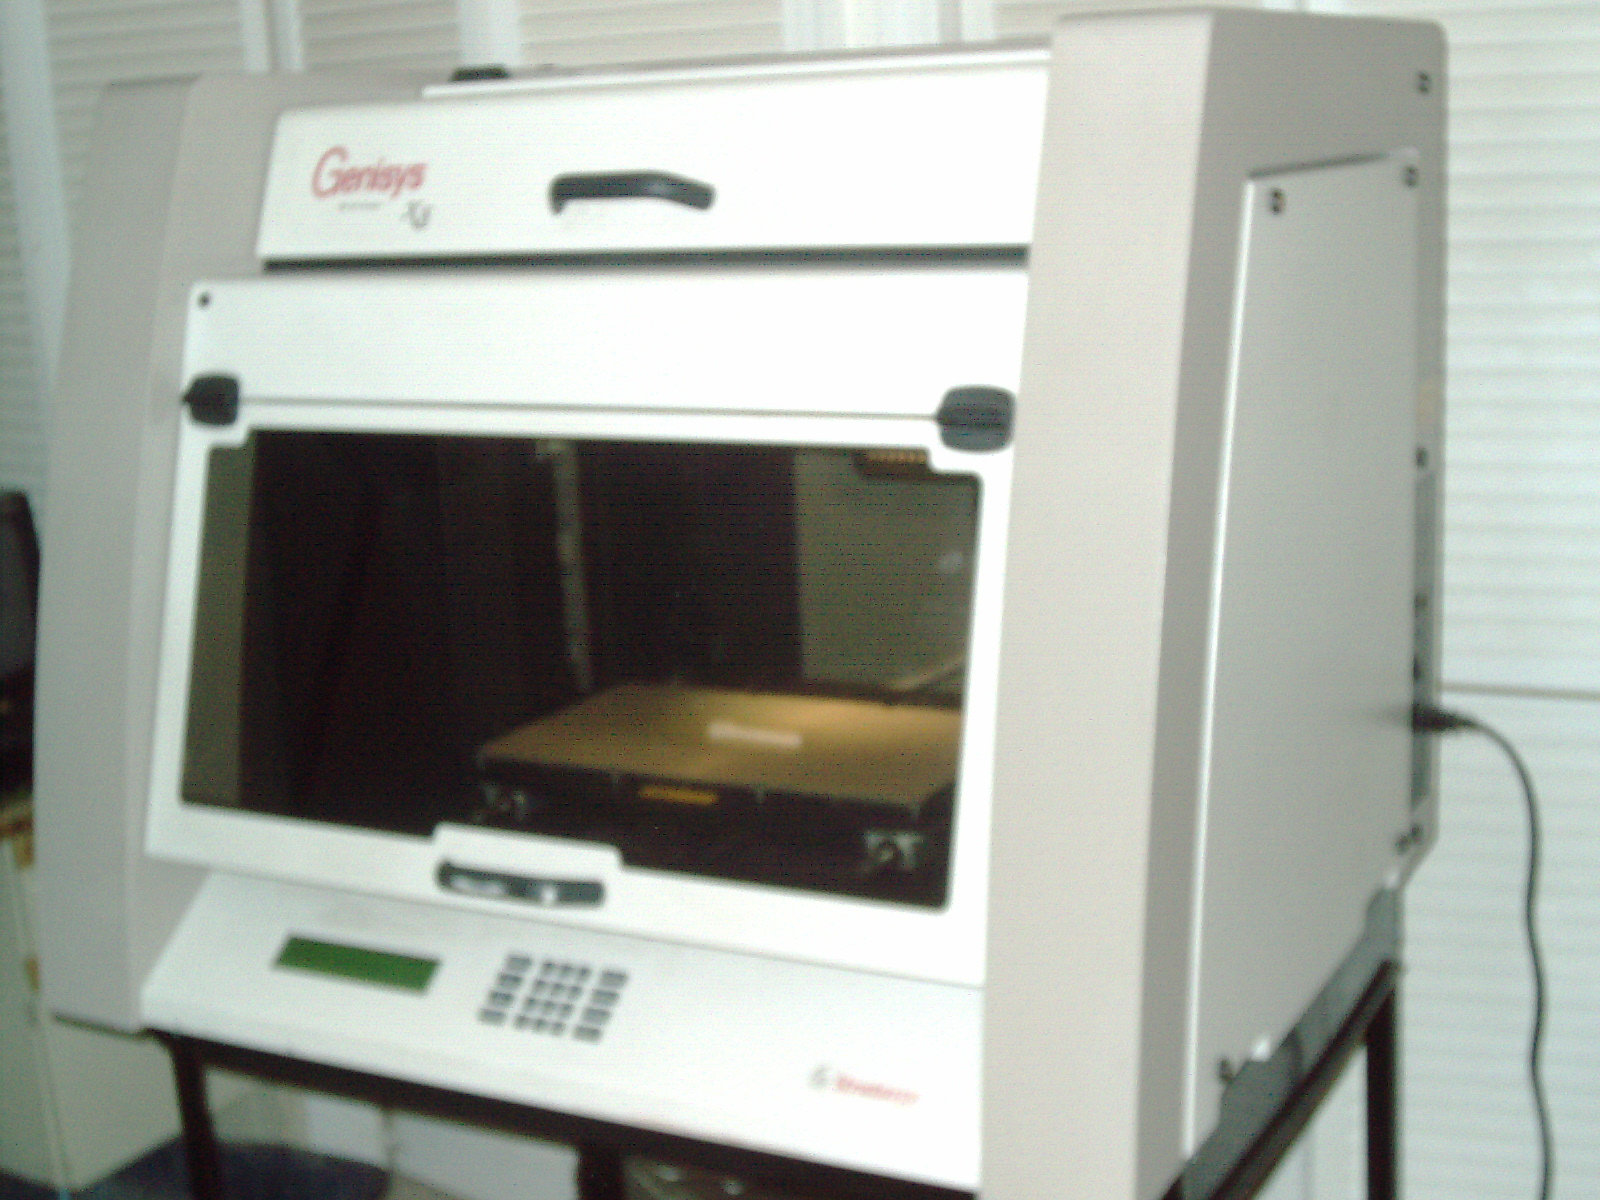
Stratasys Genisys model 1 or Genisys XS
(The very first FDM printer model in the world but version XS which means it was the next version which has a 2" bigger build volume and some revisions over the previous year)
I have been looking for spare parts and plastic media wafers for this model printer for about 5 years and occasionally I get a phonecall or email from a seller of parts or an owner who has decided to AAARGH give up on it and part it out. Its a real waste of a great machine to do that. DONT DESTROY IT.
I should say right upfront that Im not affiliated with Stratasys in ANY WAY. I own a few of their parts and pieces as they are super rare - my approach is to find the rare items and then later buy the machine itself. I know of no-one-else who has this approach. See some people have the machine but they are missing the wafer chips and cartridges and - this lack of print media means - their printer has no material to print.
Its like owning a car - but with no gas stations to buy gas from!
(there are plenty of gas stations in USA- dont worry - 1 every 1/4 mile in my local area)
My point is that I now have 3 full tanks of media - probably more media than I will use in my lifetime.
Now that I have sufficient media - Ive made a few purchases of spare parts
1. Printhead
2. Wafer loading mechanism (tractor feed/worm gear) which loads the chip into the printhead
3. LCD & board & Silicone kepad & backer
4. Misc PCB Boards / circuit boards
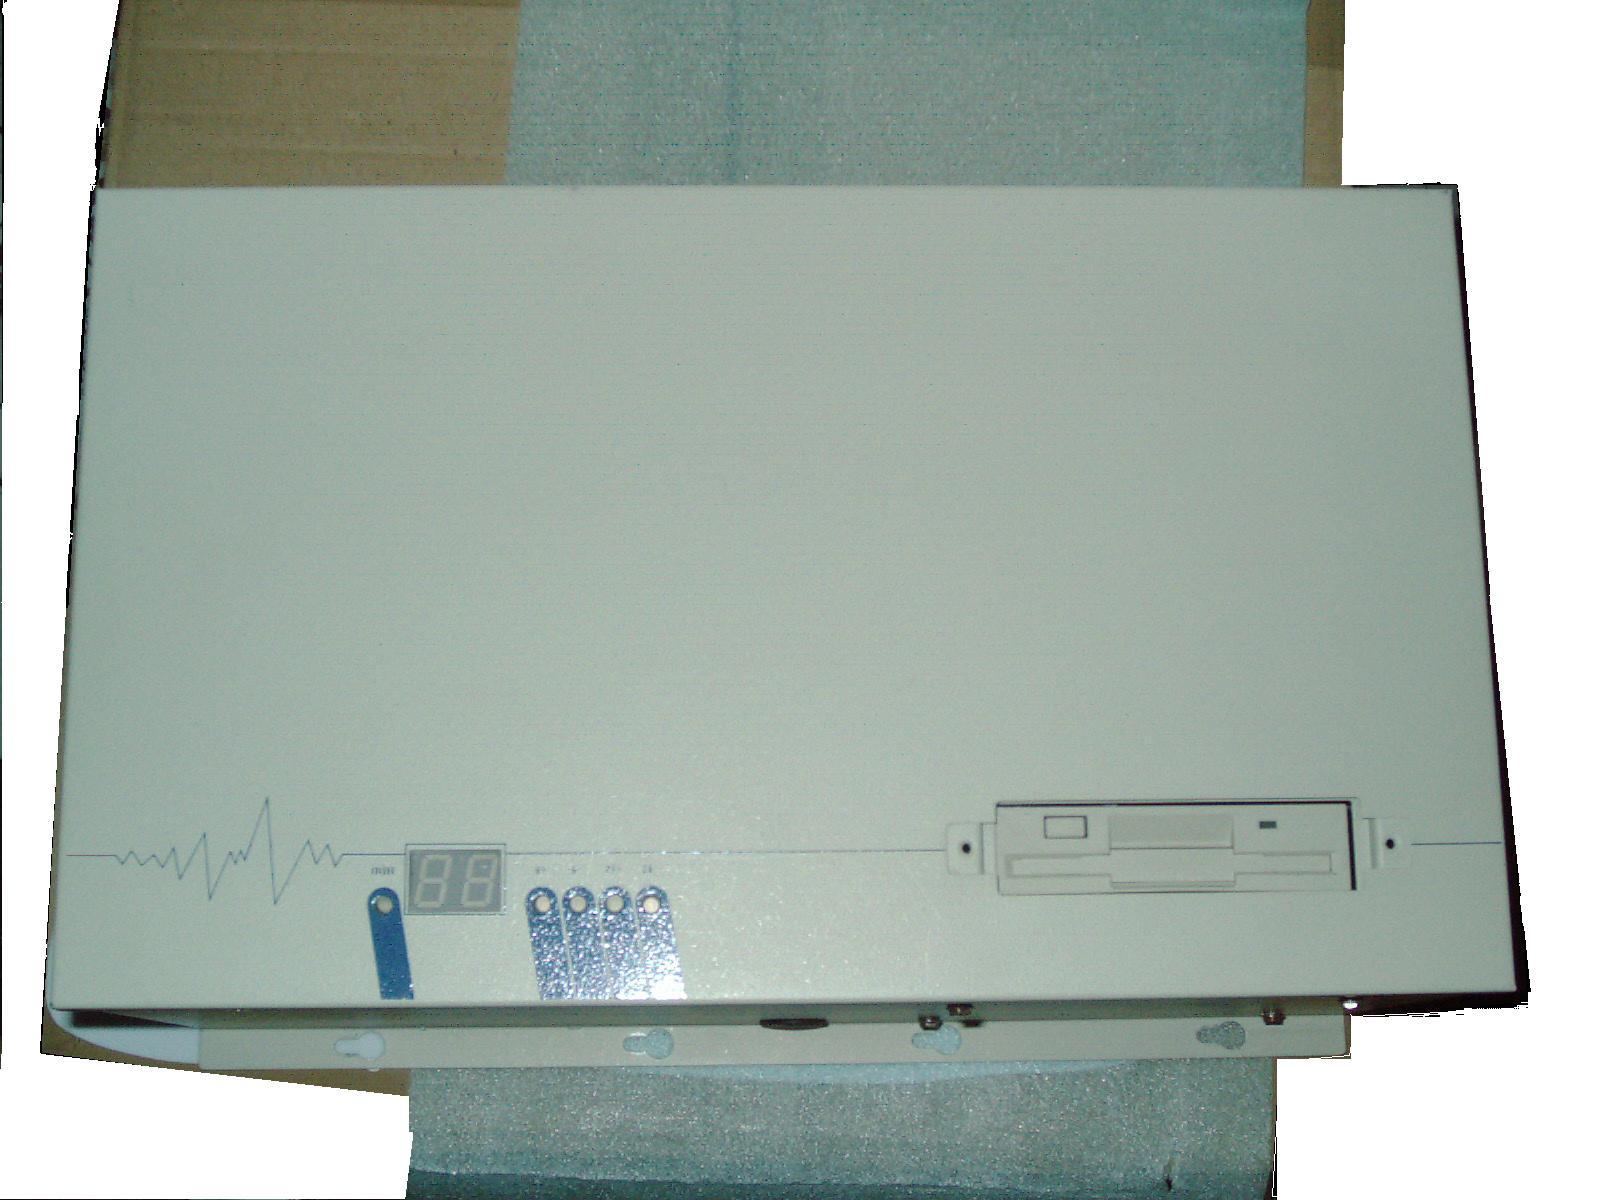
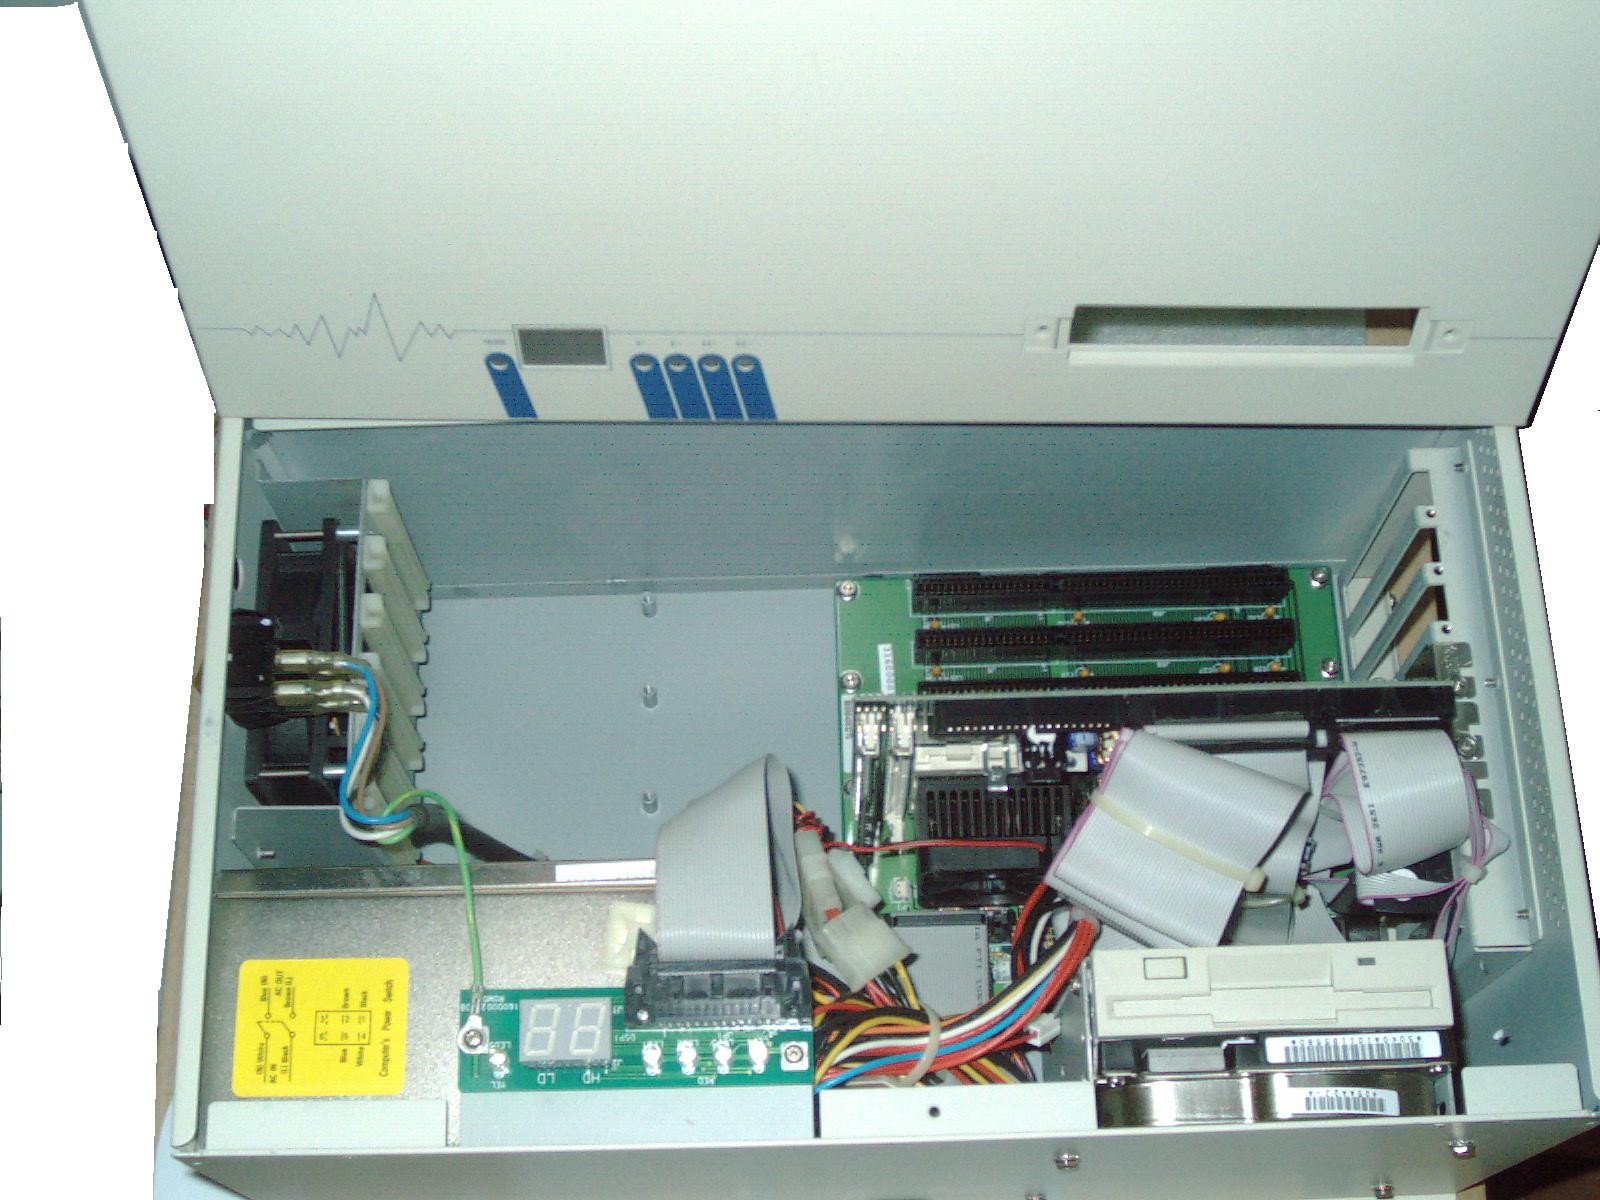
5. The Computer and steel beige case - contains cards, hard drive, CPU, memory ports etc
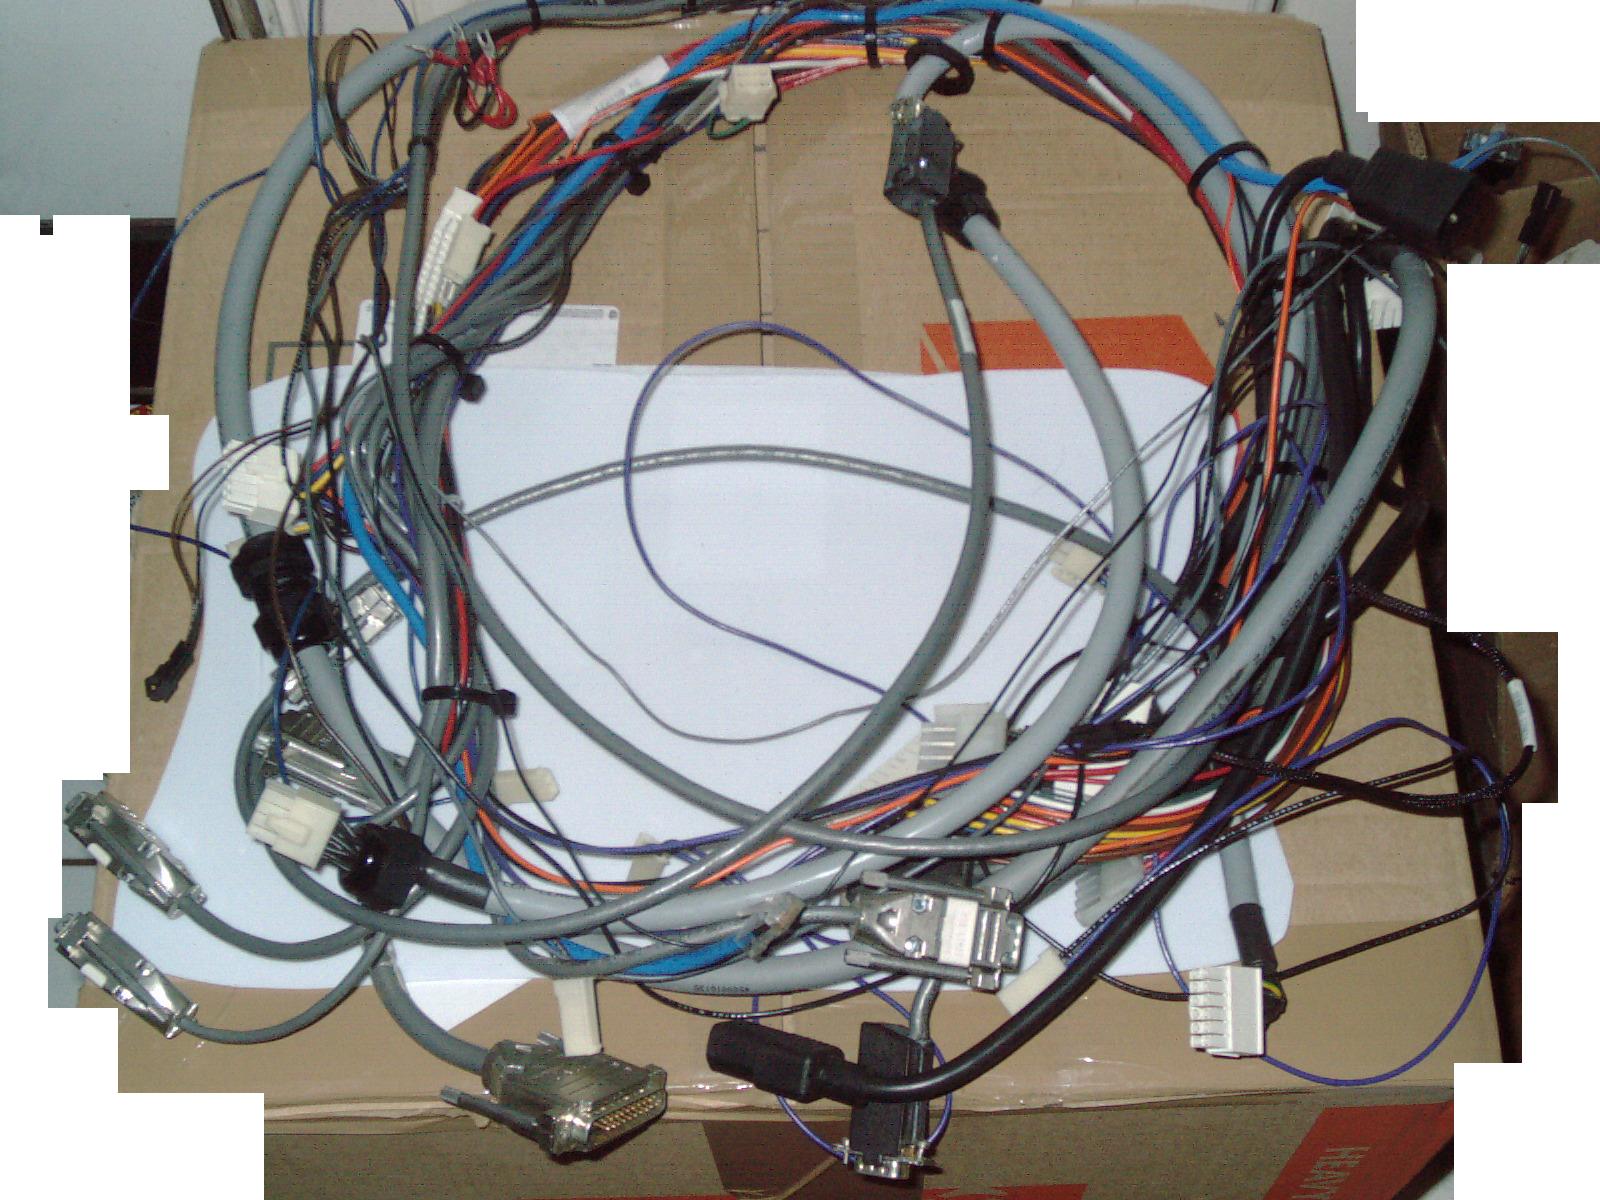
6. Odds and ends cables, connectors, brackets
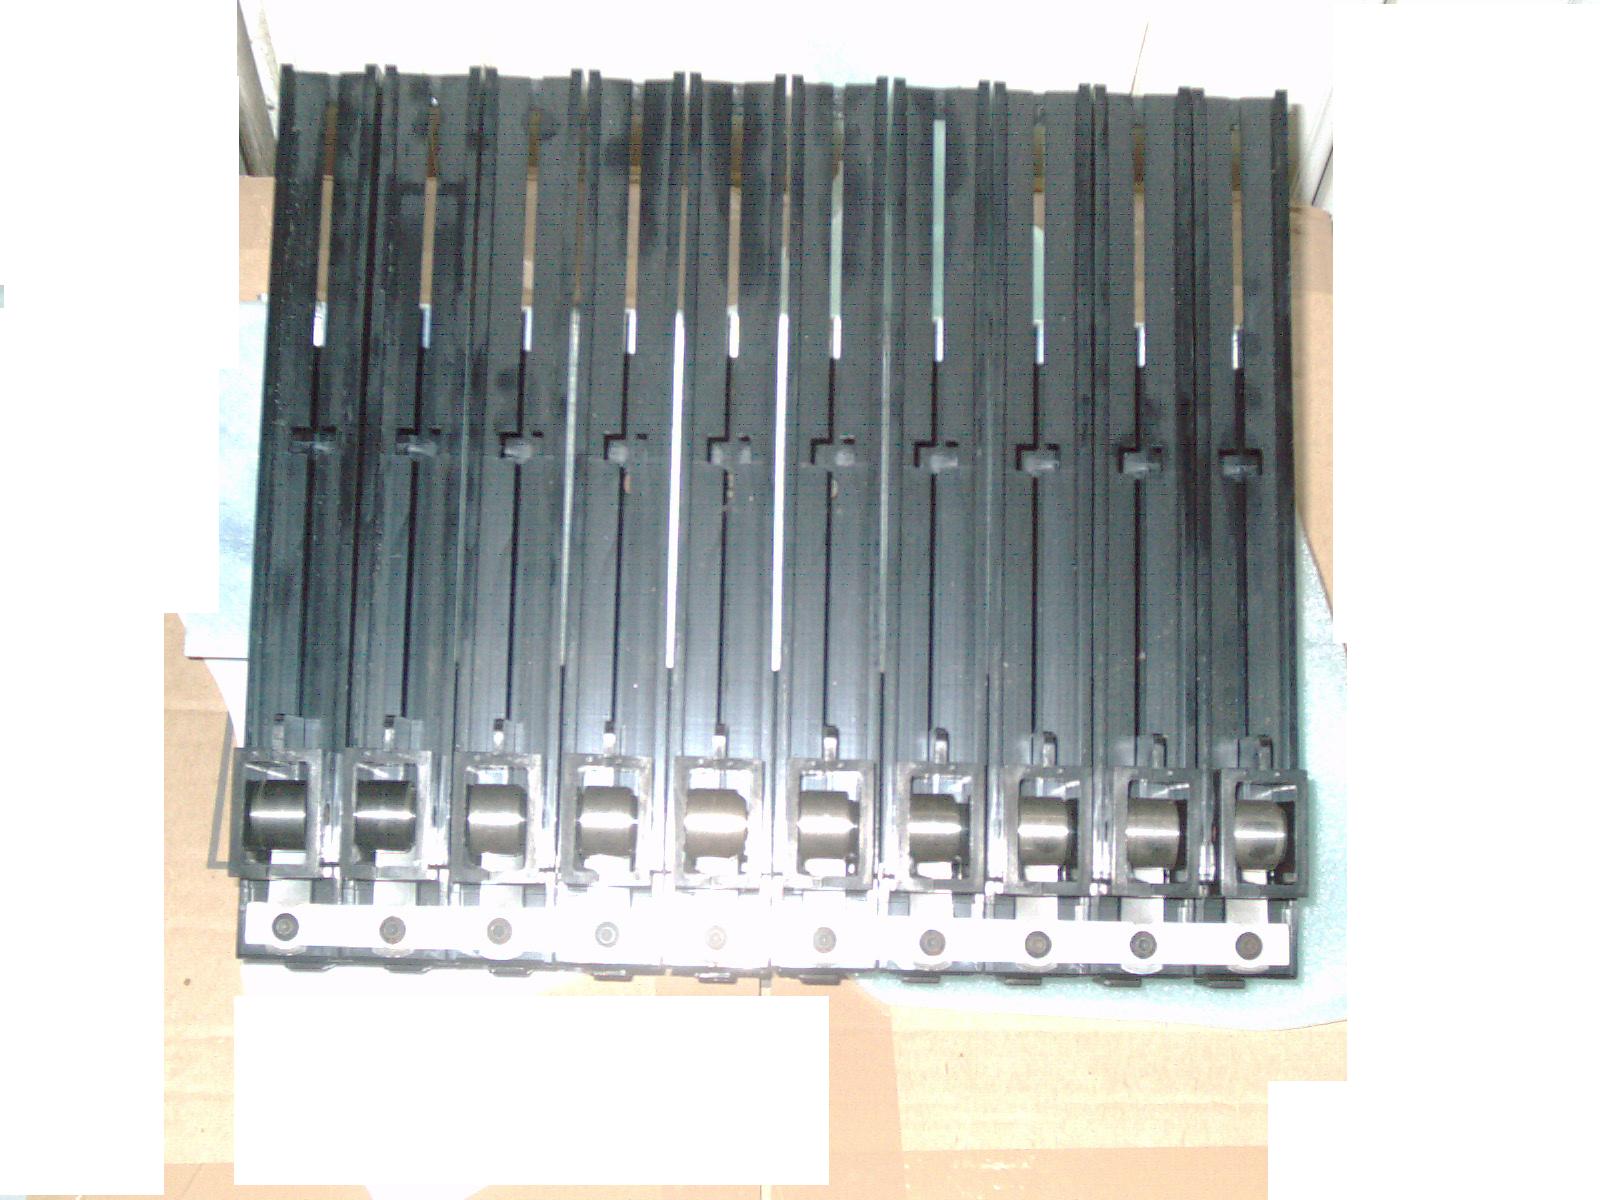
7. Black plastic ten-bay cartridge loading dock and attached PCB
8. I dont yet have a spare power supply
9. Instruction manual 3-ring Binder
10. Floppy diskettes
11. CD-ROM installation
12. Loose wafer chips without case
13. Empty cartridges (approx 25) and empty boxes
14 Full cartridges with approx 50 wafer chips each (unsealed)
15 Full cartridges with approx 50 wafer chips each (sealed NIB)
I dont have any print samples - got some print samples for sale?
As I create the beginnings of this page on Sept 12 2016 I am planning on including photos of all the parts/pieces I have purchased over the last few years. Some through big-auction-site. Some through phonecalls from the seller and paid by paypal.
I see $200 - to - $450 for a semi-pretty-good-hobbyiest machine. But instead I choose to keep investing in whatever Stratasys Genisys parts I can find/buy. It is what I prefer. Maybe the reader prefers something different - I made my choice a long time ago and Im sticking to it.
There are fewer and fewer Stratasys Genisys and XS machines each and every year
1. Dumpster
2. Converted to reprap
3. Mangled in shipping
4. Damaged in storage
5. Lack of print media
6. No power up
7. Powers up but with an error
8. Missing printhead and one PCB - disabled by upgrading
I have communicated with sellers who refused to sell to me and later when I contacted them to see if I can buy parts pieces they ended up throwing out years ago- what a waste!!!
I could barely find any online photos /videos of anything even printed on a Stratasys Genisys or XS.
Update 4/16/17
I have located a Stratasys Genisys XS in fixer upper condition and have begun making payments/installments. The machine was functioning correctly but the seller decided to print his own PLA homemade wafers (as he was down to only 100 original wafers, he printed some on his other 3d printer) and the very first one jammed. I hope that the wormdrive/belt drive which feeds the wafer into the Genisys XS printhead isnt broken. Reprap filament PLA is a material that melts at somewhere between 190 to 220 degrees C. The Stratasys Genisys wafers melt at a much lower temperature as it is a special Polyester and probaby has a melting point approx 30 to 40 degrees C cooler. So that homemade PLA wafer was not a good idea and it ruined his machine. I have a bunch of Stratasys Genisys XS parts which I bought from a seller who had gutted his machine to make a reprap. That seller sold me everything except the shell, mechanism, motors, magnet reel switches, heated buildplate and power supply - so I most likely have everything I need to fix this machine with the jammed PLA wafer. I have some expenses for the next two months in saving funds for a new roof. The seller of the PLA jammed Genisys XS is willing to drop it off from Michigan to Illinois and willing to accept installment payments. Im glad to finally find one and catches me at a bad time when I have to redo my roof. I am working hard to come up with the funds for both my roof project and the 3d printer - which I have been looking for - for years. For some reason sales have been better than past years so Im hopeful that good sales will continue for awhile longer as I take-on these challenges.
Here are 3ea youtube video demos from the seller showing the actual printer that I am in the process of purchasing.
Copy and paste these links into your browser to view
https://youtu.be/Do_dvyTjFIc
https://www.youtube.com/watch?v=Zzbb31K3kJ4
https://youtu.be/KMj4UrgaFqE
The seller prefers his newer 3d printers to this machine and also the fact that there are no build materials left and one homemade wafer is stuck inside. One video shows a side-by-side comparison to a rep-rap printer he owns to the Stratasys.
Update 11/6/17
I have completed my payments to the seller of this Stratasys Genisys and he wrote by email saying that he is figuring out how to transport the unit. He originally told me that he will drive it over from MI to IL but now says that due to health issues is looking for someone to transport it.
It took several months of saving to come up with the remainder of the funds. I had to replace my roof and financial recovery from that took awhile. I appreciate the seller working with me on this.
Stratasys Genisys model 1 or Genisys XS
(The very first FDM printer model in the world but version XS which means it was the next version which has a 2" bigger build volume and some revisions over the previous year)
I have been looking for spare parts and plastic media wafers for this model printer for about 5 years and occasionally I get a phonecall or email from a seller of parts or an owner who has decided to AAARGH give up on it and part it out. Its a real waste of a great machine to do that. DONT DESTROY IT.
I should say right upfront that Im not affiliated with Stratasys in ANY WAY. I own a few of their parts and pieces as they are super rare - my approach is to find the rare items and then later buy the machine itself. I know of no-one-else who has this approach. See some people have the machine but they are missing the wafer chips and cartridges and - this lack of print media means - their printer has no material to print.
Its like owning a car - but with no gas stations to buy gas from!
(there are plenty of gas stations in USA- dont worry - 1 every 1/4 mile in my local area)
My point is that I now have 3 full tanks of media - probably more media than I will use in my lifetime.
Now that I have sufficient media - Ive made a few purchases of spare parts
1. Printhead
2. Wafer loading mechanism (tractor feed/worm gear) which loads the chip into the printhead
3. LCD & board & Silicone kepad & backer
4. Misc PCB Boards / circuit boards
5. The Computer and steel beige case - contains cards, hard drive, CPU, memory ports etc
6. Odds and ends cables, connectors, brackets
7. Black plastic ten-bay cartridge loading dock and attached PCB
8. I dont yet have a spare power supply
9. Instruction manual 3-ring Binder
10. Floppy diskettes
11. CD-ROM installation
12. Loose wafer chips without case
13. Empty cartridges (approx 25) and empty boxes
14 Full cartridges with approx 50 wafer chips each (unsealed)
15 Full cartridges with approx 50 wafer chips each (sealed NIB)
I dont have any print samples - got some print samples for sale?
As I create the beginnings of this page on Sept 12 2016 I am planning on including photos of all the parts/pieces I have purchased over the last few years. Some through big-auction-site. Some through phonecalls from the seller and paid by paypal.
I see $200 - to - $450 for a semi-pretty-good-hobbyiest machine. But instead I choose to keep investing in whatever Stratasys Genisys parts I can find/buy. It is what I prefer. Maybe the reader prefers something different - I made my choice a long time ago and Im sticking to it.
There are fewer and fewer Stratasys Genisys and XS machines each and every year
1. Dumpster
2. Converted to reprap
3. Mangled in shipping
4. Damaged in storage
5. Lack of print media
6. No power up
7. Powers up but with an error
8. Missing printhead and one PCB - disabled by upgrading
I have communicated with sellers who refused to sell to me and later when I contacted them to see if I can buy parts pieces they ended up throwing out years ago- what a waste!!!
I could barely find any online photos /videos of anything even printed on a Stratasys Genisys or XS.
Update 4/16/17
I have located a Stratasys Genisys XS in fixer upper condition and have begun making payments/installments. The machine was functioning correctly but the seller decided to print his own PLA homemade wafers (as he was down to only 100 original wafers, he printed some on his other 3d printer) and the very first one jammed. I hope that the wormdrive/belt drive which feeds the wafer into the Genisys XS printhead isnt broken. Reprap filament PLA is a material that melts at somewhere between 190 to 220 degrees C. The Stratasys Genisys wafers melt at a much lower temperature as it is a special Polyester and probaby has a melting point approx 30 to 40 degrees C cooler. So that homemade PLA wafer was not a good idea and it ruined his machine. I have a bunch of Stratasys Genisys XS parts which I bought from a seller who had gutted his machine to make a reprap. That seller sold me everything except the shell, mechanism, motors, magnet reel switches, heated buildplate and power supply - so I most likely have everything I need to fix this machine with the jammed PLA wafer. I have some expenses for the next two months in saving funds for a new roof. The seller of the PLA jammed Genisys XS is willing to drop it off from Michigan to Illinois and willing to accept installment payments. Im glad to finally find one and catches me at a bad time when I have to redo my roof. I am working hard to come up with the funds for both my roof project and the 3d printer - which I have been looking for - for years. For some reason sales have been better than past years so Im hopeful that good sales will continue for awhile longer as I take-on these challenges.
Here are 3ea youtube video demos from the seller showing the actual printer that I am in the process of purchasing.
Copy and paste these links into your browser to view
https://youtu.be/Do_dvyTjFIc
https://www.youtube.com/watch?v=Zzbb31K3kJ4
https://youtu.be/KMj4UrgaFqE
The seller prefers his newer 3d printers to this machine and also the fact that there are no build materials left and one homemade wafer is stuck inside. One video shows a side-by-side comparison to a rep-rap printer he owns to the Stratasys.
Update 11/6/17
I have completed my payments to the seller of this Stratasys Genisys and he wrote by email saying that he is figuring out how to transport the unit. He originally told me that he will drive it over from MI to IL but now says that due to health issues is looking for someone to transport it.
It took several months of saving to come up with the remainder of the funds. I had to replace my roof and financial recovery from that took awhile. I appreciate the seller working with me on this.
Update 11/29/17
I am currently clearing out some space in my small lab for the above pictured 3d printers arrival which is approximately in a few days. It is sitting on a Harbor Freight cart 24" x 36" with the top shelf mounted upside down as a platform. The seller purchased the cart for $29 for this purpose and he said he would sell the cart to me.
I have located some pics of the lot of parts which I purchased approximately in 2016 and these parts are spare parts from a seller who gutted his machine and made a rep-rap (waste of a Stratasys) from it by using the case and power supply and motor/guideways etc but removing the rest.
These are the parts he sold me and I couldnt obtain the rest - I tried but he refused to sell me the other parts. I currently have these parts safely packed in my closet. I purchased these spare parts even before obtaining my 3d printer- as eventually I knew Id find one for sale.
The following parts pictures are here in a gallery and shot by the seller in approx 2016. I have not tested these parts but he said he gutted a fully working machine for lack of wafer media.
As I wait for the arrival of my Stratasys 3d printer I emailed the seller with the question of the dimensions. It is a very big machine and wanted to figure out which room I can put it in- and make a spot for it to go. Being a very big 3d printer I was concerned that it would not fit through some doorways.
Here are the dimensions
36" wide x 32" high x 31" depth
This means that the machine will need to go through the doorway sideways. I can put it in my lab as it will fit as intended- some finagling to get it sideways to fit through the doorway means I need to put it on its back on some styrofoam so the backside wont get crushed by its own weight.
I cleared a large heavy desk for it to fit on - with a very thick flat top to support the weight.
My lab looks alot better now - with the clutter removed - as I make space for the 3d printer and space to finagle it through the doorway sideways. (update it actually didnt need to go in sideways- it went through the doorway sitting normal on the cart- with just enough to make it)
---------------------------------
Update 12/3/17
YES IT ARRIVED YESTERDAY!!!! 2 men transported it from Michigan to Illinois (200 miles + each way)
in a minivan and all three of us moved this heavy 220LB machine onto the black cart and into my lab.
I received
1ea Stratasys Genisys XS
a. looks complete and no dents or other obvious damage
b. I have not tested or powered up
c. Jammed homemade wafer stuck inside printhead mechanism
d. Heated bed mechanism seems to move normal when I move it by hand
e. rusty screws on left and right side panels
f. I see no bodging or tinkering signs - other than the stuck wafer
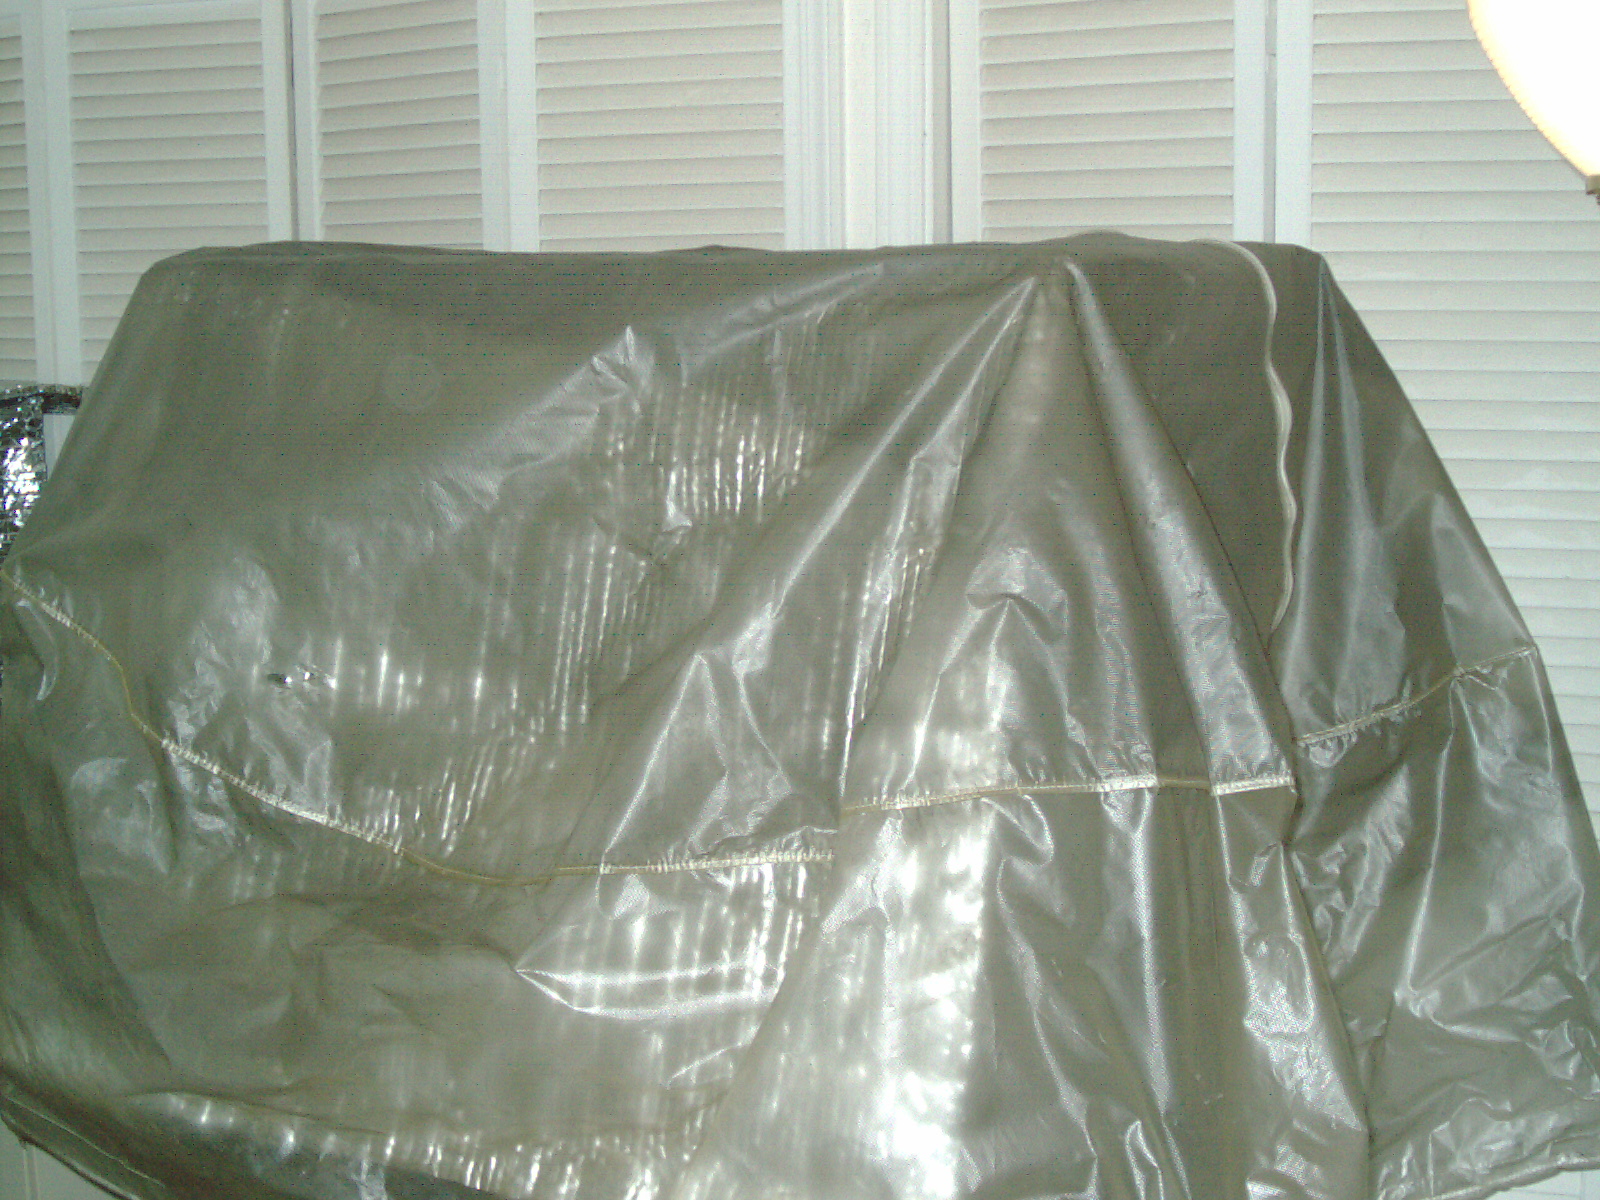
1ea vinyl cover
1ea book
1ea stapled instruction sheets of paper
1ea power cord
2ea extraneous - blue homemade wafers- made by seller- which I removed from the loading cassettes as I didnt want them to jam also.
The seller brought with him an employee of the company who sold it to him. The story of the machine is that the ower of a prototyping company purchased this Stratasys Genisys XS brand new directly from Stratasys. The original owner was a person in a wheelchair and used this machine for only a few times. The 2nd man told me these things and he directly witnessed. He told me it is a very low hour machine. I asked him what the original price was and he said his best guess was 12 to 15 thousand dollars when brand new. He said that the machine printed well and the build material was extremely brittle.
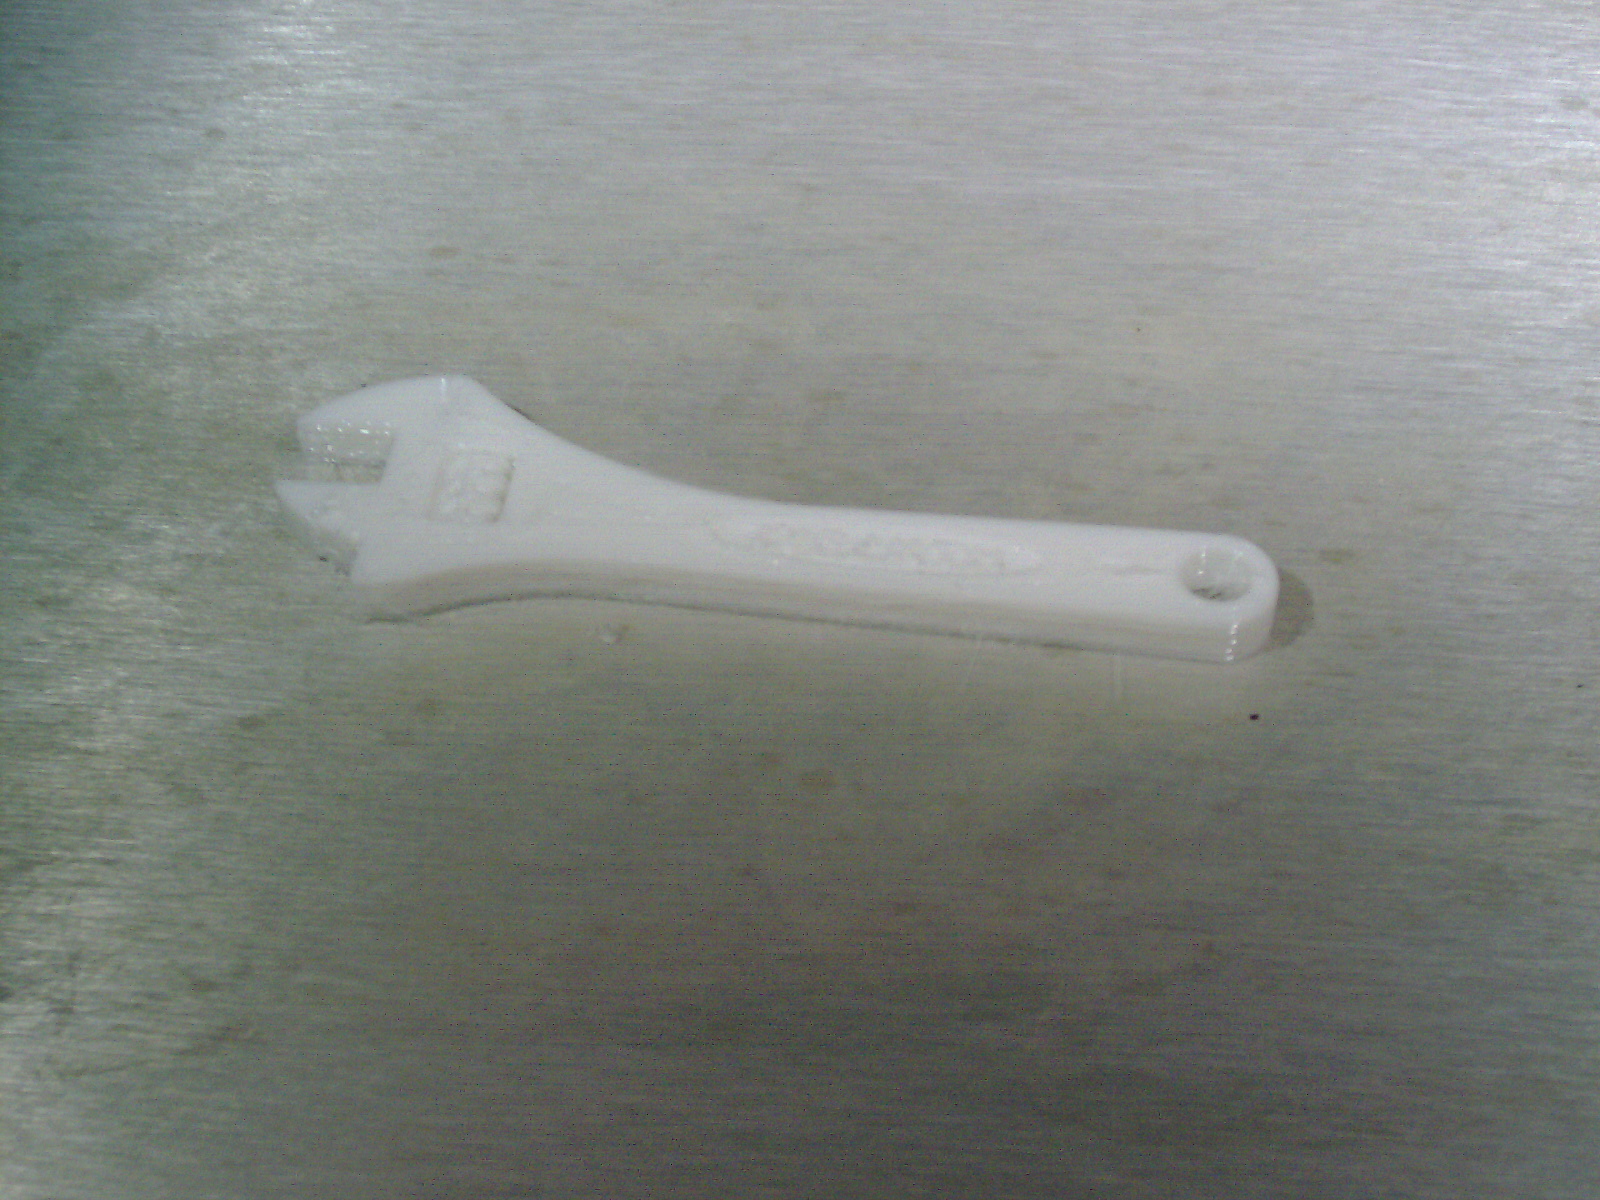
This company then sold this machine to the next owner and he used it to make only the samples which were contained in the machines memory. He made a wrench and I asked if it was a crescent wrench - typical 3d printer demo - but he said no it was not a crescent wrench- it made an open end wrench and he said that it is still in the machines memory and that I should build one for myself. I asked about how he gets the machine to load a file and he said he never tried it and only printed the included sample. He mentioned a metal cover on the back of the machine which if removed shows a CRT port and keyboard port etc. I came to realize that this is a standalone unit and meant to be operated from the front panel and selecting things from the keypad and LCD display. He said that the output turned out very well. He said that his actual physical printsample might still be inside the machine- but I looked and I dont see any.
I asked about how to get the printout to stick to the printbed and he said he used red color glue stick - same as school glue.
Neither one of these men used the Stratasys machine much and both had extensive experience on reprap machines.
I dont want to risk the machine by powering it on. With a jammed homemade PLA (PLA is not compatible with this machine) wafer stuck - I dont want to risk further damage - if the machine continues to try to advance it into the printhead. The PLA wafer is not melting and the seller said he turned it off immediately when he saw the "pressure increase" and so there may or may not be damage???? I need to remove the fake wafer obstruction and clean and lubricate inside before I can power it on. For now I have to concentrate on other projects to pay the bills. I will work on this when I can.
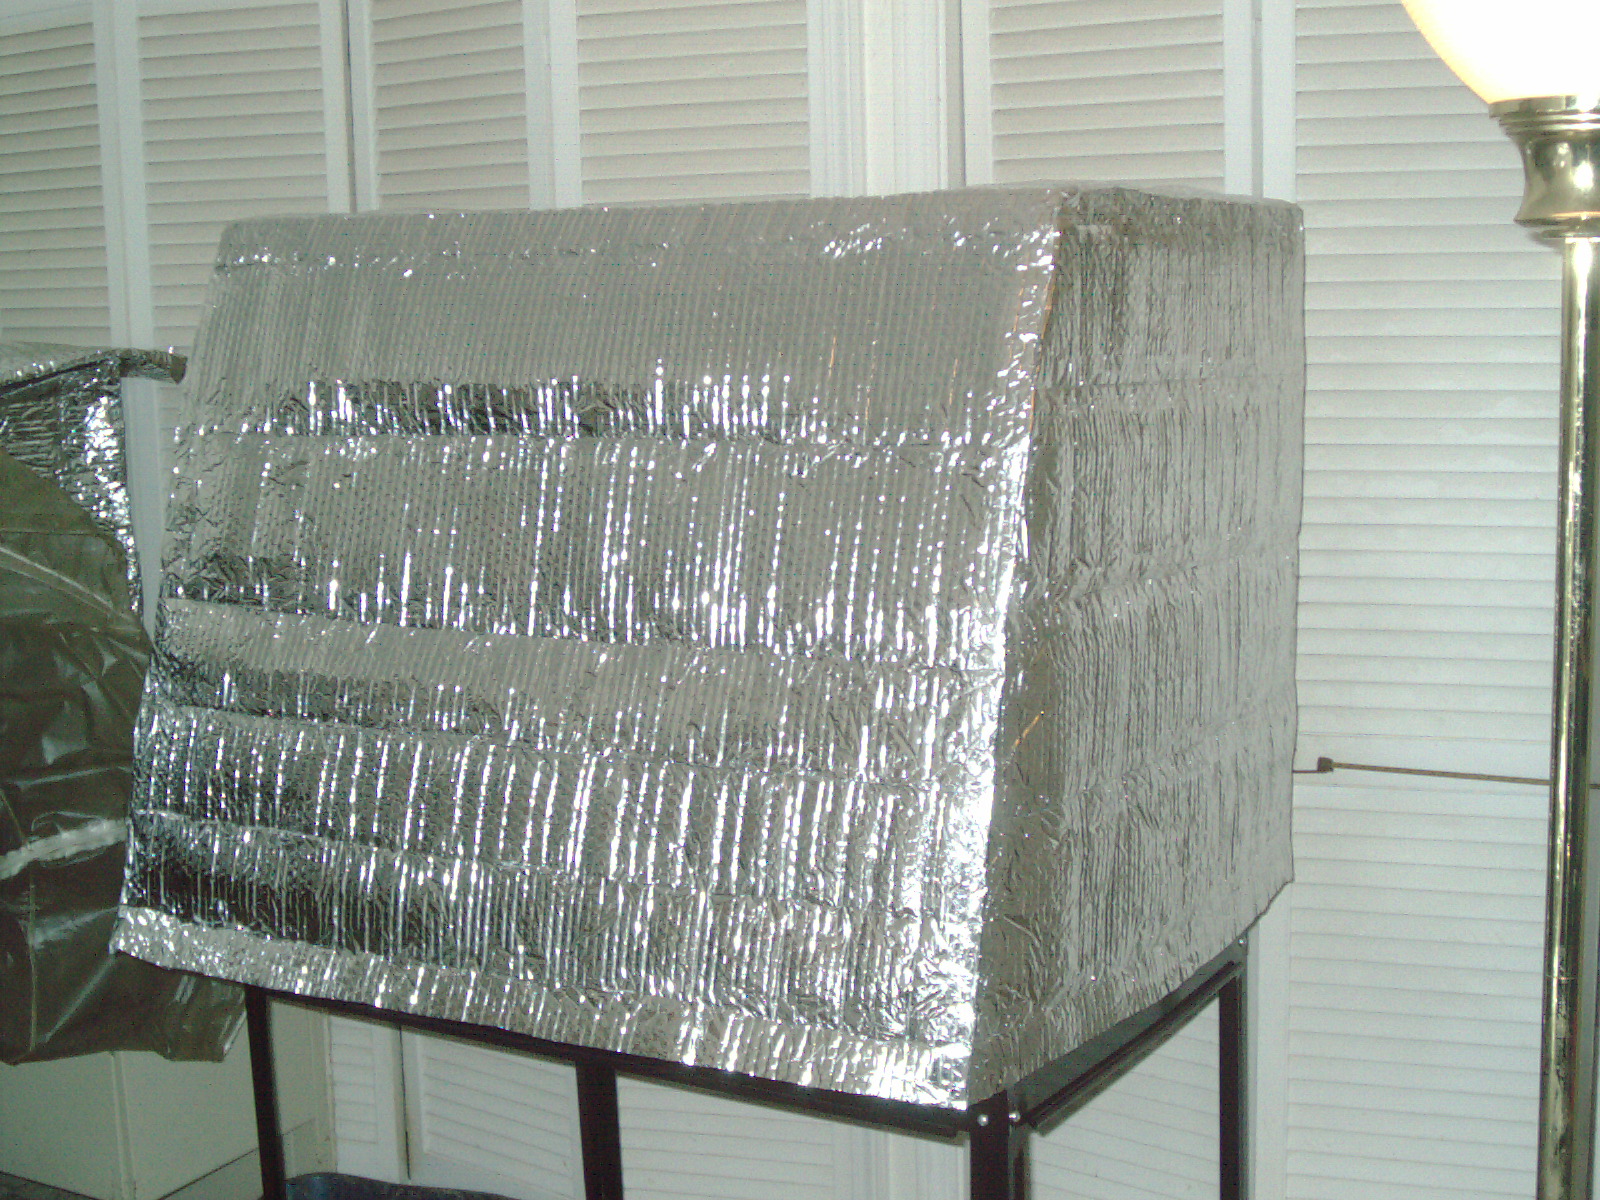
It is in my nice clean clutter free lab and has the cover on and is sitting on the Harbor Freight cart which I also bought from the seller.
Here are the dimensions
36" wide x 32" high x 31" depth
This means that the machine will need to go through the doorway sideways. I can put it in my lab as it will fit as intended- some finagling to get it sideways to fit through the doorway means I need to put it on its back on some styrofoam so the backside wont get crushed by its own weight.
I cleared a large heavy desk for it to fit on - with a very thick flat top to support the weight.
My lab looks alot better now - with the clutter removed - as I make space for the 3d printer and space to finagle it through the doorway sideways. (update it actually didnt need to go in sideways- it went through the doorway sitting normal on the cart- with just enough to make it)
---------------------------------
Update 12/3/17
YES IT ARRIVED YESTERDAY!!!! 2 men transported it from Michigan to Illinois (200 miles + each way)
in a minivan and all three of us moved this heavy 220LB machine onto the black cart and into my lab.
I received
1ea Stratasys Genisys XS
a. looks complete and no dents or other obvious damage
b. I have not tested or powered up
c. Jammed homemade wafer stuck inside printhead mechanism
d. Heated bed mechanism seems to move normal when I move it by hand
e. rusty screws on left and right side panels
f. I see no bodging or tinkering signs - other than the stuck wafer
1ea vinyl cover
1ea book
1ea stapled instruction sheets of paper
1ea power cord
2ea extraneous - blue homemade wafers- made by seller- which I removed from the loading cassettes as I didnt want them to jam also.
The seller brought with him an employee of the company who sold it to him. The story of the machine is that the ower of a prototyping company purchased this Stratasys Genisys XS brand new directly from Stratasys. The original owner was a person in a wheelchair and used this machine for only a few times. The 2nd man told me these things and he directly witnessed. He told me it is a very low hour machine. I asked him what the original price was and he said his best guess was 12 to 15 thousand dollars when brand new. He said that the machine printed well and the build material was extremely brittle.
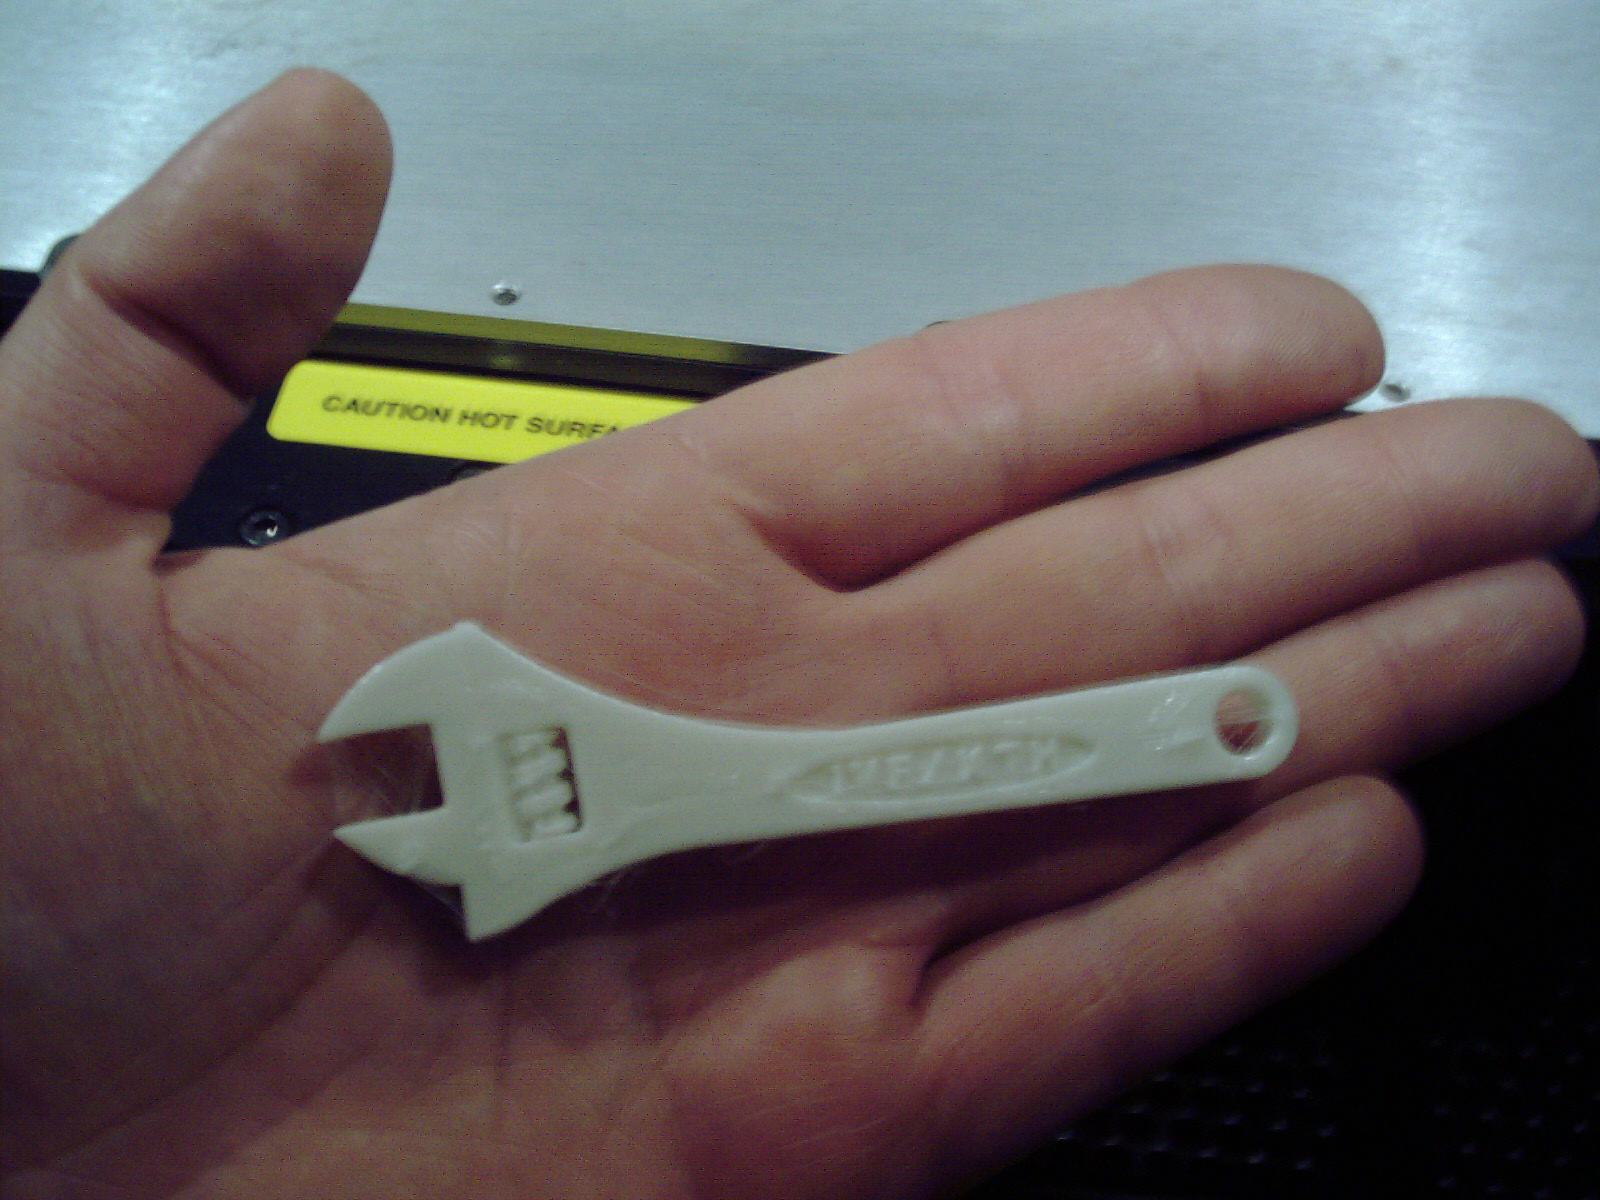
This company then sold this machine to the next owner and he used it to make only the samples which were contained in the machines memory. He made a wrench and I asked if it was a crescent wrench - typical 3d printer demo - but he said no it was not a crescent wrench- it made an open end wrench and he said that it is still in the machines memory and that I should build one for myself. I asked about how he gets the machine to load a file and he said he never tried it and only printed the included sample. He mentioned a metal cover on the back of the machine which if removed shows a CRT port and keyboard port etc. I came to realize that this is a standalone unit and meant to be operated from the front panel and selecting things from the keypad and LCD display. He said that the output turned out very well. He said that his actual physical printsample might still be inside the machine- but I looked and I dont see any.
I asked about how to get the printout to stick to the printbed and he said he used red color glue stick - same as school glue.
Neither one of these men used the Stratasys machine much and both had extensive experience on reprap machines.
I dont want to risk the machine by powering it on. With a jammed homemade PLA (PLA is not compatible with this machine) wafer stuck - I dont want to risk further damage - if the machine continues to try to advance it into the printhead. The PLA wafer is not melting and the seller said he turned it off immediately when he saw the "pressure increase" and so there may or may not be damage???? I need to remove the fake wafer obstruction and clean and lubricate inside before I can power it on. For now I have to concentrate on other projects to pay the bills. I will work on this when I can.
It is in my nice clean clutter free lab and has the cover on and is sitting on the Harbor Freight cart which I also bought from the seller.
Update 12/4/17
I was able to get my Stratasys Xs 3d Printer to work fully and I even printed out 2 included sample prints of the Wrench.
Summary of problems and How I fixed it.
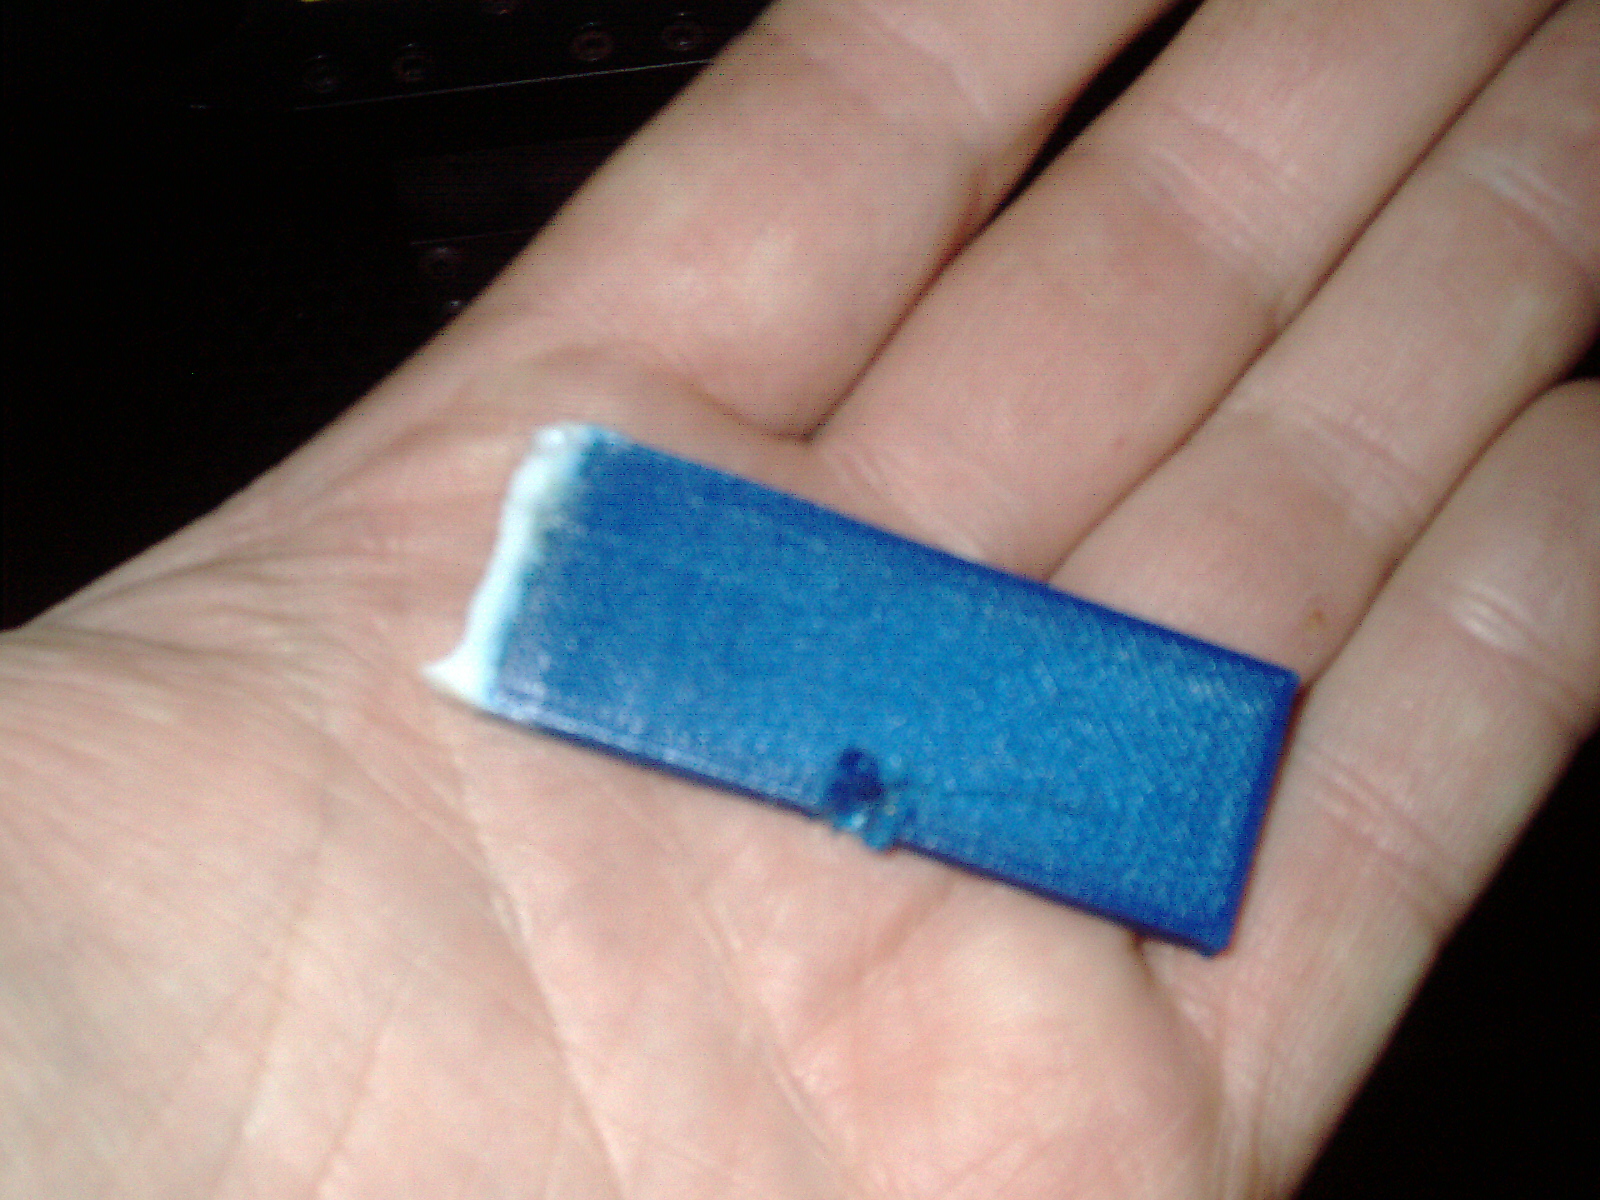
1. I unjammed 2ea Homemade Fake Blue PLA wafers which the previous owner made and got stuck in there
2. I removed 2ea additional Homemade Fake Blue PLA wafers from the hopper (a second catastrophe just waiting)
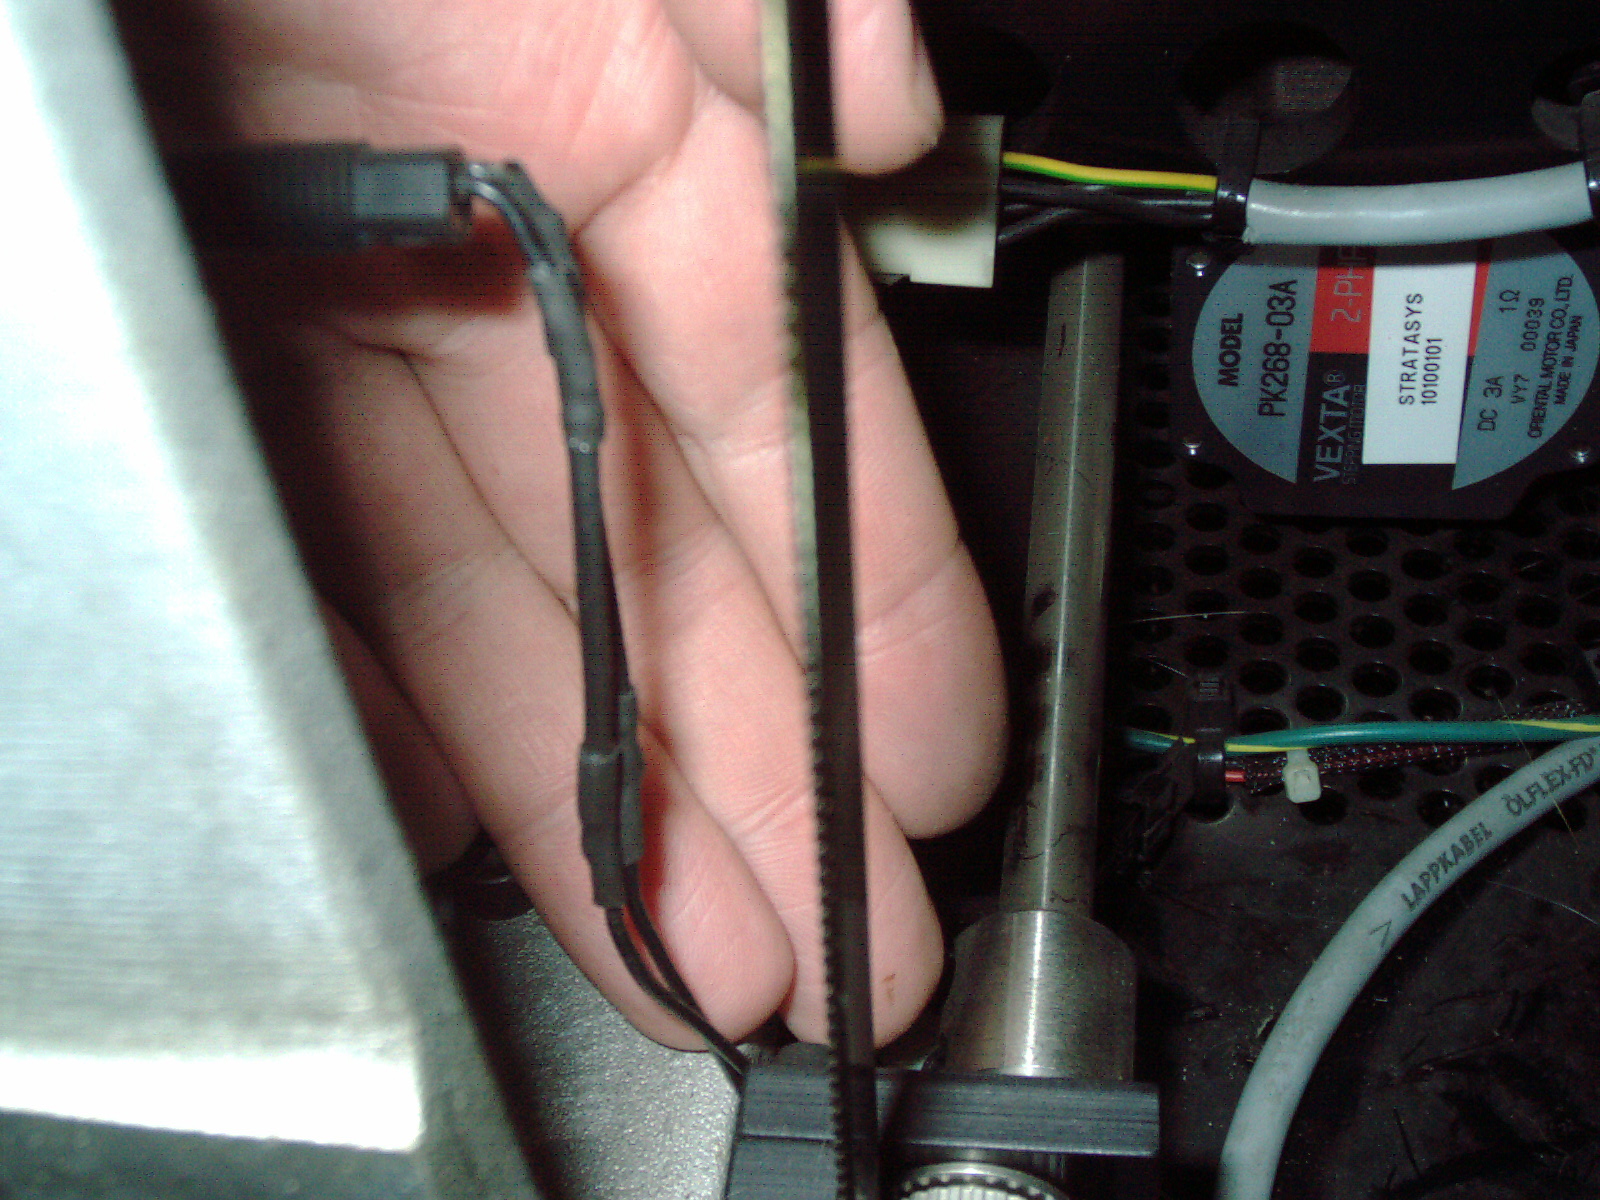
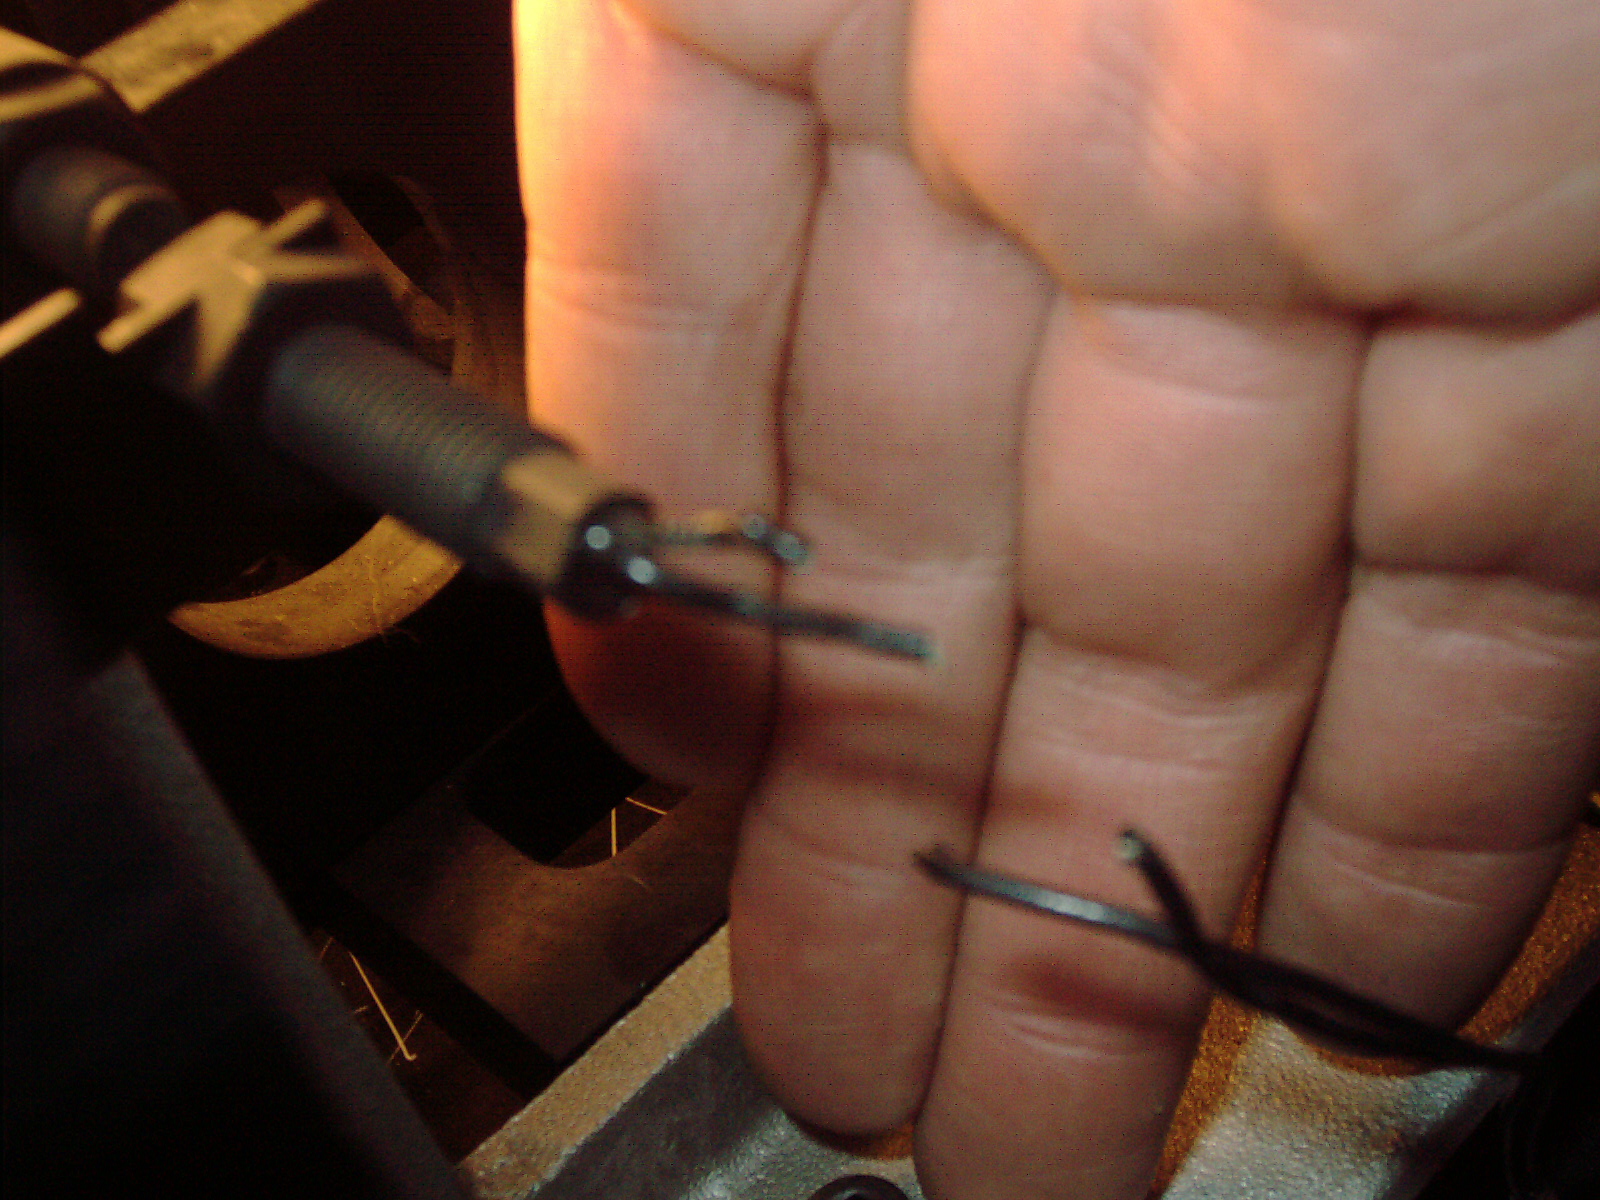
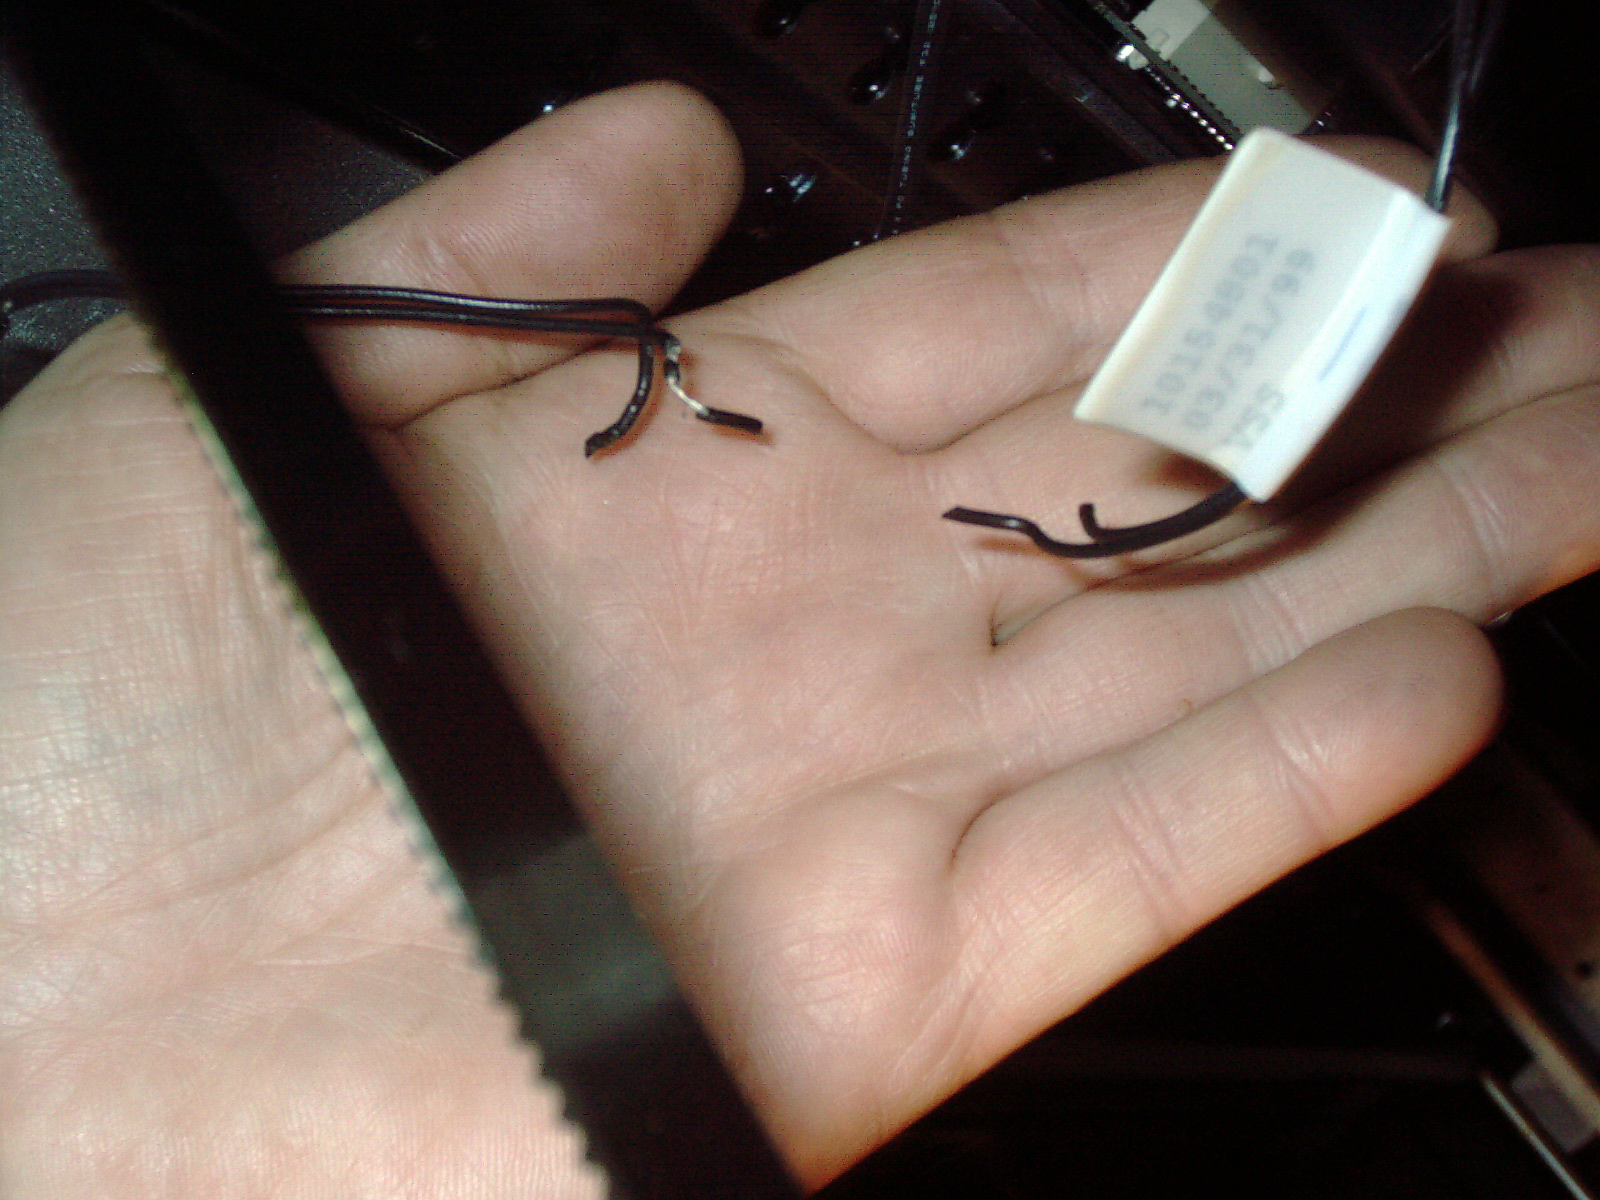
3. I noticed 2ea Home switches with cut wires and soldered them together with a 1-1/2" piece of wire and heat shrink tubing. The extra piece of wire makes this just a tad longer so it would be better. I dont know - possibly the long trip did this somehow (a long distance delivery - slamming on the sellers minivan brakes in traffic may have caused the printbed to move violently???) or possibly the printbed got caught and tore these 4ea wires for one of the previous owners????
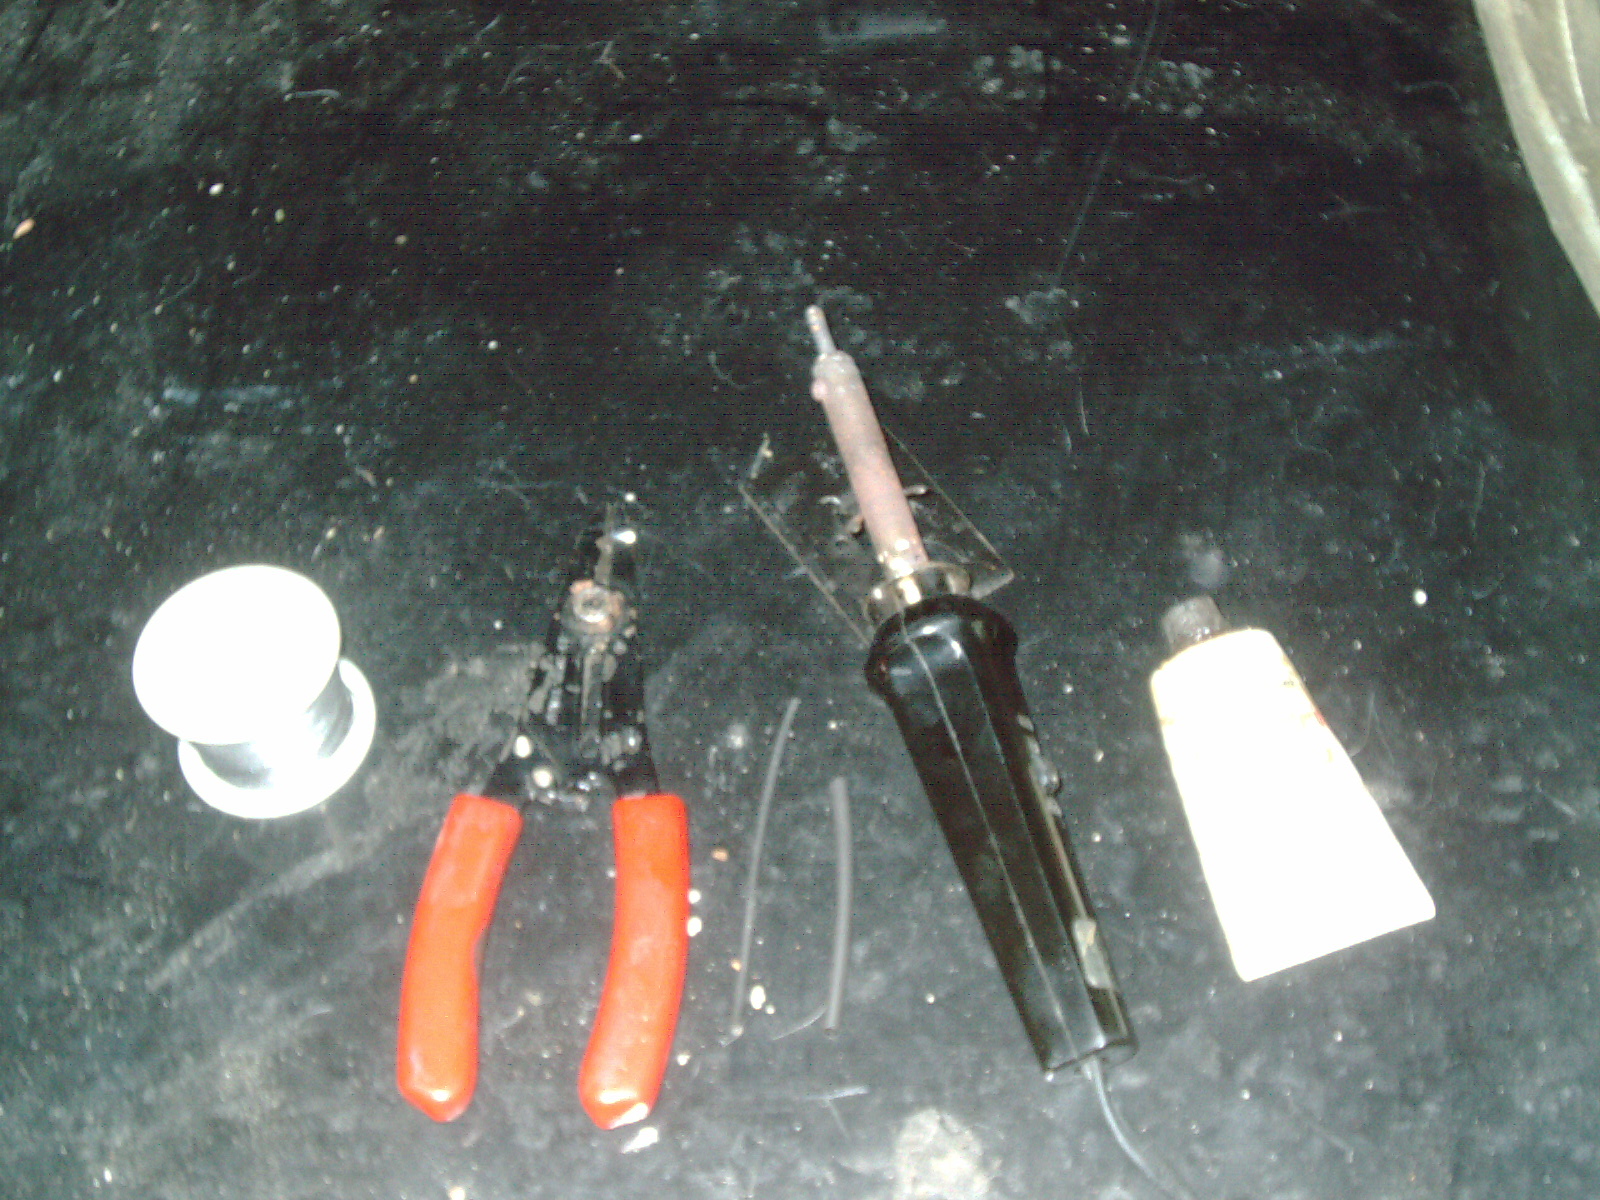
4. I spent all night on it, cleaning all of the insides, outsides, etc with isopropanol and tissue paper and vacuum cleaner.
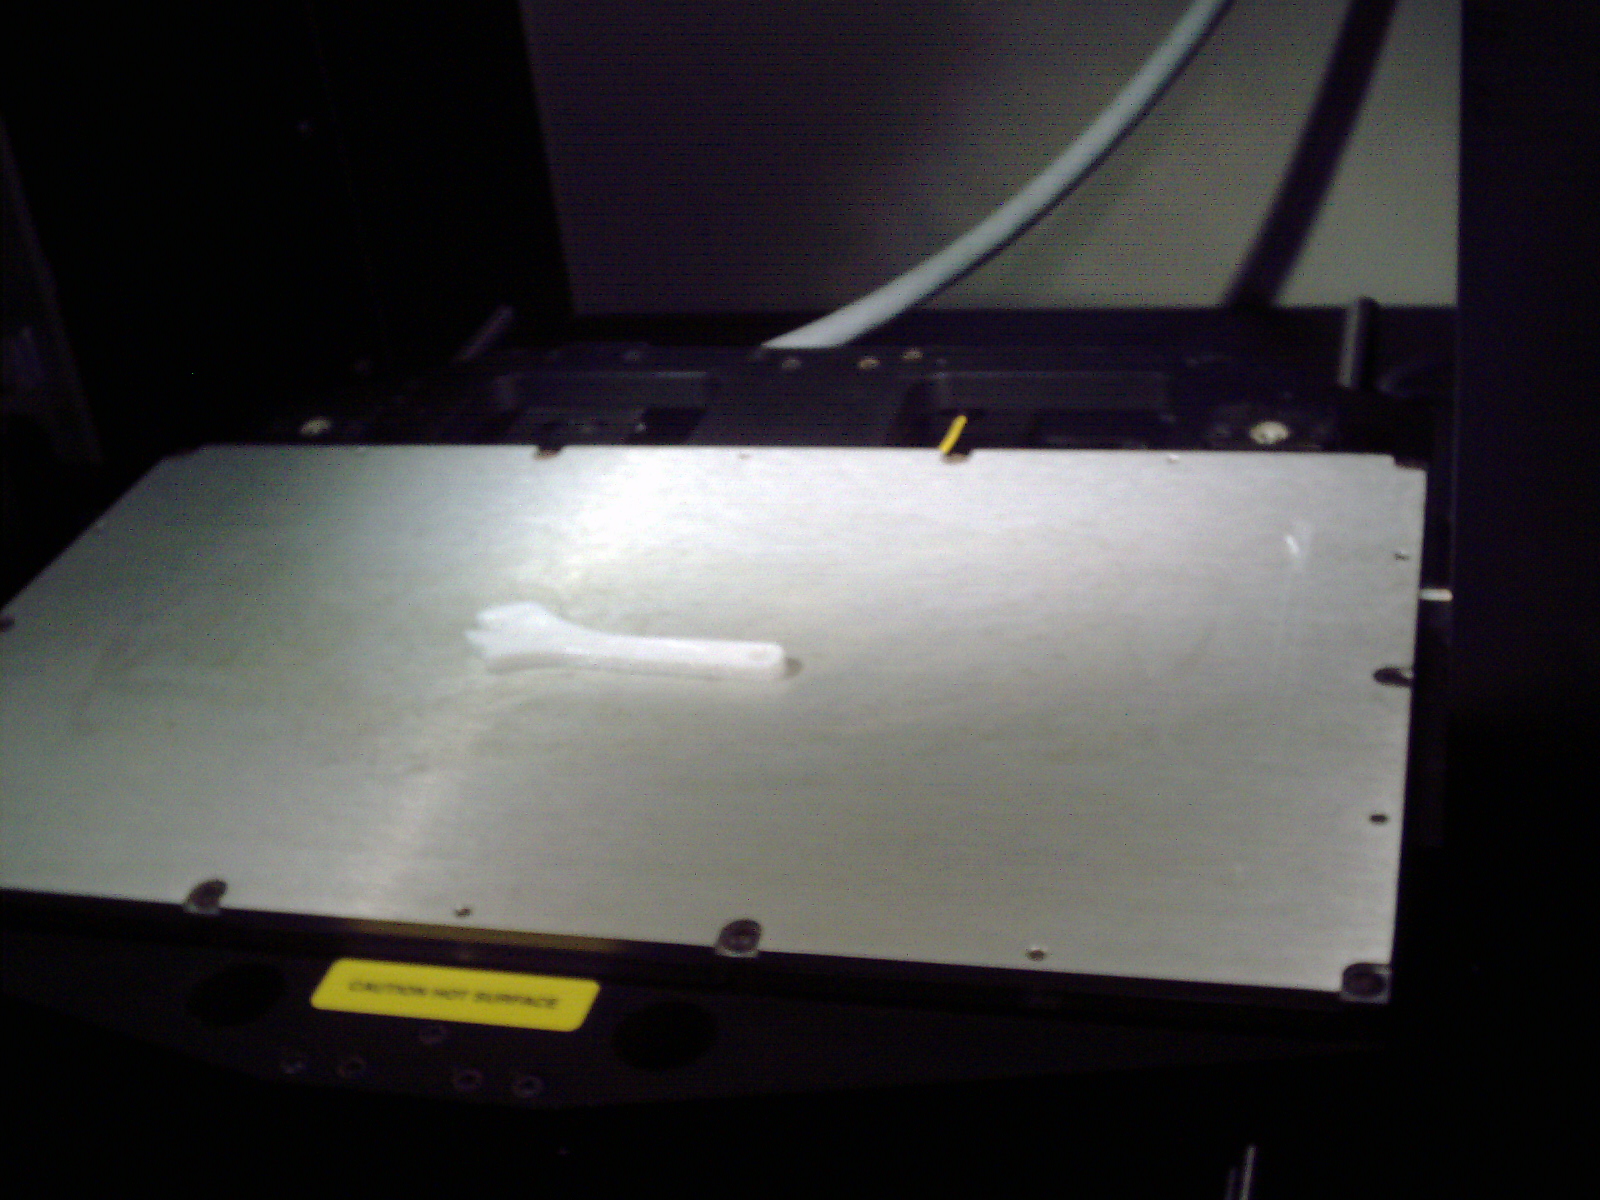
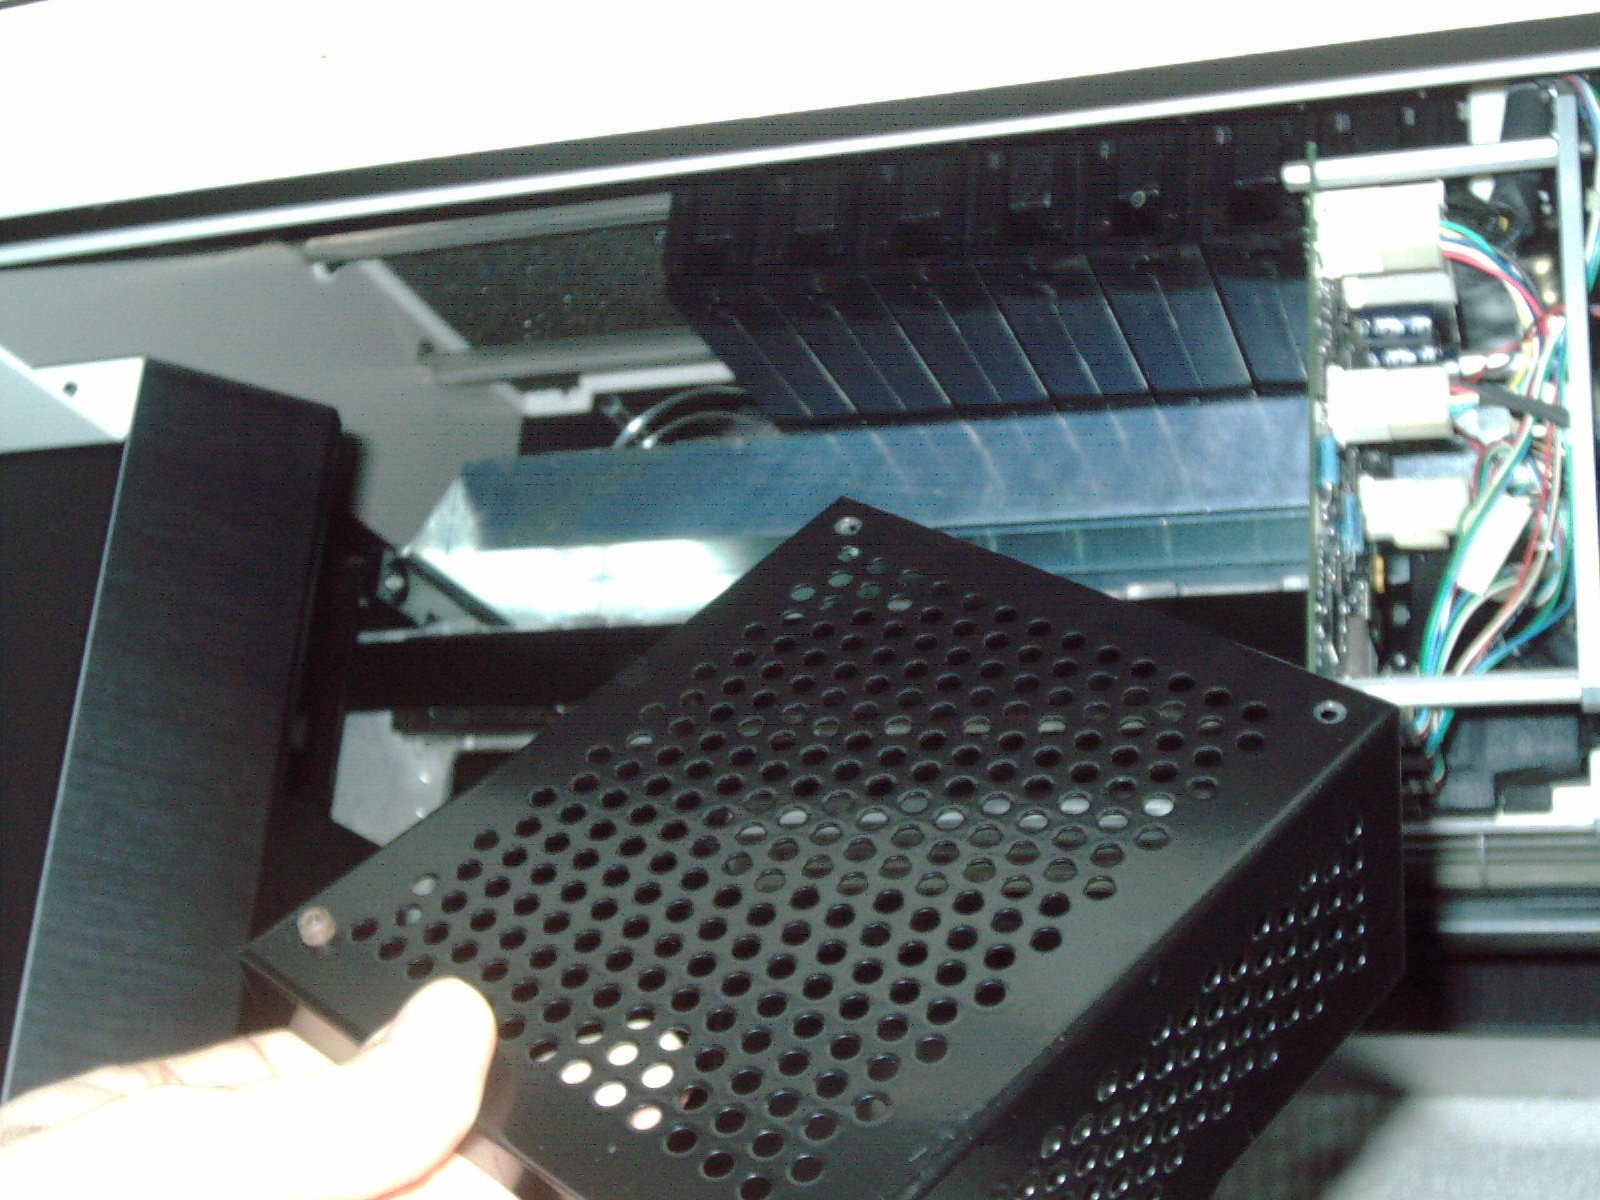
The jammed PLA wafers were a real bear to remove. What worked is using a Dremel tool to cut a small slot in the side and then pry it up and out carefully. I had to repeat this step several times - cutting addition slot and prying up on it. I was careful NOT to break the Z-Axis plastic which gear - which was very very close by. By using a screwdriver - and prying up in the notch I made with the Dremel - that was a safer method - instead of just grabbing the wafer with pliers and possibly accidently hitting the plastic gear and breaking it off. Since there was 2 jammed PLA wafers - the above method worked for the top one. But I still had to remove the one that actually went inside the hot prithead. I couldnt pry it out because - it was fused to the melted/now solidified plastic inside the printhead chamber. So I used a Dremel tool with a brown brittle thin cutoff wheel and made a slot in the worm drive. That way I could used a broad flat head screwdriver to turn the wormdrive and have the machine itself unload the wafer. However- I decided to power the machine up and heat up the printhead. While it was heating - I turned the wormdrive backwards ( using the screwdriver and homemade slot in the wormgear) I powere off the machine just when I felt the printhead may be hot enough to have molten plastic inside. I backed off the wormprive manually with the machine powered off - but still hot. AND THAT STUCK WAFER CAME UP AND OUT AS PRETTY AS YOU PLEASE!!!!!
The 2 modifications I made to revive this machine
1. I Cut a shallow slot in the worm drive gear- as cleanly as I could
2. Spliced back to together the broken X and Y home switch wires - as professionally as I could
Here is a pictorial gallery of my work
I was able to get my Stratasys Xs 3d Printer to work fully and I even printed out 2 included sample prints of the Wrench.
Summary of problems and How I fixed it.
1. I unjammed 2ea Homemade Fake Blue PLA wafers which the previous owner made and got stuck in there
2. I removed 2ea additional Homemade Fake Blue PLA wafers from the hopper (a second catastrophe just waiting)
3. I noticed 2ea Home switches with cut wires and soldered them together with a 1-1/2" piece of wire and heat shrink tubing. The extra piece of wire makes this just a tad longer so it would be better. I dont know - possibly the long trip did this somehow (a long distance delivery - slamming on the sellers minivan brakes in traffic may have caused the printbed to move violently???) or possibly the printbed got caught and tore these 4ea wires for one of the previous owners????
4. I spent all night on it, cleaning all of the insides, outsides, etc with isopropanol and tissue paper and vacuum cleaner.
The jammed PLA wafers were a real bear to remove. What worked is using a Dremel tool to cut a small slot in the side and then pry it up and out carefully. I had to repeat this step several times - cutting addition slot and prying up on it. I was careful NOT to break the Z-Axis plastic which gear - which was very very close by. By using a screwdriver - and prying up in the notch I made with the Dremel - that was a safer method - instead of just grabbing the wafer with pliers and possibly accidently hitting the plastic gear and breaking it off. Since there was 2 jammed PLA wafers - the above method worked for the top one. But I still had to remove the one that actually went inside the hot prithead. I couldnt pry it out because - it was fused to the melted/now solidified plastic inside the printhead chamber. So I used a Dremel tool with a brown brittle thin cutoff wheel and made a slot in the worm drive. That way I could used a broad flat head screwdriver to turn the wormdrive and have the machine itself unload the wafer. However- I decided to power the machine up and heat up the printhead. While it was heating - I turned the wormdrive backwards ( using the screwdriver and homemade slot in the wormgear) I powere off the machine just when I felt the printhead may be hot enough to have molten plastic inside. I backed off the wormprive manually with the machine powered off - but still hot. AND THAT STUCK WAFER CAME UP AND OUT AS PRETTY AS YOU PLEASE!!!!!
The 2 modifications I made to revive this machine
1. I Cut a shallow slot in the worm drive gear- as cleanly as I could
2. Spliced back to together the broken X and Y home switch wires - as professionally as I could
Here is a pictorial gallery of my work
Update 12/4/17
How I Installed the CDROM disc on my Windows XP Laptop
The CDROM disc is intended for Windows NT or a Unix (possibly will work on Linux also - but I dont have that) But I tried it on my older Windows XP laptop a Dell Inspiron 2650 using a Pentium 4 processor and 512MB of memory. I was able to get the CDROM disc to install a working "AutoGen Version 3.1" which is a way to load STL files, Slice the file, and sent the datafile (CRM file extension) to the Stratasys Genisys Xs 3d Printer- and there are quite alot of options including rotation, resize, etc etc and placement on the printbed - including Nesting several objects to be printed simultaneously. The book doesnt call it "nesting" it uses the work "packing". So printing more than one object simultaneously is "packing" and fits them on the heated bed like a jigsaw puzzle - all adjacent to each other.
OK heres how I got the installation CDROM to work ... It seems there is an error in the setup where it makes a folder called "AutoGenV31" and the program itself is looking for a folder called "AutoGen" - see this little hiccup needs to be corrected before it will work properly. Here I am with a 17 year old 3d Printer and Im seeing having to figure this out on my own. Im sure that the mfg ran into this technical issue back then. It isnt a big issue and easy to resolve. It is possible that on older operating systems which only allow a certain number of characters for the folder name- that this wouldnt even be an issue. But with Windows XP you can have large names for files and folders - so the operating system sees "AutoGen" folder and "AutoGenV31" as two totally different things. Whereas an older operating system would truncate AutoGenV31 to AutoGen and ignore the extra characters - that is my hunch???? By renaming the newly created folder to "AutoGen" - we eliminate this hiccup.
How to get AutoGen Version 3.1 to work on Windows XP
1. Put CDROM disc in drive
2. Navigate to NT-4.0 Folder
3. Double click on Setup (picture of a Blue Computer)
4. Select Typical Installation
5. After it is installed and you try to run the program - you get an error message that the files are not found
6. Navigate to C: drive and see the new folder AutoGenV31
7. rename this folder to AutoGen
Now it works - no more error messages about files not being found


|
AutoGen V3_1 screenshot on XP Laptop.JPG Size : 102.888 Kb Type : JPG |
Update 12/9/17
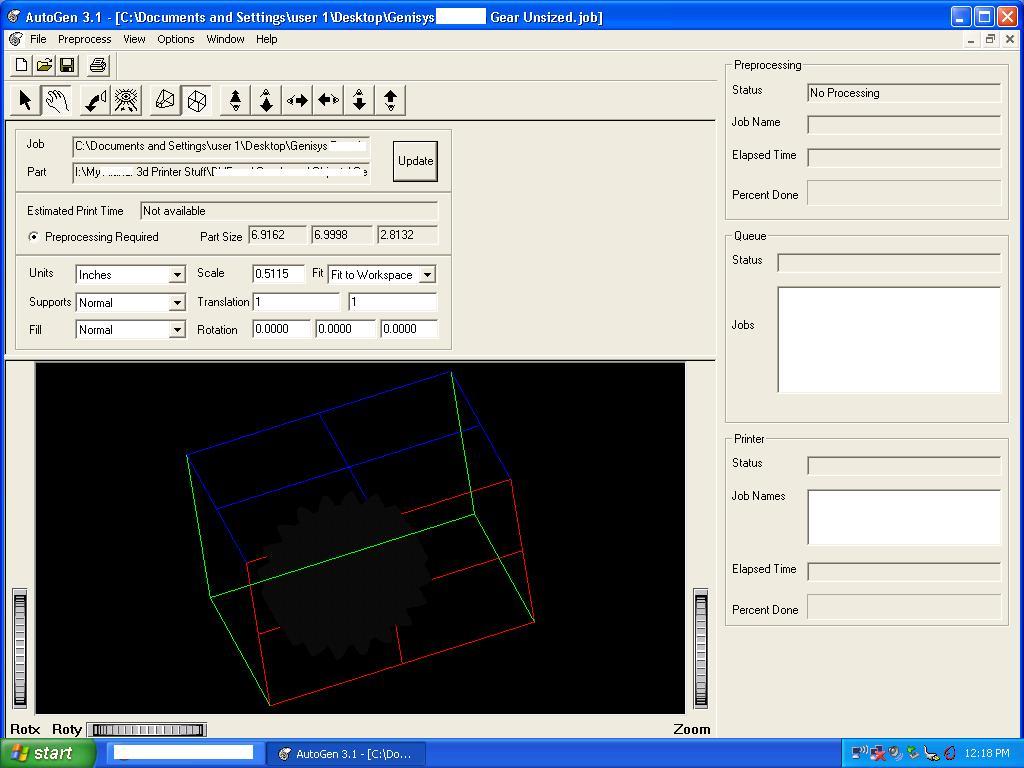
I have made a screenshot of a gear I scanned using a Roland MDX-3 or Roland PIX-3 (I scanned a long time ago and cant remember which machine I used - I own both machines and from the same era as the 3d printer) and this STL file was able to be loaded by the AutoGen V3.1 software. Can you see the gear? It is dark gray and the software DOES NOT show the object itself - only a Silouette filled in with gray. As you rotate the object and rectangle build area - the many facet of the gear become 3-D -but alas you only see the grey filled in silouette. THANK GOODNESS it does the grey silouette. Because there are SO MANY POINTS that when it comes to display it as a rendered object - it truly bogs down even a fast computer. This technique of grey filled in silouette is remarkable and is INSTANTANEOUS for viewing and placing and resizing etc. Everything I played with in the software worked as it should. I have not attempted to connect my laptop network port to the 3d printer as I have network cables BUT there is one type for direct connection and another type for connection to a router and THEN to the laptop. I dont want to risk damage by connecting the wrong network cable - as they all look alike.
The owners manual is very specific on these two network cable models and gives the exact number for each type. I cant recall the cable number as I write this.
I did run into the "File not found error" just once today when I tried to load AutoGen and the funny thing is that I renamed the folder BACK to Autogen and now it works. Im wondering if the glitch goes back-and-forth. So this means I may have to just create 2 folders - one for each name and then it will find its files regardless of which folder name it looks under. Arent software glitches fun? Not.
I see articles badmouthing this wonderful 3d printer and I wonder if the pesky software glitch with a very simple solution stumped the article writers 17 years ago?
I read some online articles
1. Stratasys Genisys costed $55,000 in 1996
2. Stratasys Genisys Xs costed $45,000 to 55,000 in 1999
3. According to the 2 men who dropped off my 3d printera week ago it costed $12,000 to $15,000
4. Some versions of Genisys and possibly Genisys Xs were DOS based and some were Linux based- and the article said that the DOS based machines were upgradable to Linux. "Upgrade" ????? DOS is fine too. The forget that IBM was involved with developing this machine - Whats wrong with DOS on an IBM machine? Some of the people writing articles online - YIKES!
There was one person who wrote about their university acquiring a Stratasys Genisys and paid $60,000 for it. It makes me chuckle. They bought a $45,000 printer for $60,000 the money is SO LARGE that its funny how prices have come down so much since then. You know - the POWER of ebay is the reason I have these machines. That and the quick obsolesence of anything not the latest model.
I was expecting a JUNKER (based on the articles I read - but I didnt believe it) and amazingly it prints pretty good and the software is pretty good. And even reads my pretty standard output Roland STL files (Current Cura software which works with my Alunar HB-R100 $100 ebay purchased 3d printer also reads this STL files without any problem) Which means I can scan ANYTHING and print it out - on 2 machines. The scanning process takes a VERY LONG time in highest resolution- and very well worth the wait to create a wonderful scan. I look at the handheld scanners - even the high end ones and is NO COMPARISON to the Roland 3d scanners which use a needle to "feel" their way across an object - similar to the way a blind person uses a cane to feel their way. The scan of this gear is very small and detailed at 1/2" diameter. Even a handheld modern 3d scanner which uses optical and laser cant do that- and those scans lack detail. Even so a 3d printer cant take advantage of the high level of detail from this Roland scan of the gear. But the Autogen software handles it no problem- thats great.
Update 12/10/17
I spent 2 nights using shiny silver color bubblewrap packaging which comprises the material in my homemade dust covers.
I have accumulated from some machinery purchases over the years. This packing material is strips of bubblewrap about 3-5" wide and rolled up like a carpet. Then these rolled up "cinnamon rolls" are strategically placed around the machine during shipping. It is amazing how many of these are placed side-by-side and stacked to completely surround equipment. I had a whole box of these and I used 2 rolls of clear packing tape to make large sheets from these strips. After I had made these sheets-from-strips - I carefully cutout a pattern for each side/top/back/front of each machine - sometimes the machine had many facets or a diagonal area which I tried to mimic for a good or at least functional fit. Then I taped these cutouts together to make the actual Dust covers.
The cats litter box and the vigorous scratching - throws dust everywhere and I have made these DIY dust covers from taped-together bubblewrap to protect my gear and equipment- that I have been rebuilding and purchasing parts for - to someday complete. My projects are pretty far along and I want to keep it as clean and pristine as possible - see the wood boards on the floor too.
Update 1/14/18
I have sent paypal downpayment towards 2-1/2 wafer cartridges and some leftover parts and pieces to JS. This sellers machine was destroyed by parting out the printhead and 1ea board to an un-named party. I suspect it was a 3d Printer mfg but I am not certain. The sellers intention is to gut the machine and make a reprap from the chasis. I dont want the parts and pieces and wafers to be discarded. Although I dont have any extra money right now. I did send a small downpayment which is payment in full for the wafer cartridges plus a little extra towards some parts/pieces which are at this time unquoted in price.
I have sent paypal downpayment towards 2-1/2 wafer cartridges and some leftover parts and pieces to JS. This sellers machine was destroyed by parting out the printhead and 1ea board to an un-named party. I suspect it was a 3d Printer mfg but I am not certain. The sellers intention is to gut the machine and make a reprap from the chasis. I dont want the parts and pieces and wafers to be discarded. Although I dont have any extra money right now. I did send a small downpayment which is payment in full for the wafer cartridges plus a little extra towards some parts/pieces which are at this time unquoted in price.
Update 2/20/18
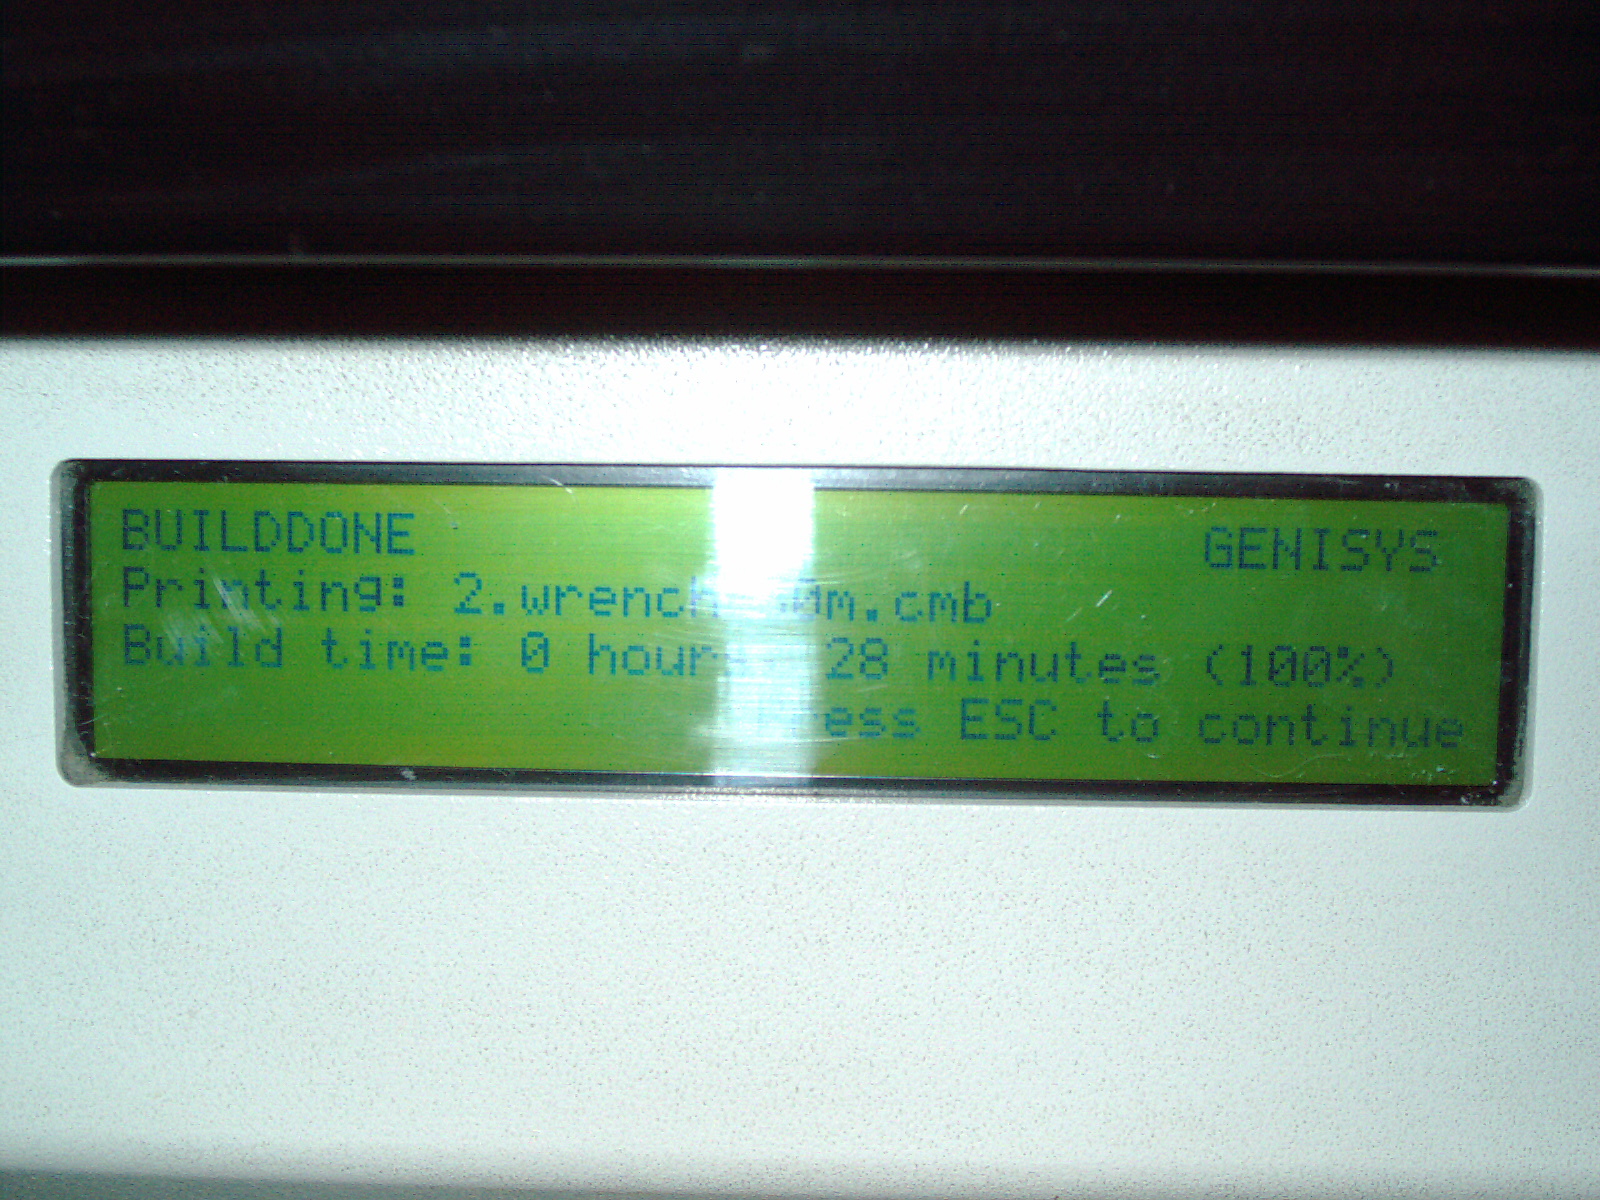
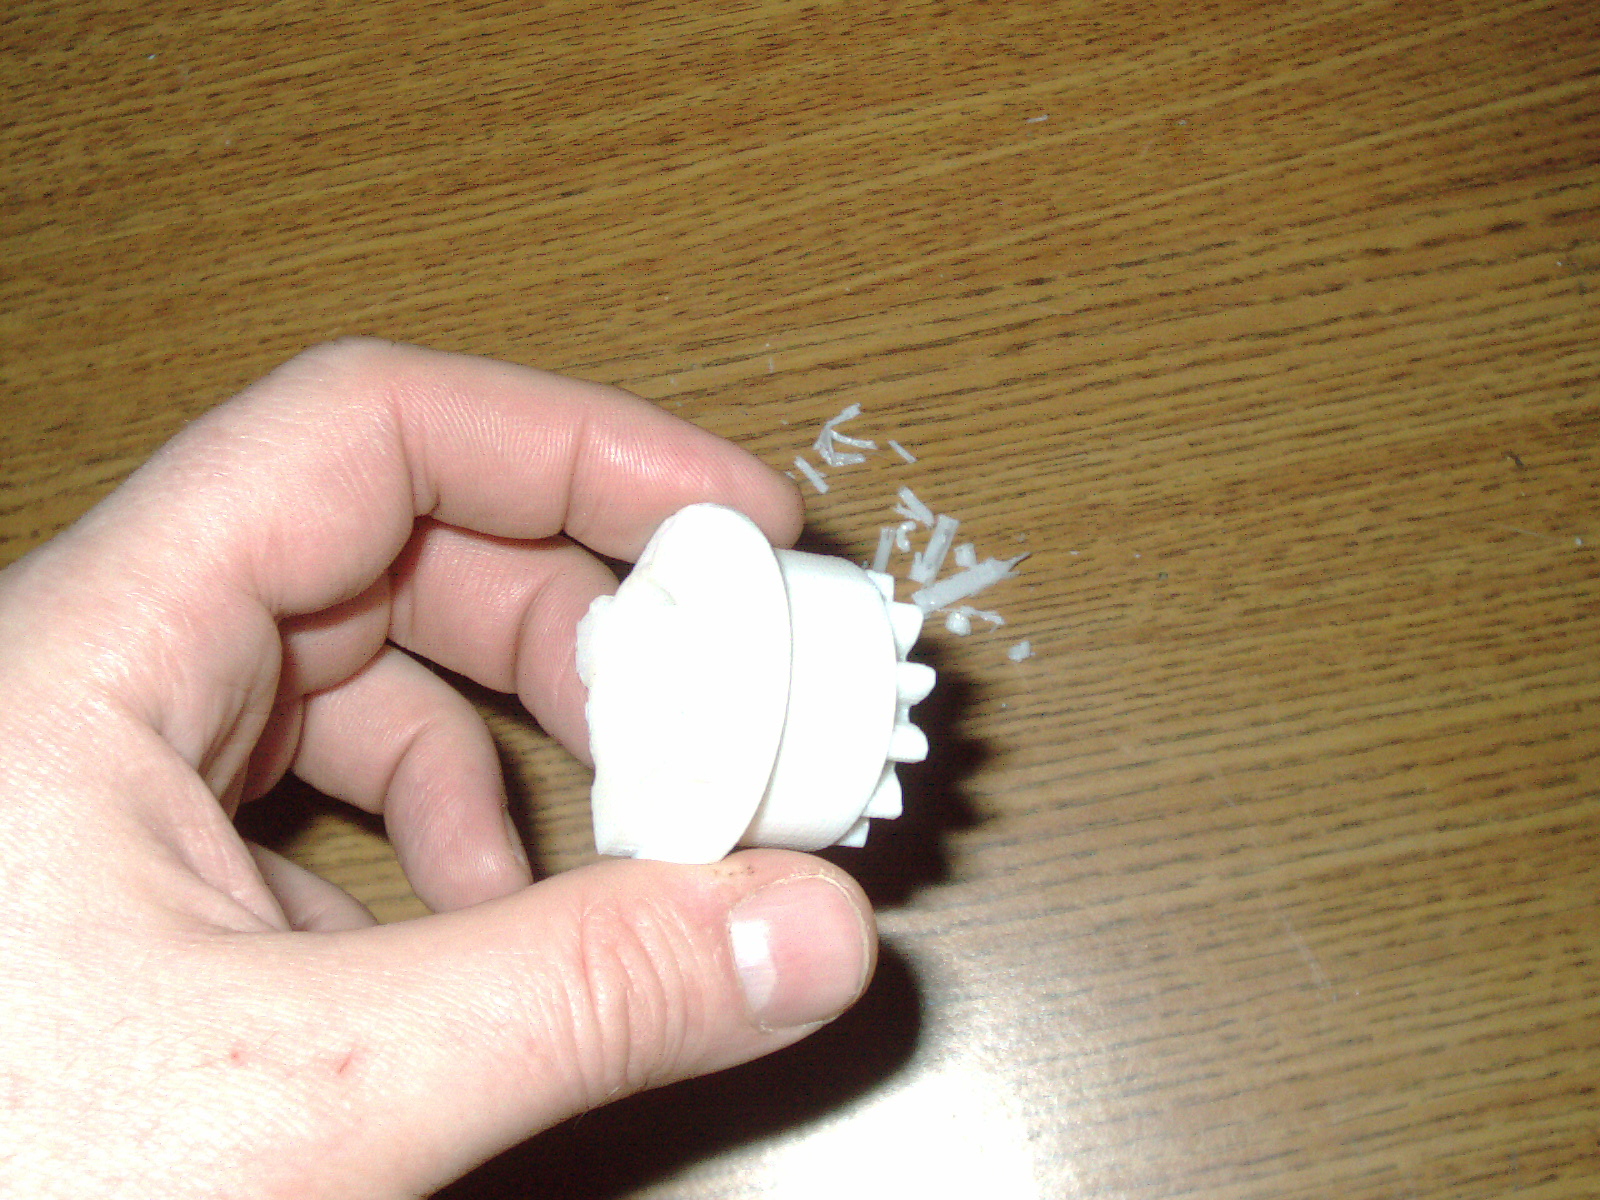
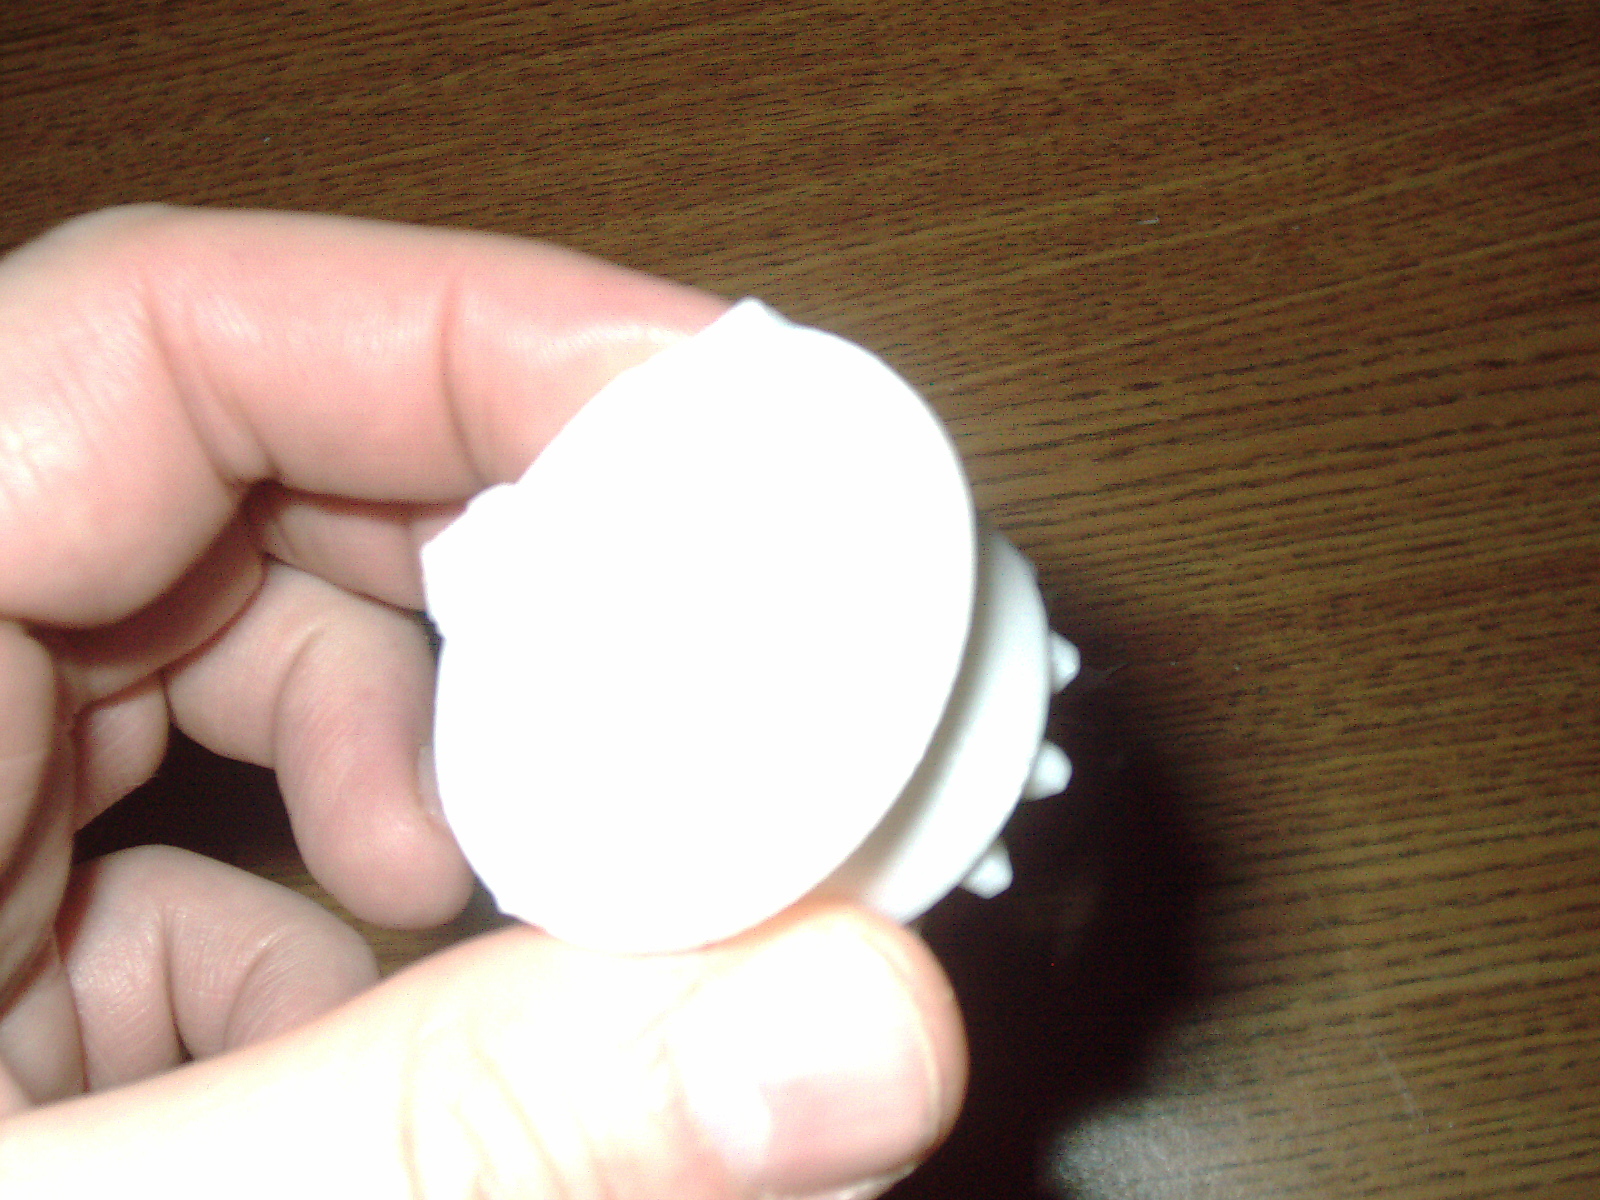
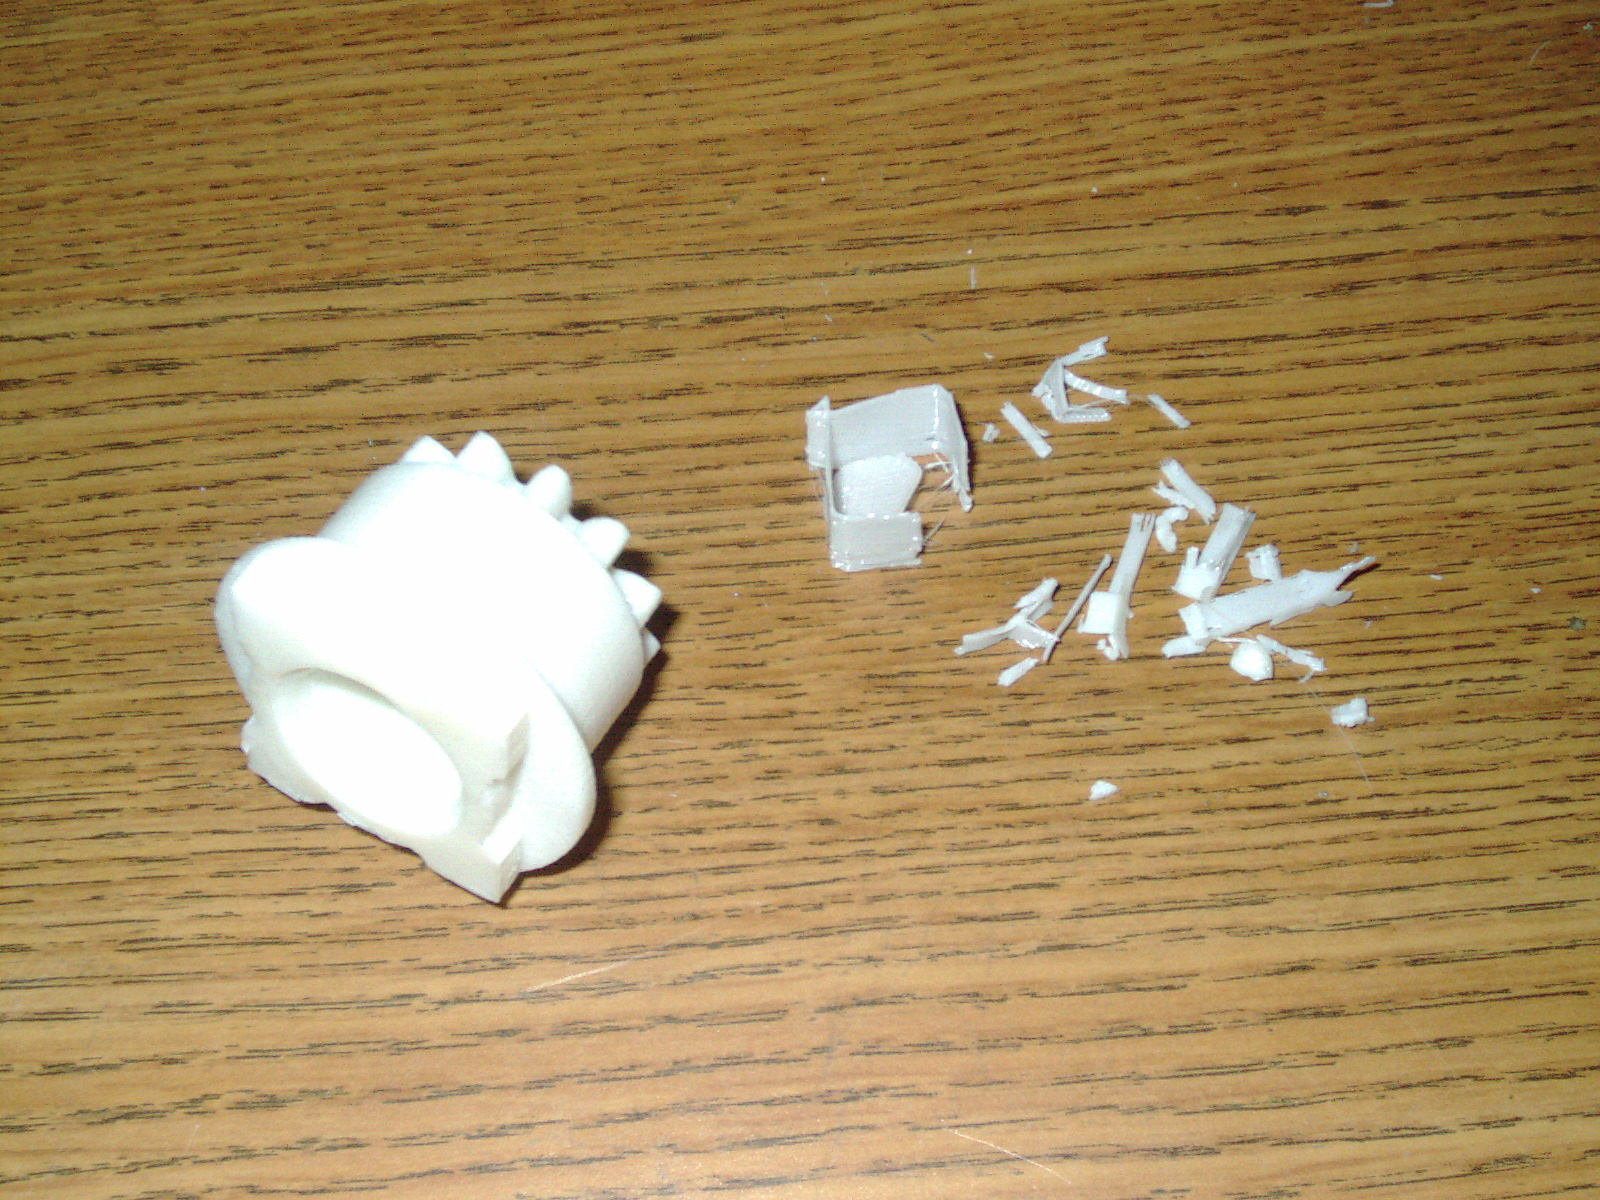
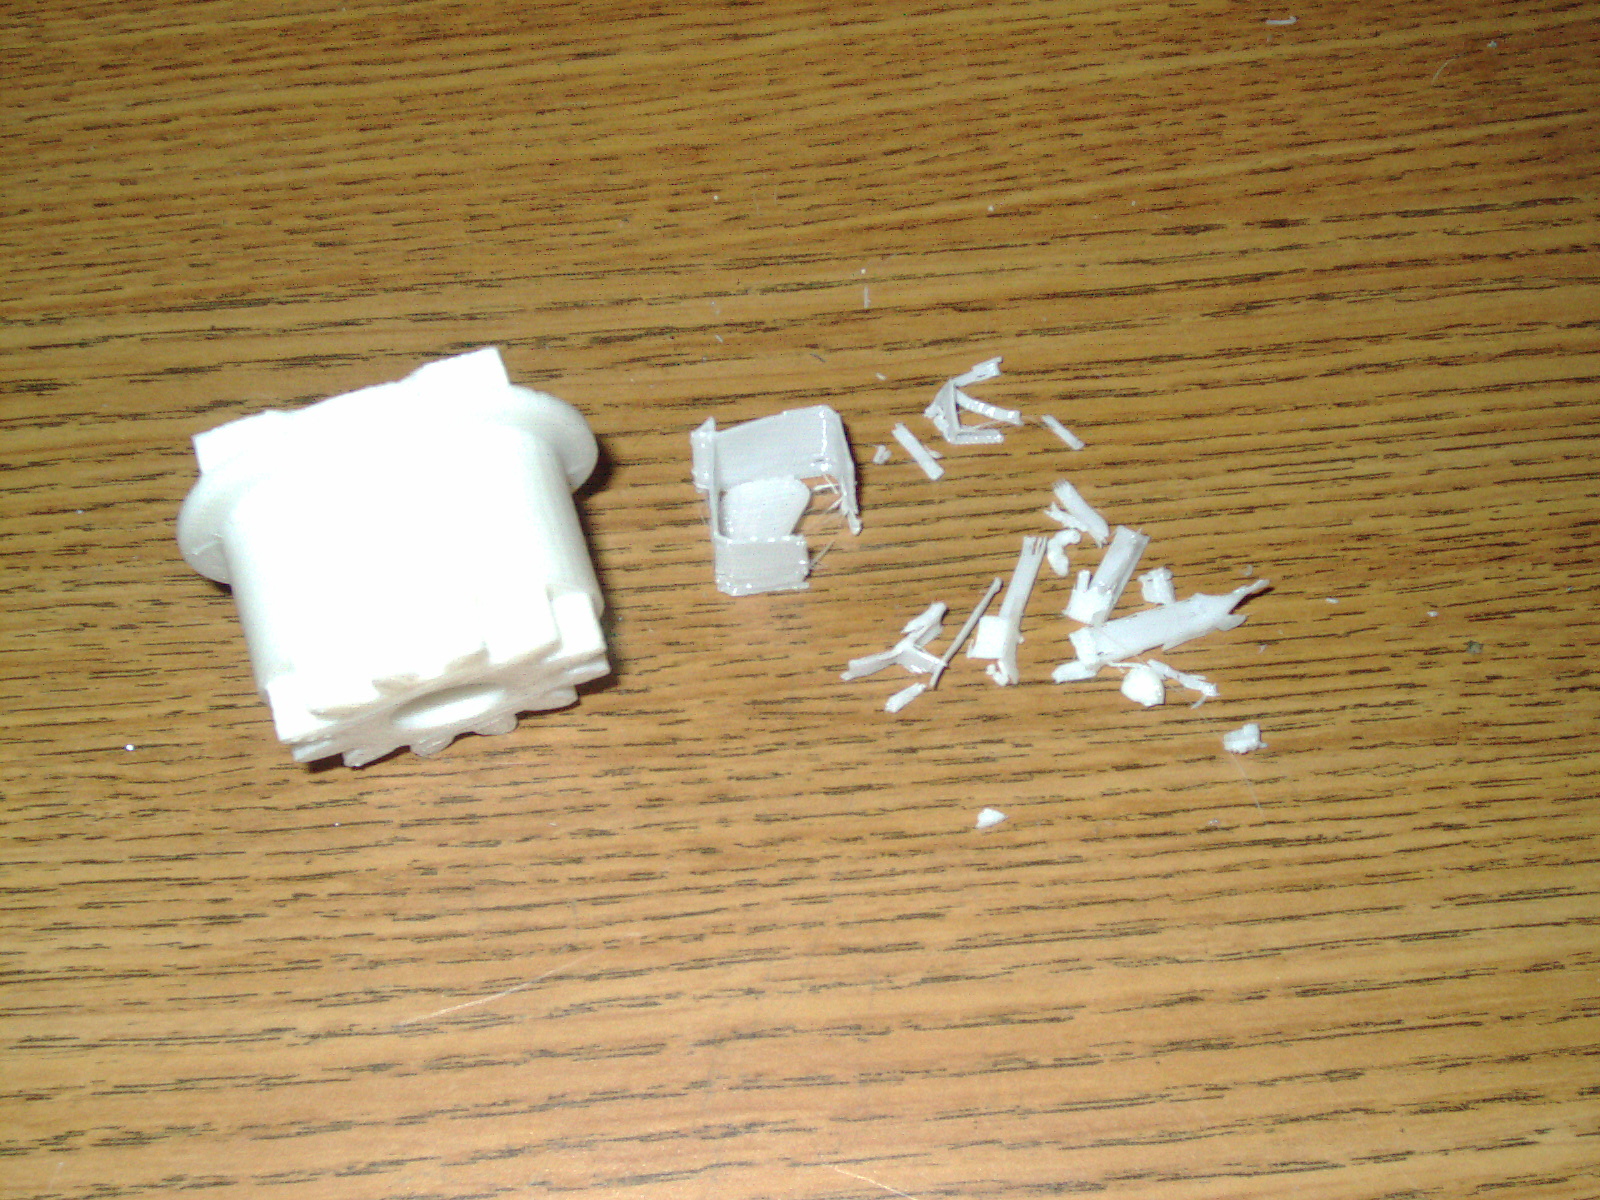
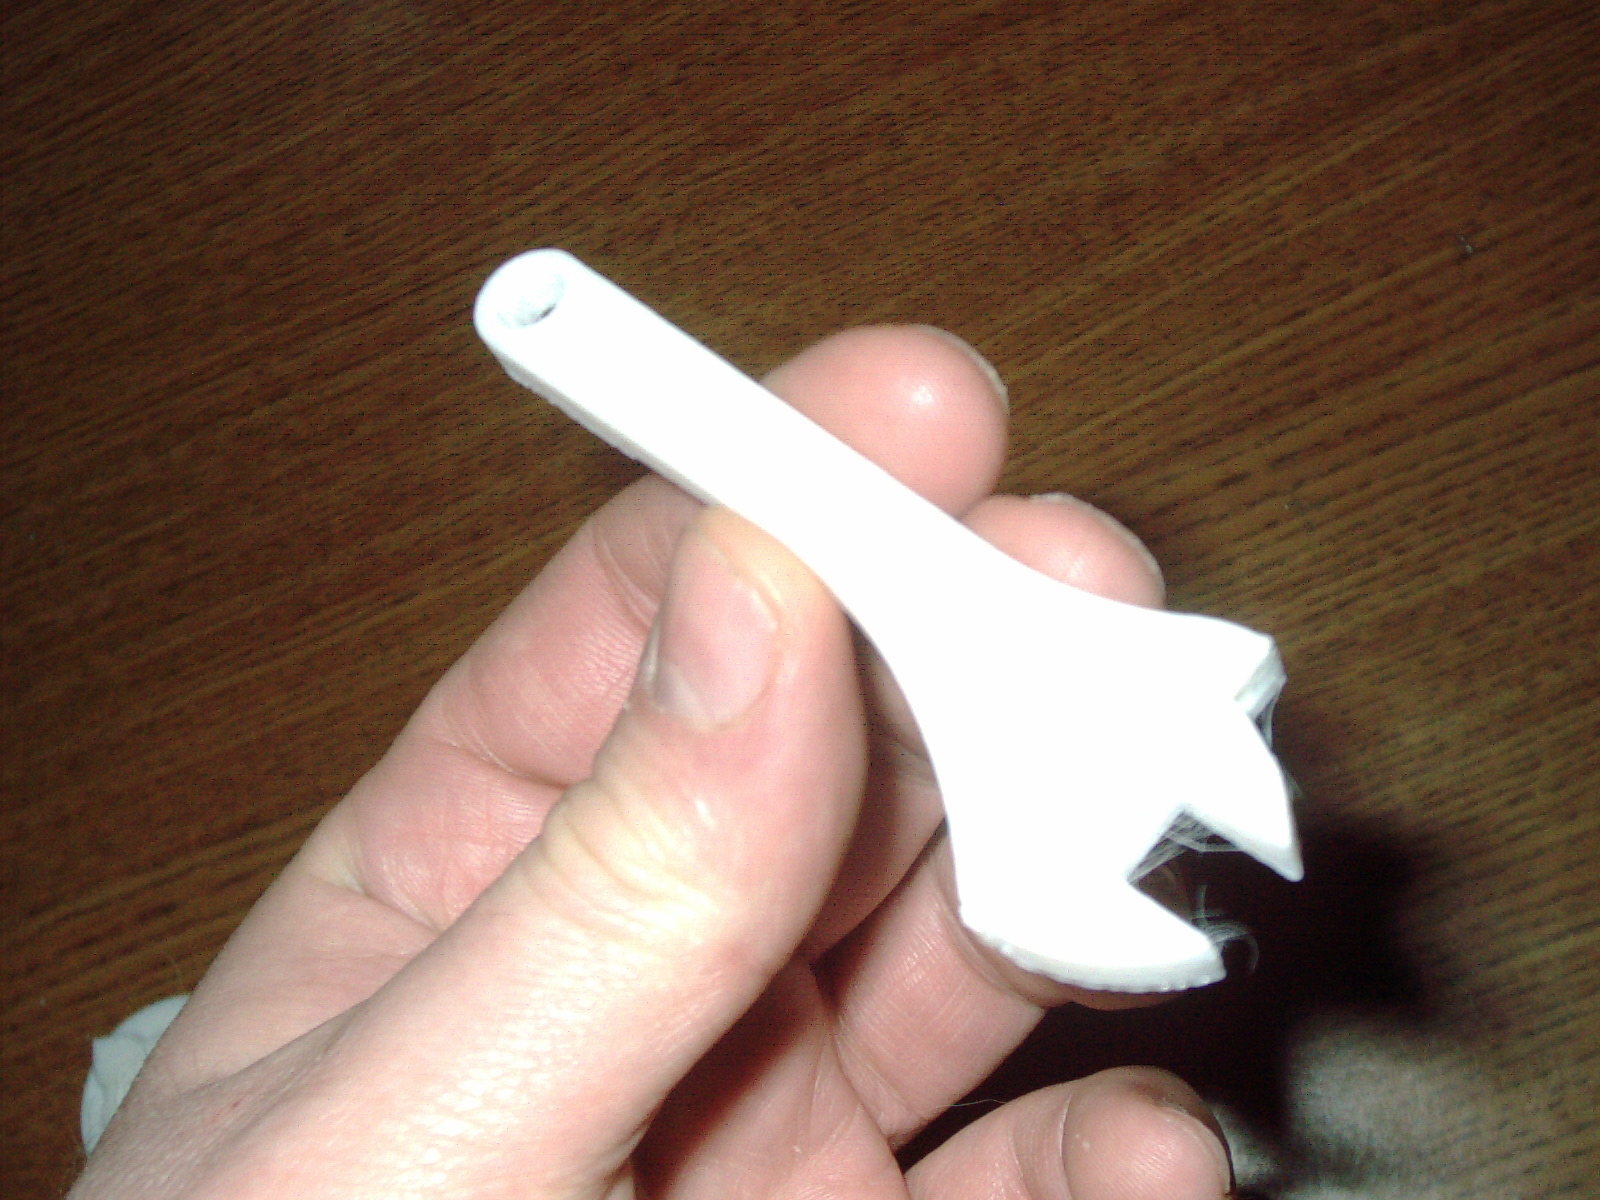
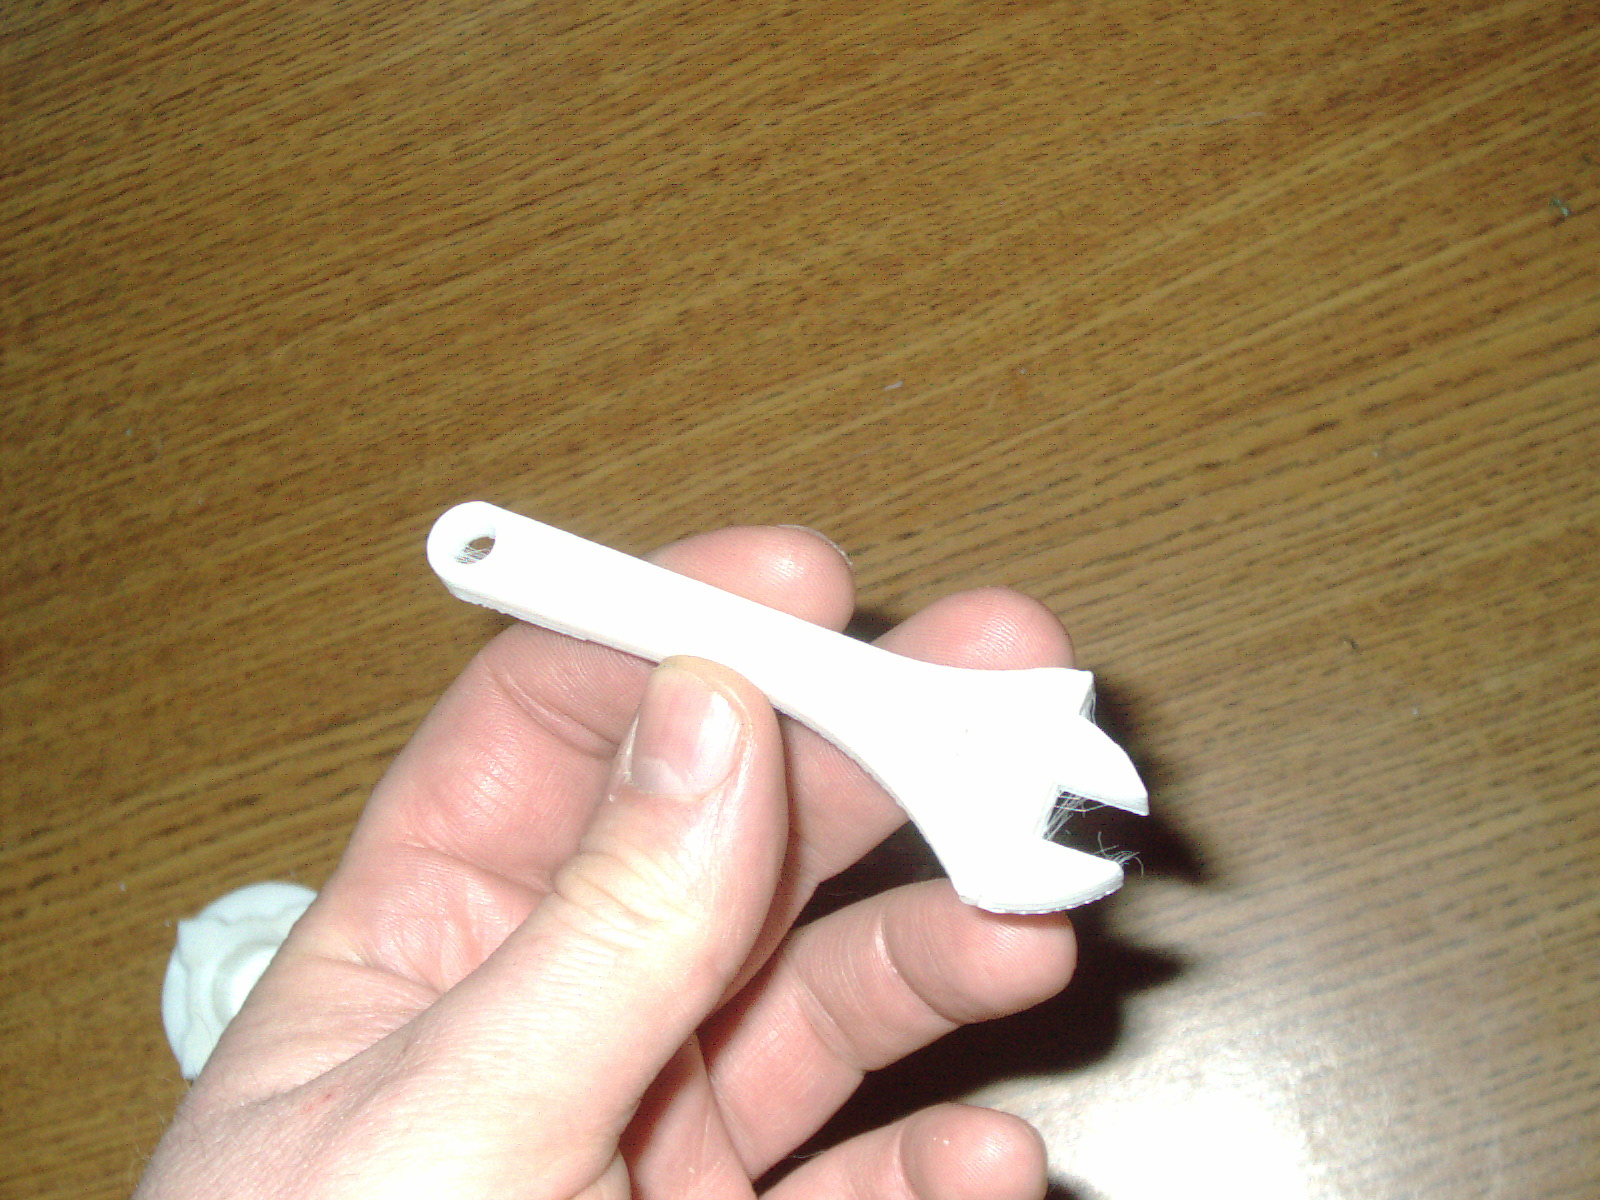
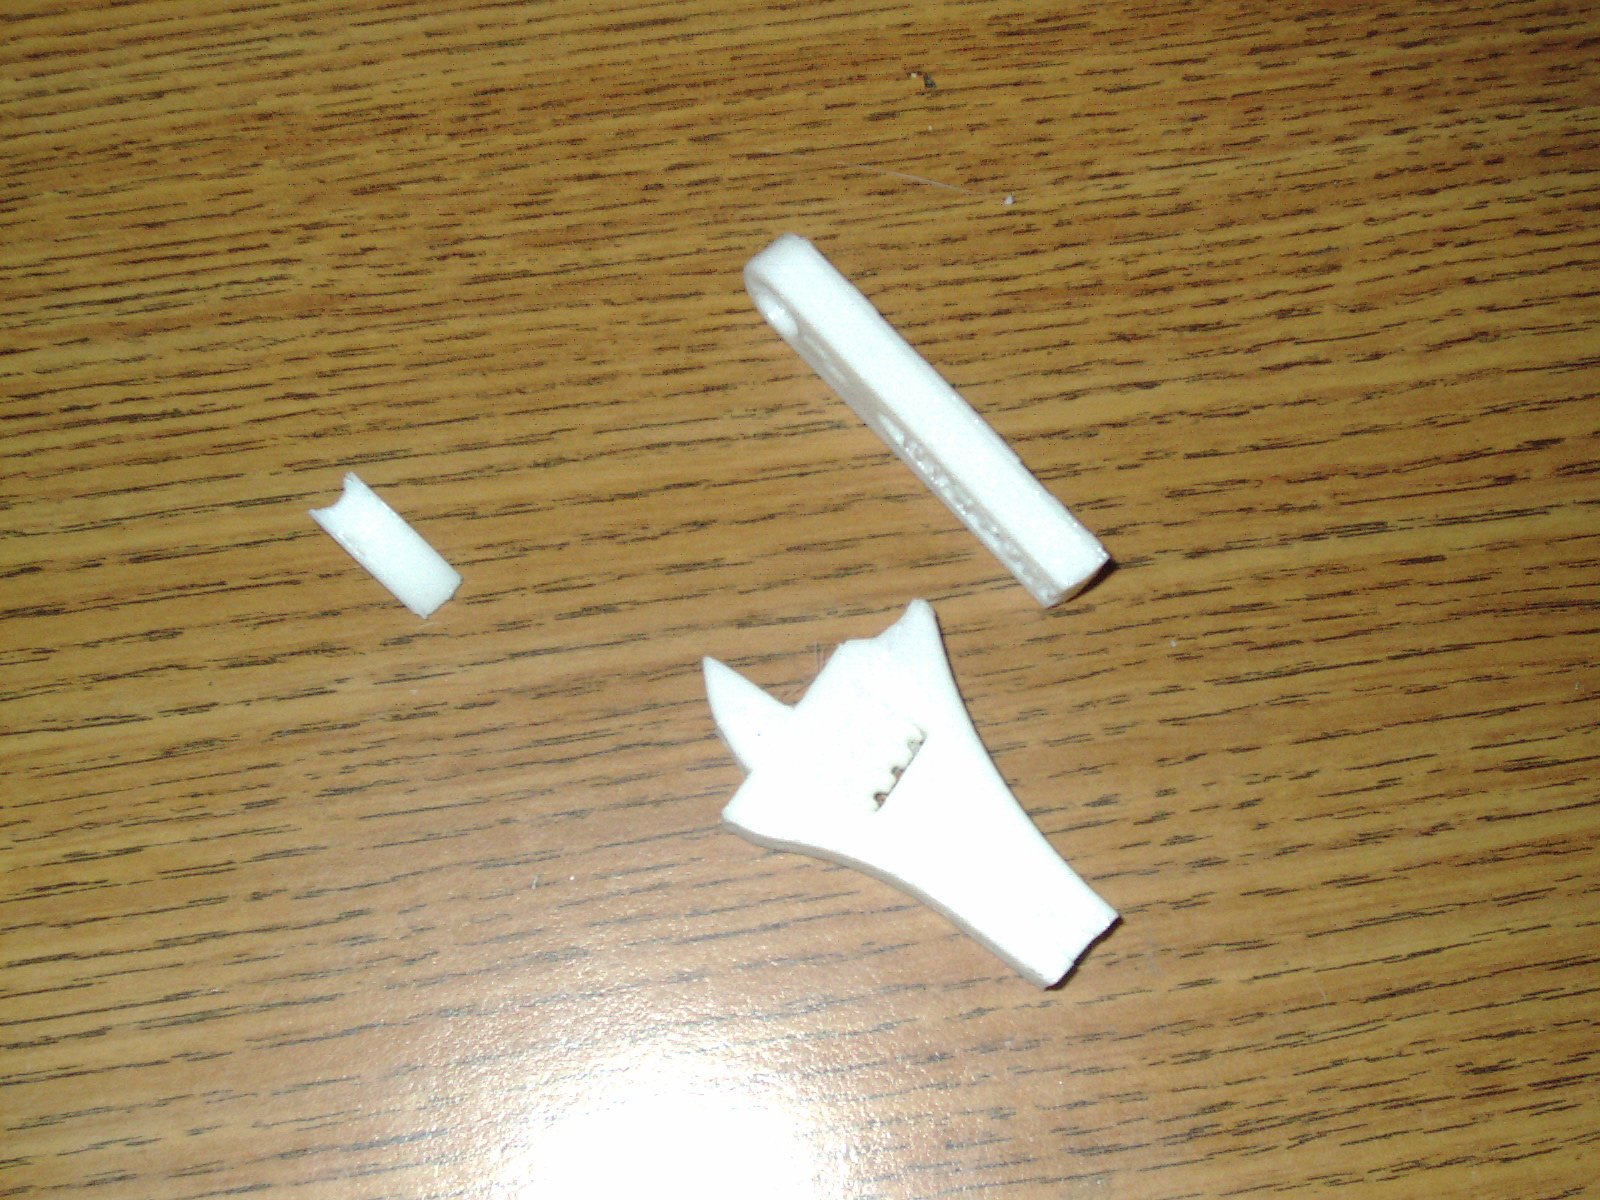
I ran my Stratasys Genisys Xs yesterday and watched it build the sample "gear 1hr" which was provided as a demo by the mfg - stored inside the machines memory. It took a few minute more than hour and was amazing to see it build the above gear and make the round platform without any supports. A few aspects of the part required supports ( and I have included the breakaway supports in the photos. The hollow hole and squarish end of the gear had a square thin wall support on the underside. The top of the gear is shiny/glossy and the underside is dull and smooth. It wasnt warm and didnt have any melted plastic smell at all. The plastic hardens when done. I learned from my "wrench" sample that the part is slightly rubbery when done and it hardens soon afterwards. It becomes as hard as peanut brittle and just as brittle. I accidently dropped my already broken wrench and chipped off one of the jaws. I still have my one good reprint of this same wrench- made last time.
The machine used 4 wafers printing the gear sample and 2 wafers printing the wrench sample. So far I have consumed 8ea of these rare and had-to-come-by wafers. As I watched it build this gear, I was amazed that it could print a "bridge" without anything underneath. Sometimes the fan would spin slower and faster as the temperature was part of its magic in making the print. I havent seen any issues with my machine. The parts adhere well to the aluminum plate and it detaches well. I havent added any gluestick- the previous owner said he applied this to the aluminum heated bed.
I learned a few things by watching the Genisys Xs print. I thought about it and what I learned made me rethink my settings on my other every-day-use 3d printer. I didnt know a 3d printer could print without any support at all. It was an eye opening experience to watch the Stratasys at work. The gear that it printed is quite large and maybe of a real-life part such as a starter from a tractor- but this plastic is very brittle and was only marketed as a "concept modeler" Im sure that it could be used for metal casting or vaccum forming molds or other applications.
I paid the seller of used/leftover Genisys parts a second installment yesterday by paypal. He said he is willing to sell me the powersupply and some other parts.
5/14/18
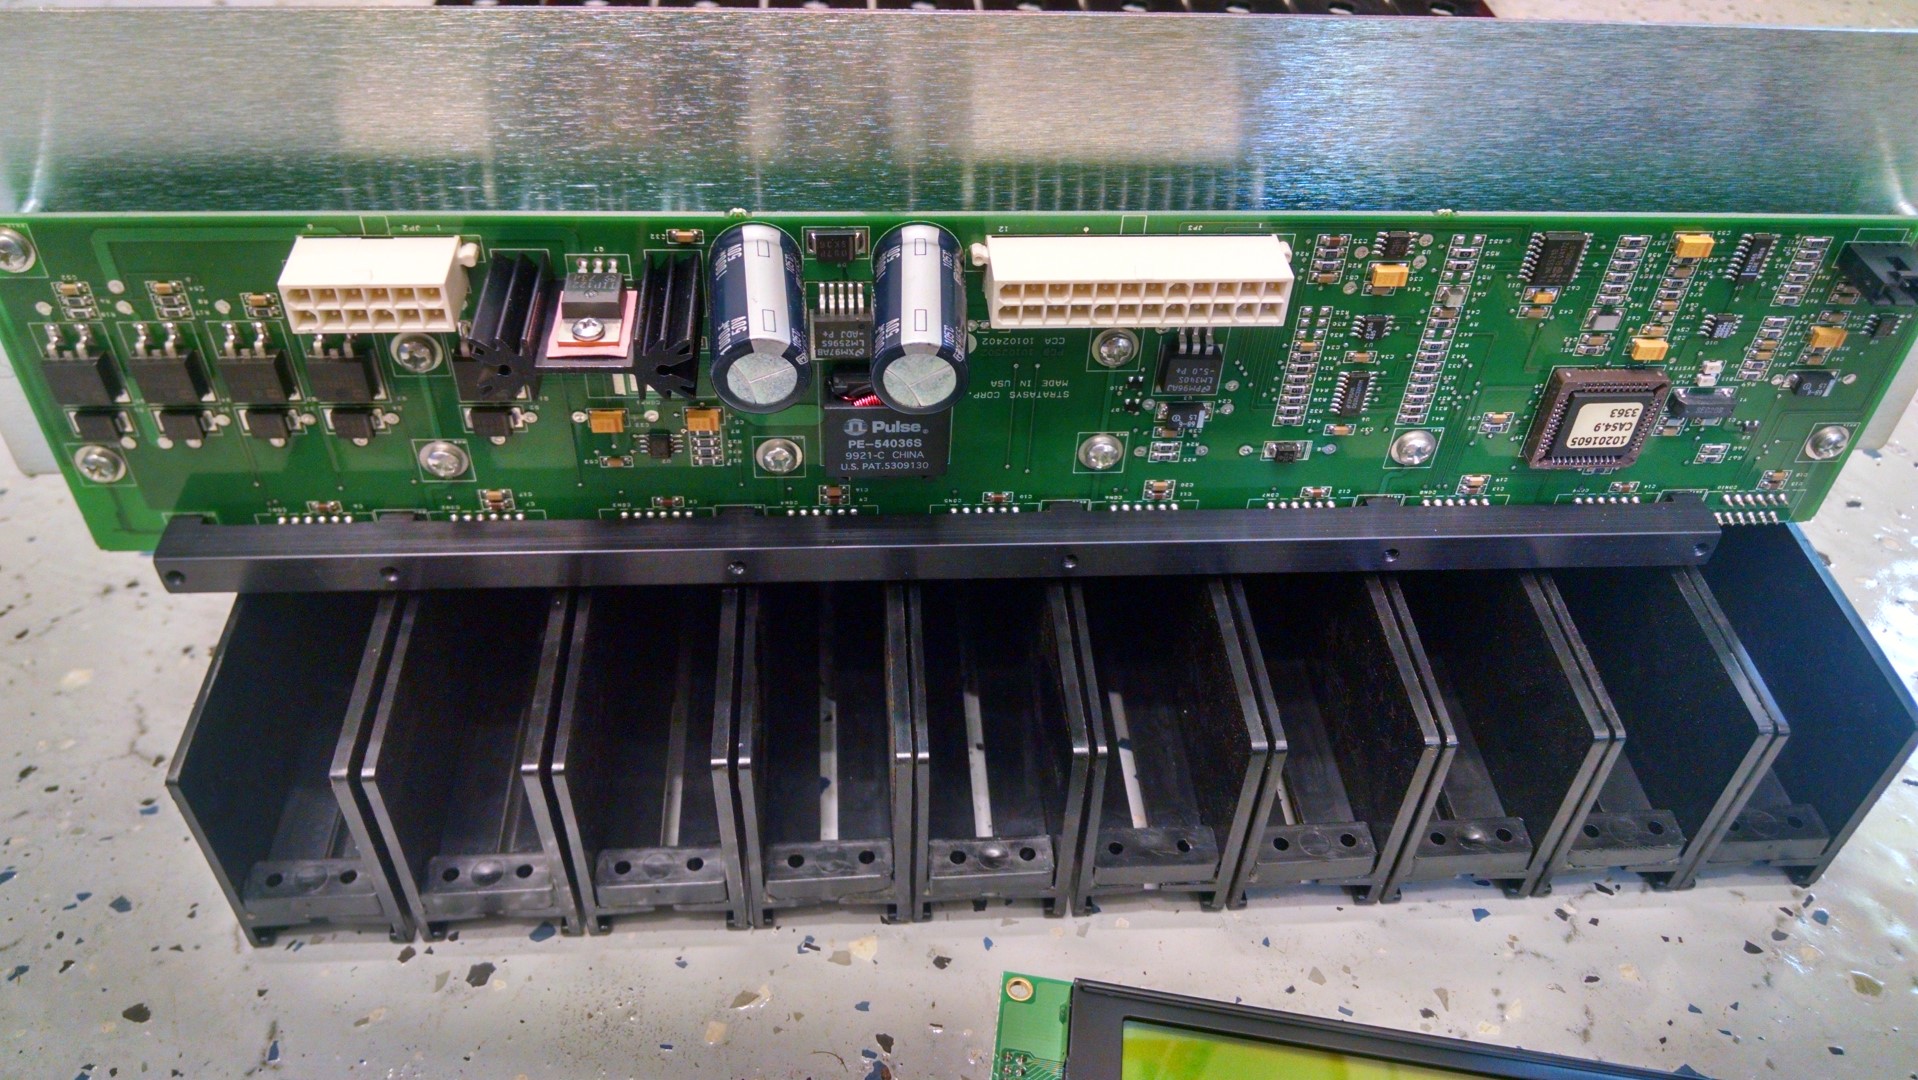
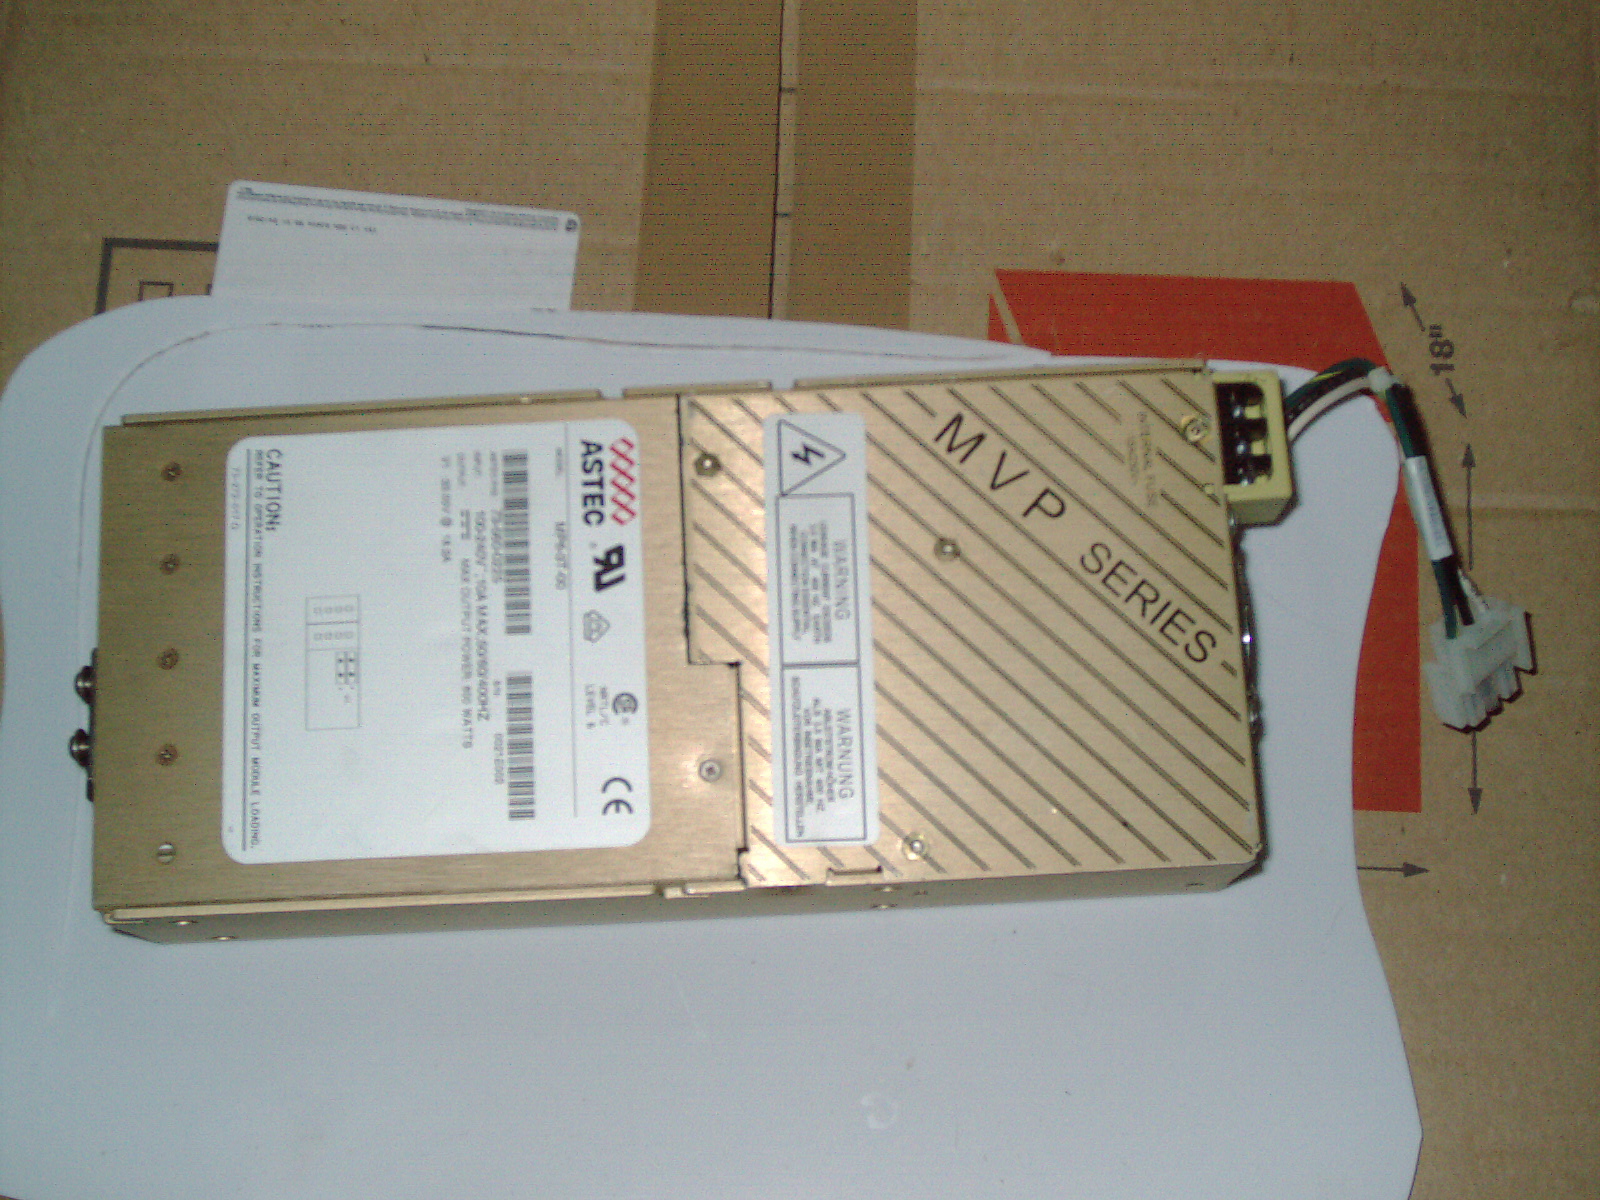
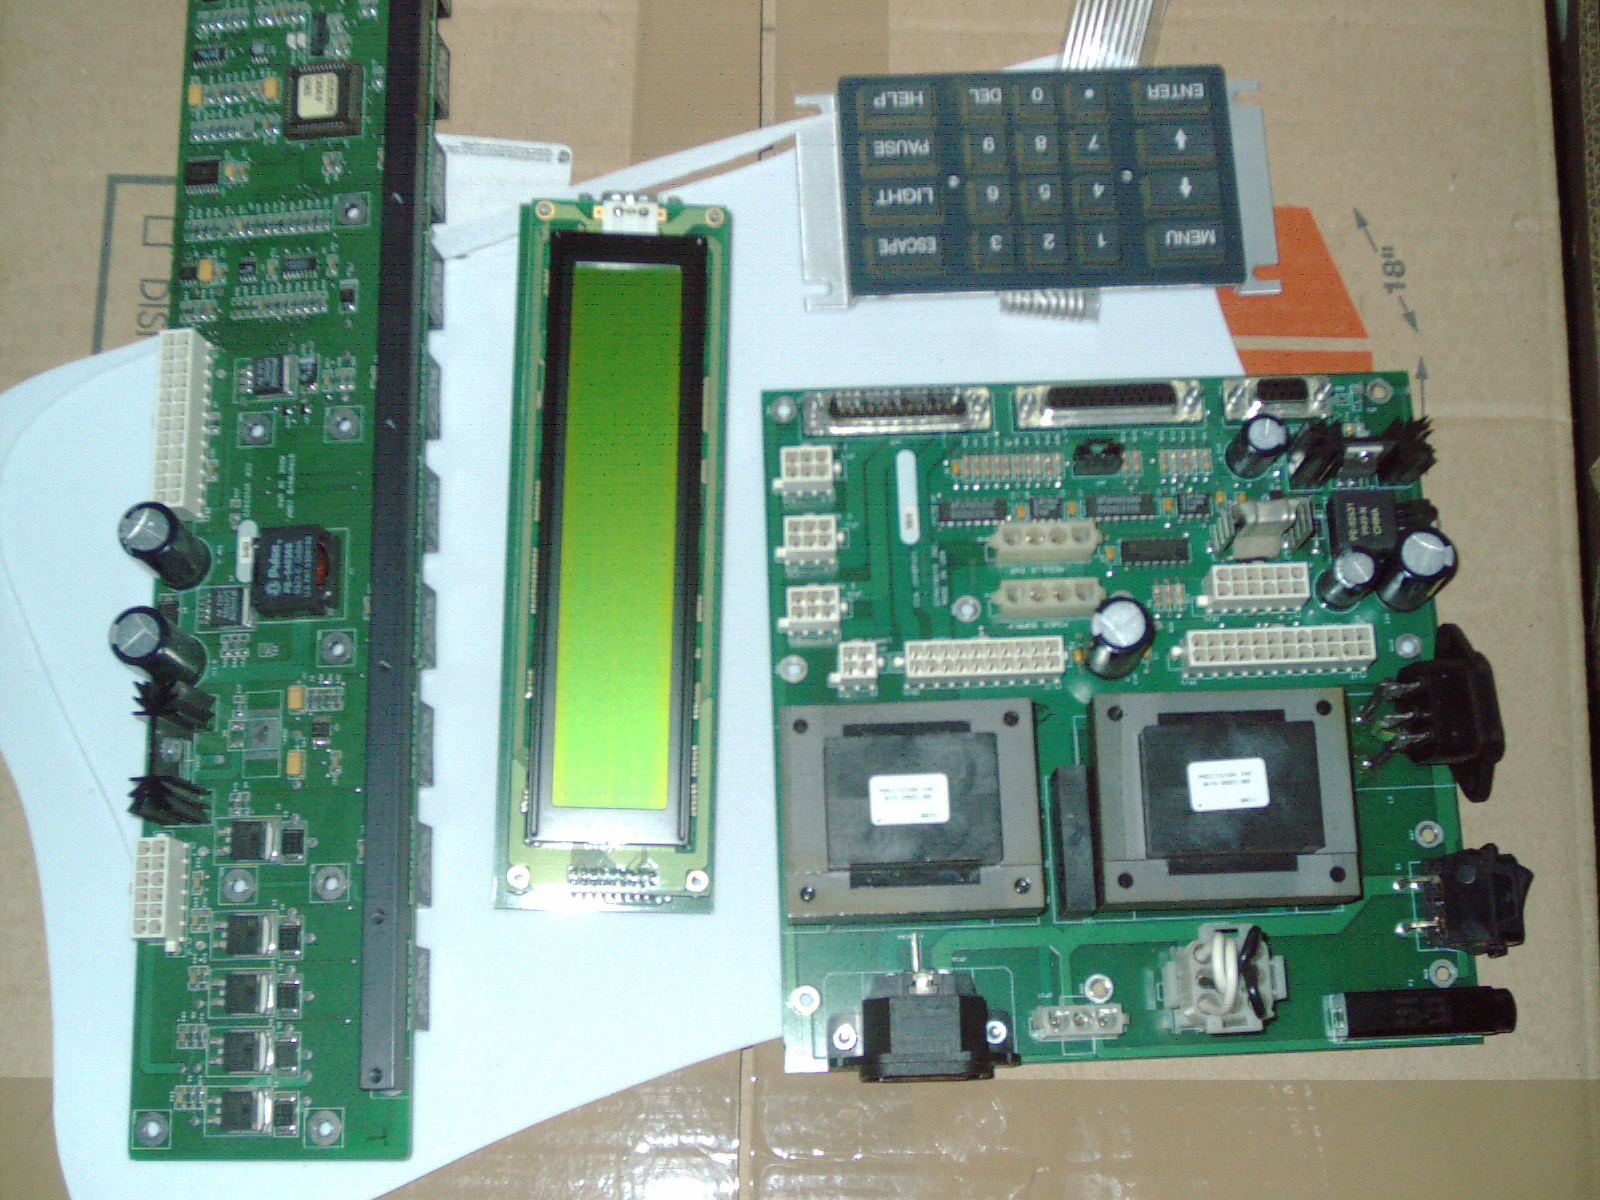
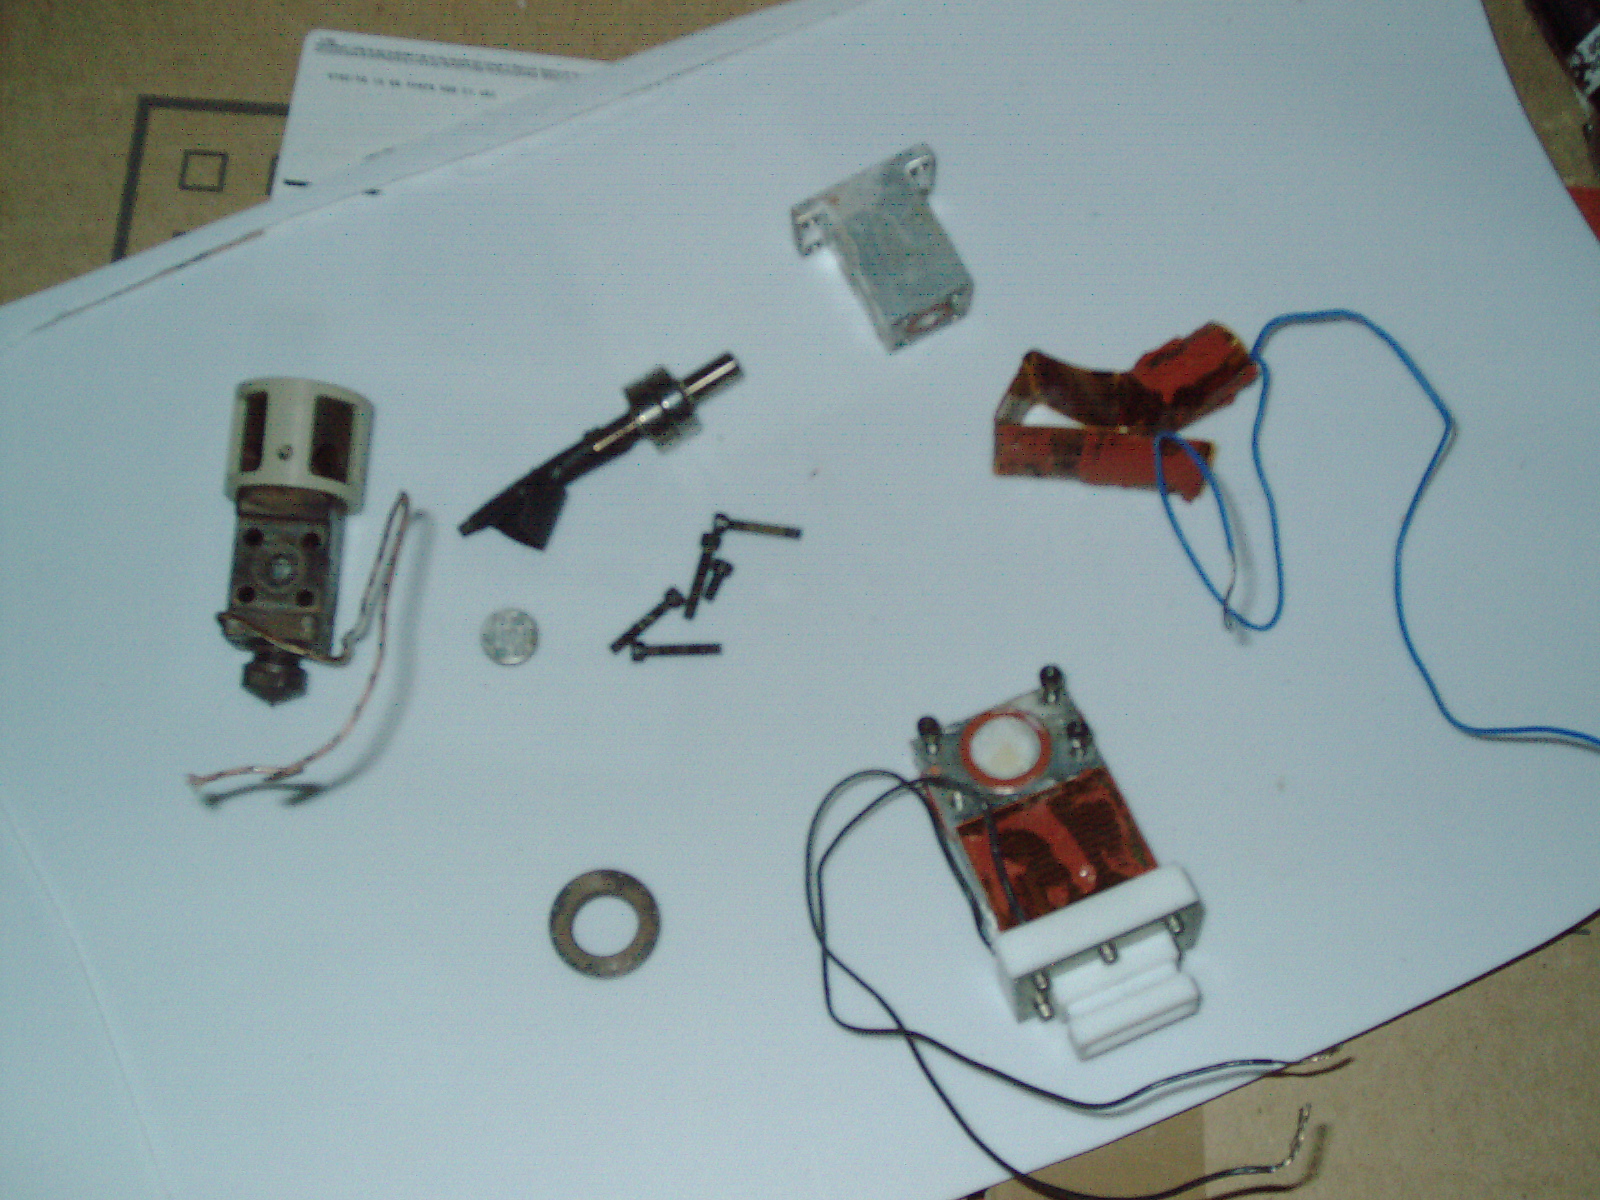
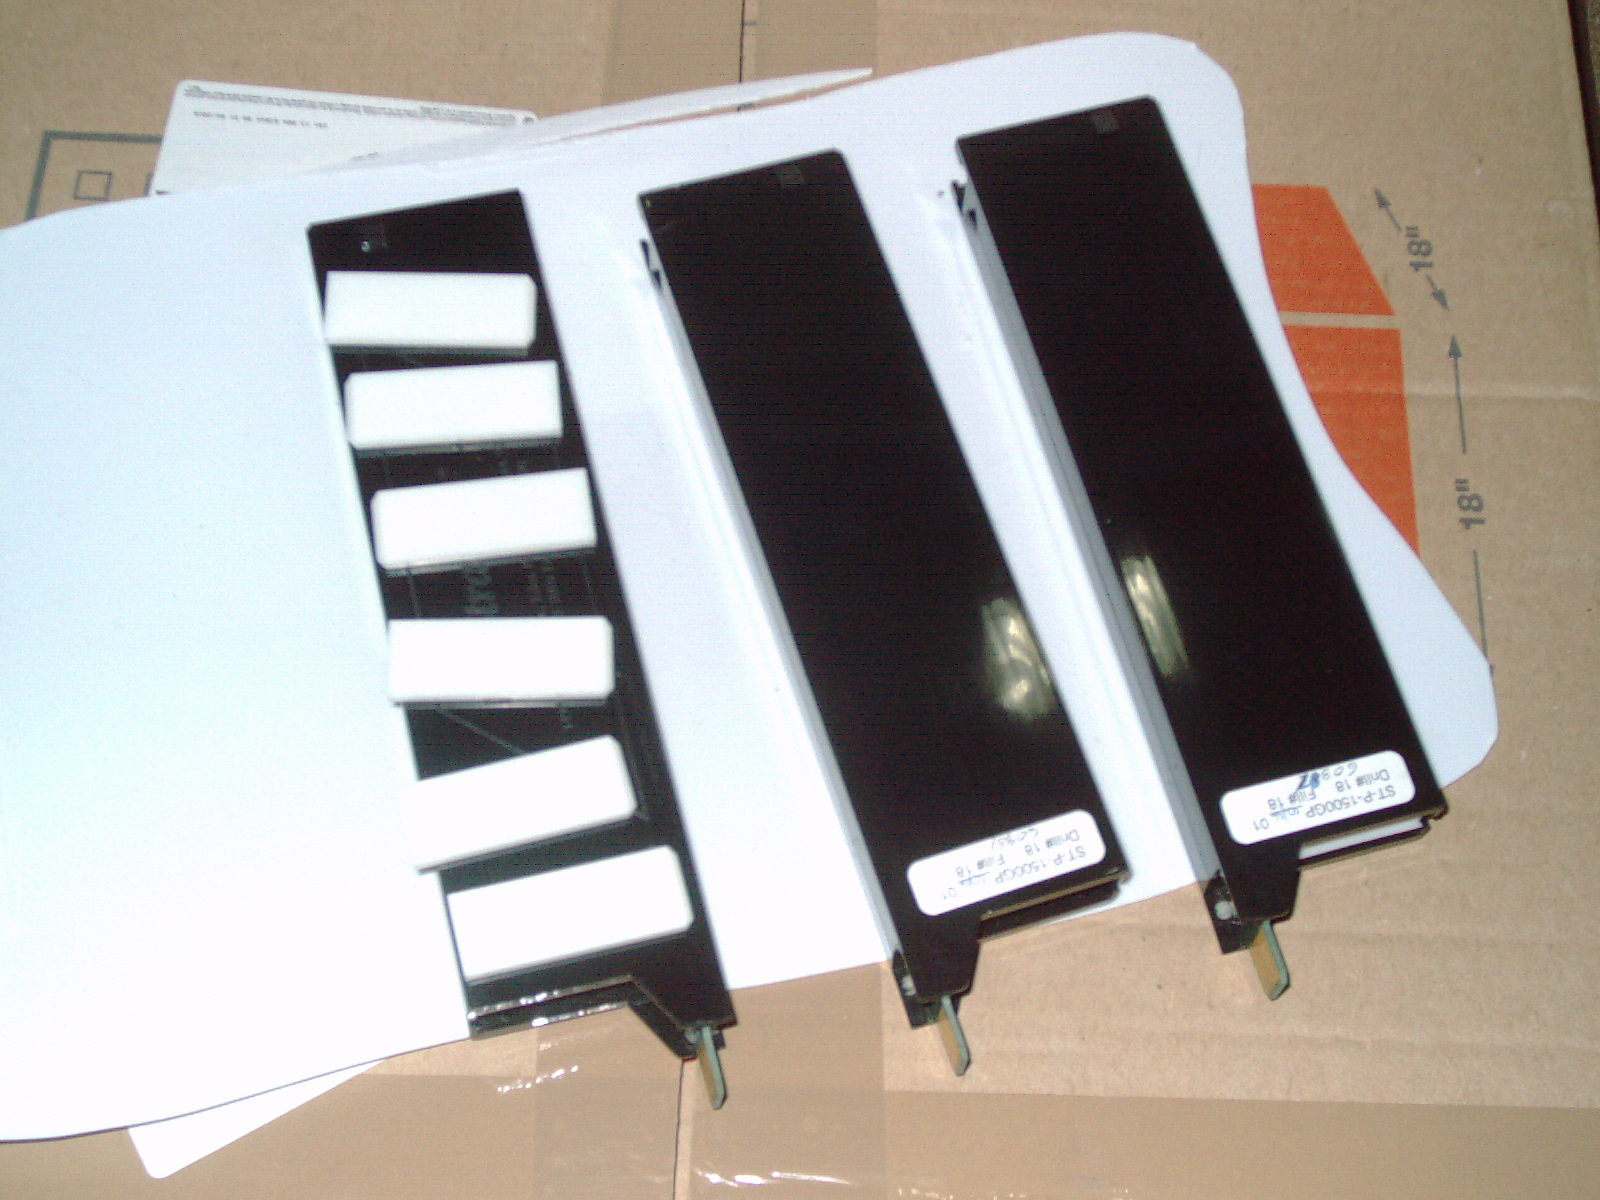
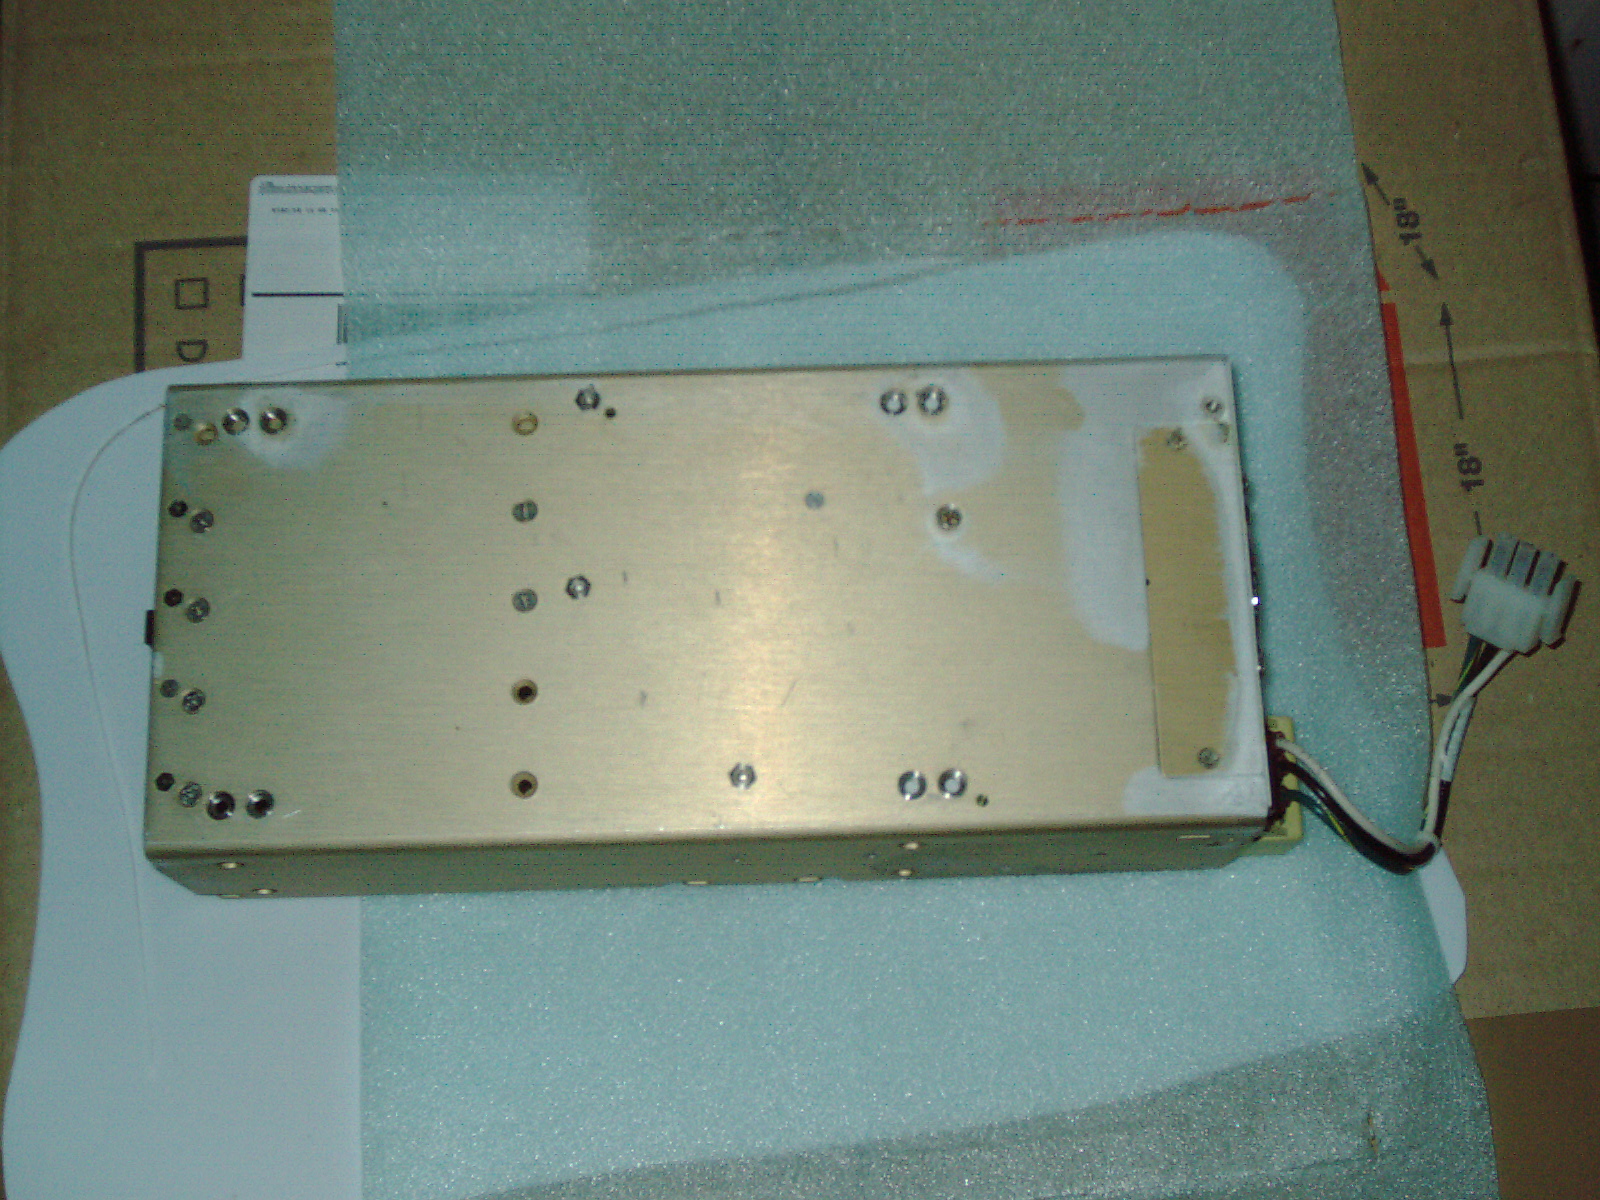
My box of Stratasys Genisys parts has arrived.
1. 2ea full wafer cartridges & 1ea with only 6ea wafers
2. Power Supply (repaired by seller)
3. LCD panel and board
4. Keypad and ribbon cable
5. Computer with motherboard, card, hard drive, disk drive, etc looks complete except missing 3ea card covers
6. Board with 2 transformers and ac connectors
7. Board with 10 connectors for wafer cartridges to plug into
8. 10ea plastic loading bays (where cartridges plug into) looks superglued by previous owner on several areas
9. Disassembled printhead by previous owner in a ziplock bag with screws and misc parts - but not complete
10. Wiring harness
There are several parts that I was expecting to be there but are not. The loading mechanism which has a circuit board and conveyor belt tires which pull the wafer into the printhead- that assembly was not in the box.
Also the printhead was disassembled but there is a portion of the printhead which is missing and the cable is missing.
The power supply looks rough on the bottom and looks "sanded" where the gold paint is missing.
One part I havent seen before is the 2 transformers board with 2ea AC connectors and on/off switch. Im glad to have this spare part.
I didnt receive any limit switches.
I didnt receive the heated bed
I didnt receive the big rubber timing belt or any timing belt.
Im glad to have these parts but I believed there would have been more. The seller sold the printhead to someone years ago (probably the Mfg bought it - or someone getting a "trade-in" allowance on a new machine.) Unfortunately maybe this is all the spare parts. If I look at all of the spare parts I received from several sellers - I have quite a bit of parts. None of the sellers sold me ALL the parts they had. I believe I have one nearly complete set of parts now - if I combine several purchased lots as a whole.
It is my hunch that this last set of parts is from a Genisys Xs. The reason I think that is that it has a 10-bay cartridge system. It is my hunch that the original Genisys (model 1 as I call it) to the best of my recollection only had 8 cartridge bays. I could be mistaken about that- maybe it had 8 or 10? It is only a hunch on my part.
Update 5/20/18
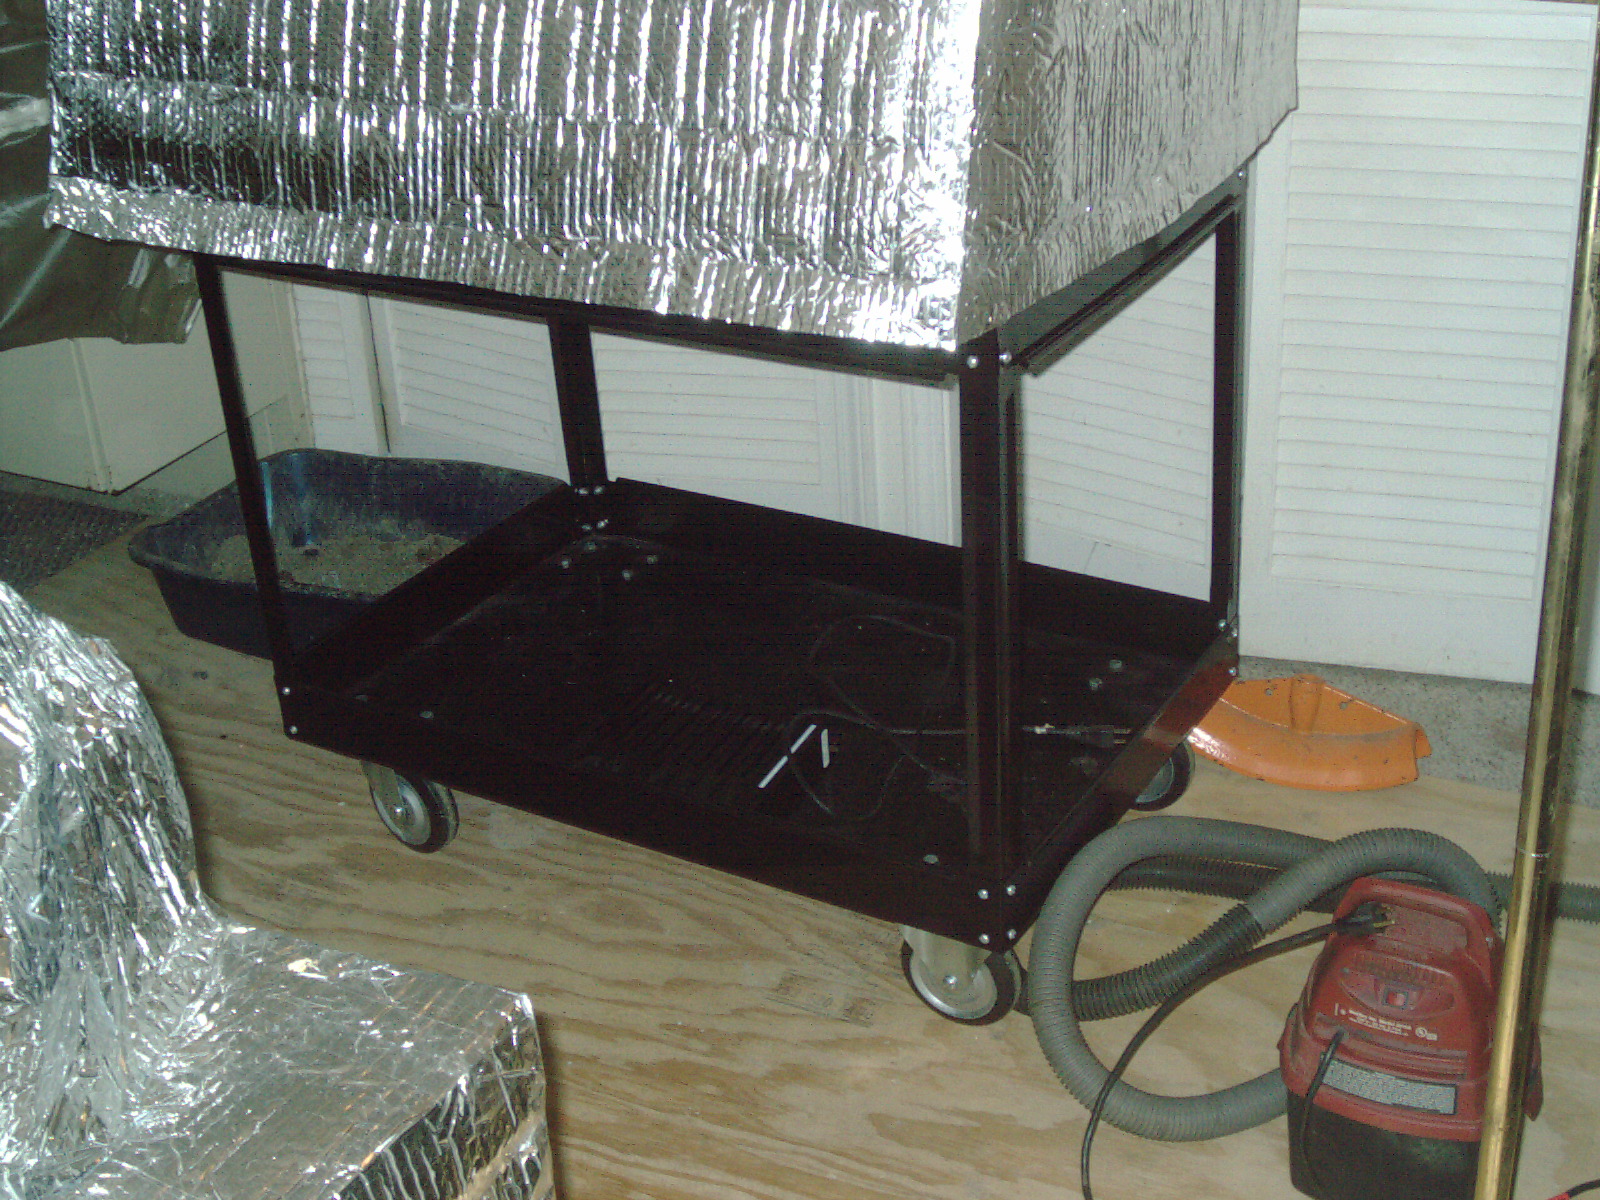
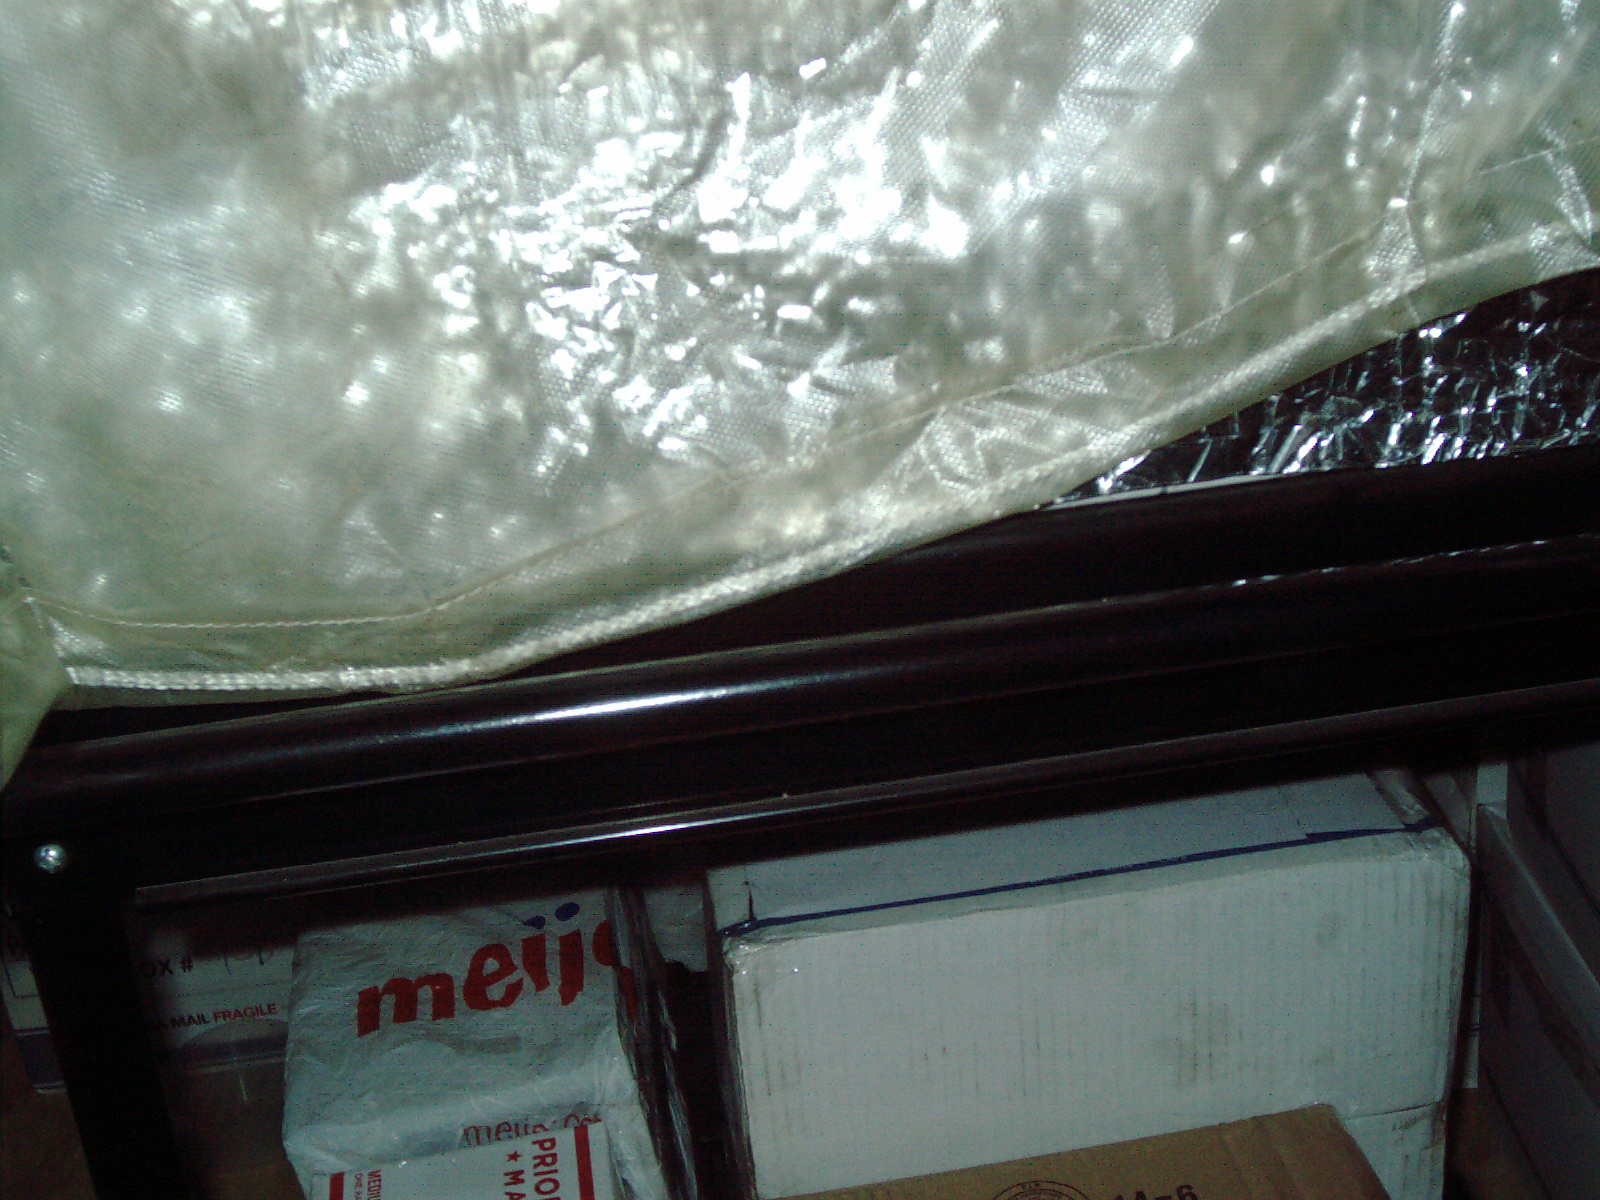
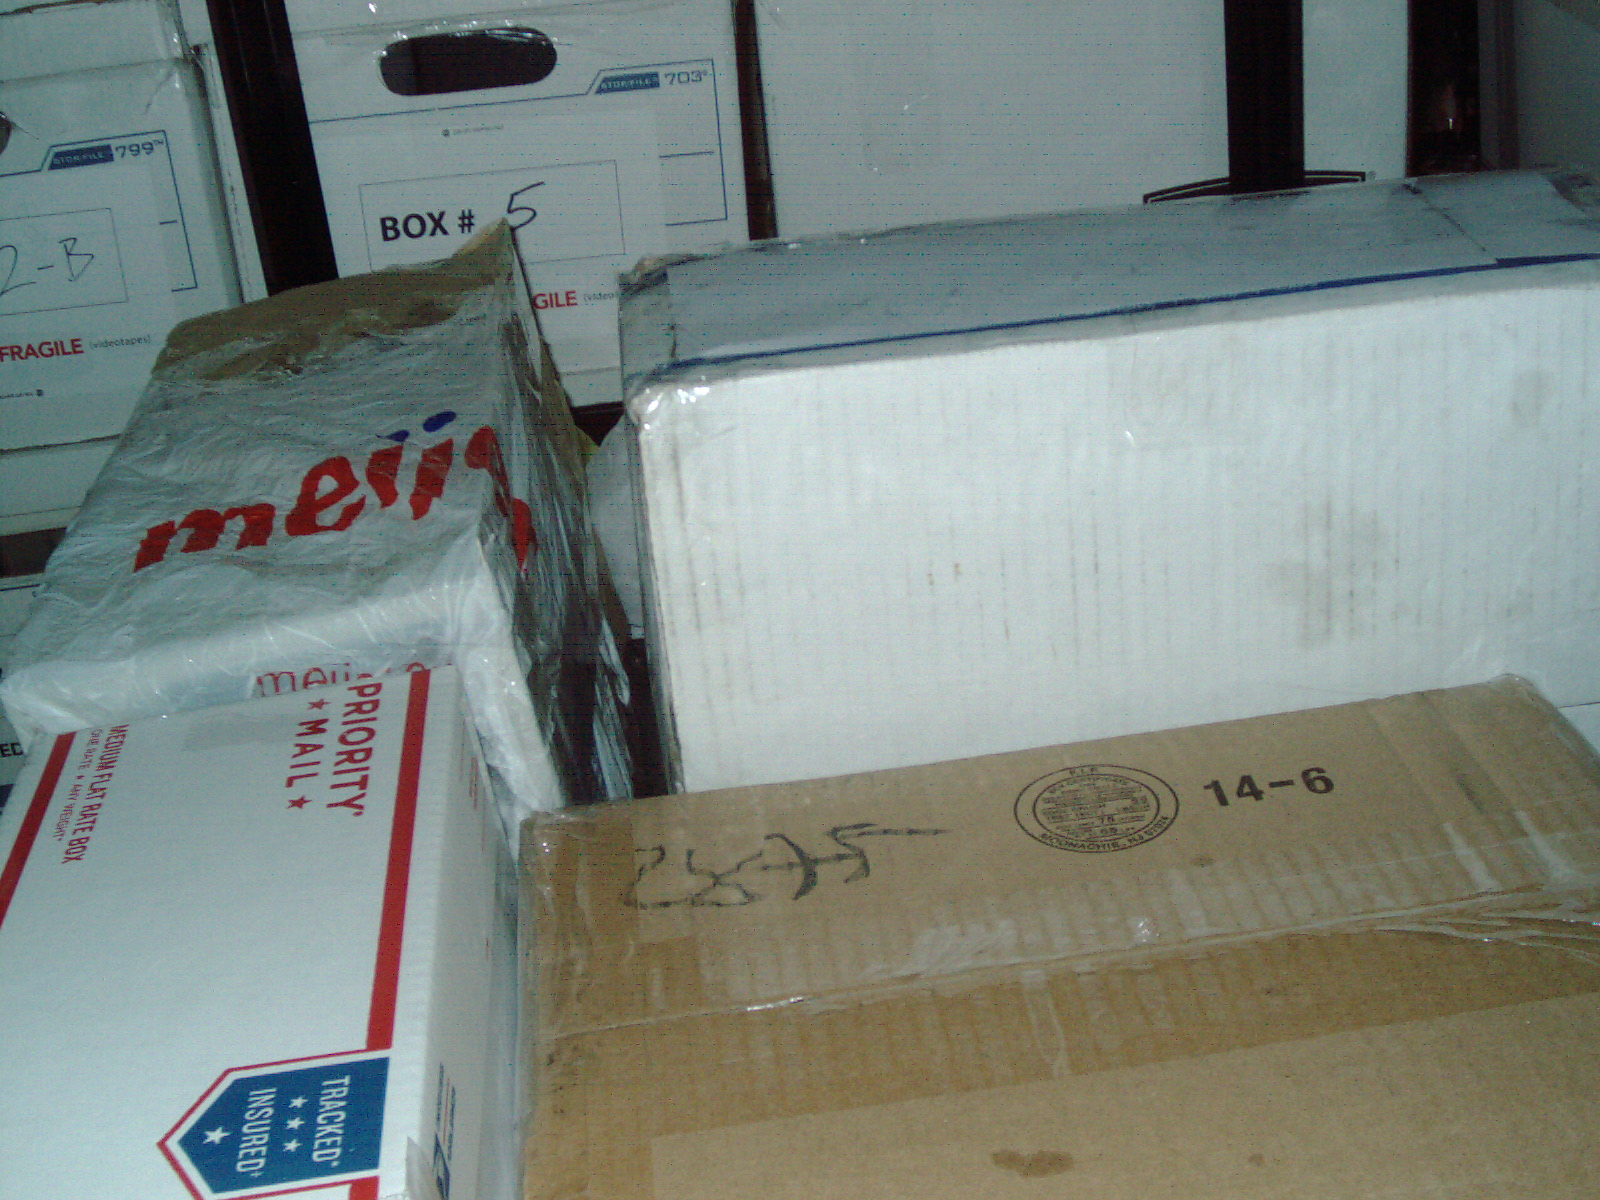
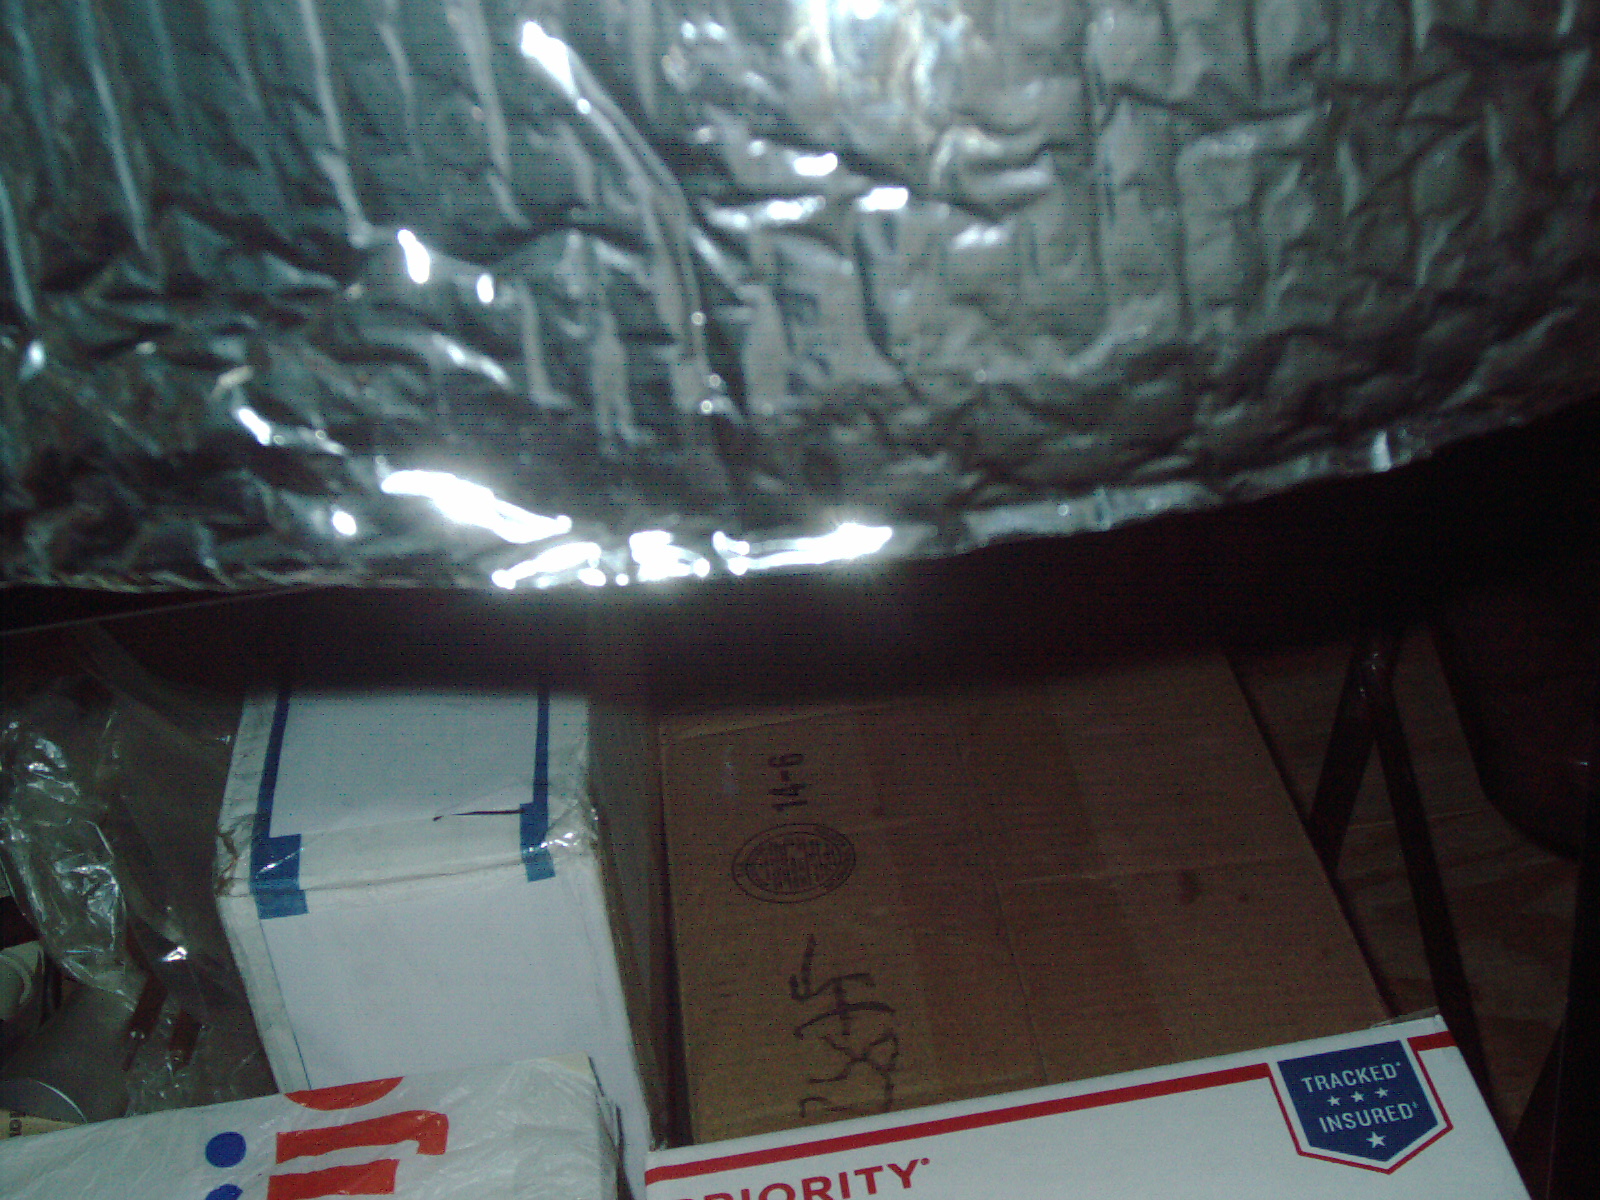
A few days ago I unpacked and took photos of the various parts I received. I also worked on sealing these replacement parts in plastic grocery bags taped together as a dust shield. Also I put these bagged parts in boxes I had leftover from online purchases. These bagged and boxed items are on the lower shelf of my cart. I didnt have enough space in my closet for more Stratasys Genisys/Genisys Xs parts. Hopefully my machine will work fine for years and will never have to use these spare parts.
I took some gallery photos of the boxes/bagged items under my cart.
It aint worth much today (I feel like I overpaid) - but 20 years ago - this was major expensive and Im glad to have these spare parts.
Note the stack of boxes behind my cart are old videotapes Im transferring for an organization/client - those 25 approx boxes are making it hard to walk in that room as it is so cramped. Im working days/some nights to get done with that videotape transfer order. That order made it possible for my Stratasys Genisys XS parts purchase.
Update 6/23/19
I purchased 25ea wafer cartridges of P1500 material. Back 2 months ago I received a phonecall from a university to come and get a Stratasys Genisys 3d printer for free. But alas I have no car and no way to pickup. I offered to buy the cartridges. I was told that the 3d printer was already sold or given away but the cartridges remain and the purchasing dept will put them on big-auction-site. Well I looked for those for weeks but found none listed for sale. About a week ago I recelived a message from the same person and I immediately bid and a week later won the auction with no other bidders. A week of shipping time later and they arrived safely and even the white shipping box has no damage.
There are 2 white boxes. The first one has 3ea P1500 boxes containing 5es cartridges each and a big piece of gray foam off to the side. The second box is the same but contains 2ea P1500 boxes with 5ea cartridges inside. I found 4ea opened cartridges and some are barely used and some completely full. I transferred all of the brand new sealed in pink bubblewrap and made 4ea brand new full P1500 boxes. 1ea P1500 box now has all of the unsealed cartridges plus 1ea brand new sealed.
I inspected the opened ones and found that instead of a piece of "styrofoam packing peanut" that there is a black piece of foam. It is possible that this is original and may have come from Stratasys like that as a revision to packaging. That is my hunch. I'm happy to have putlrchased these rare wafer cartridges. I estimate that I now have 4 or more complete tank fillips (10 cartridges loaded in one fillup)
WANTED IN ANY CONDITION
WHOLE UNIT OR PARTS
Working or not-working
ELECTRONICS PARTS PIECES BOOKS DISCS CDROM- whatever you have
whether working or not.
I dont mind getting duplicate parts.
I want as many spares as I can afford.
Here is my Wanted page which has been running for years.
http://www.drviragopete.com/wanted.php
I also ran a Craigslist ad for years looking for part/pieces.
As I take photos of the parts/pieces/items I will post them here as a gallery. I will not be posting PDF files or software etc as a respect of copyright.
Dr Virago Pete
drviragopete@att.net
phone (847) 454-7858 between 11am and 7pm daily
Note Im also in the process of restoring a 3-D Systems Thermojet from the very same era (original cost $50,000) which I paid $150 on auction and $750 shipping cost. See this webpage
http://www.drviragopete.com/wanted.php
This page last update 6/23/2018