Dr Virago Pete's Appliance Troubleshooting Tips
I decided to put this page together in order to help out.
I own several appliances which are 10+ years old and starting to need servicing on a regular basis. Since I do all of the work myself - I just have the parts cost and this page chronicles somethings that I observed or learned and my experiences. May it will help the reader with their own set of issues.
FURNACE HEATER
Carrier Weathermaker 8000TS furnace Notes
This furnace came with my house when purchased in 2003. It has been running fine for 10 years with an occasional problem of the blower motor not starting or the inducer motor making exceesive noise and causing issues. I regularly change the filter which is a 16 x 20 x 1 and it gets changed once a season at least. really I shuld change the filter monthly but I dont.
on 1/5/14 to 1/7/14 approximately Chicago area had a severe cold called a "Polar Arctic Vortex" it was a news story where they advised people not to travel or go outside due to the minus 50 degrees F windchill. It was so cold my furnace was running continuously for days. In that period I would realize that my furnace was not running and the temp inside my house would drop rapidly. In just 15minutes the temp would be 10degrees below normal. Sometimes at night sometimes during the day. And I would go to the furnace to figure out what th eproblem was. I see the blinking LED red light would flash in a repeating pattern 4x 3x 4x 3x over and over. The handy cheatsheet on the inside front cover of th efurnace was not helpful to figure out what was wrong. To make a long story short here's what I did
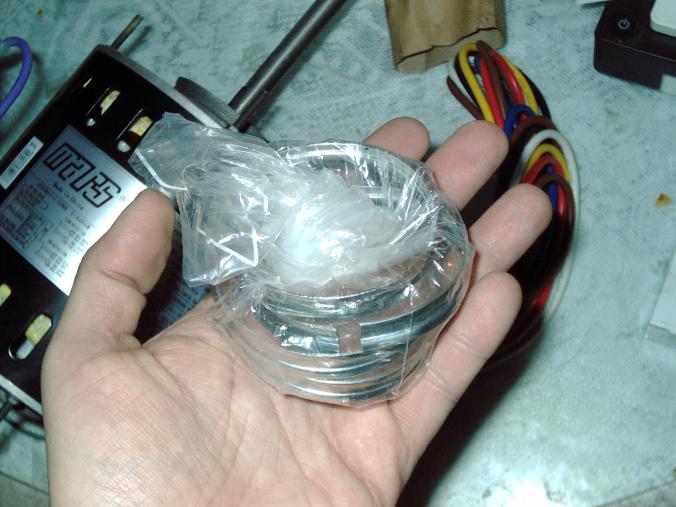
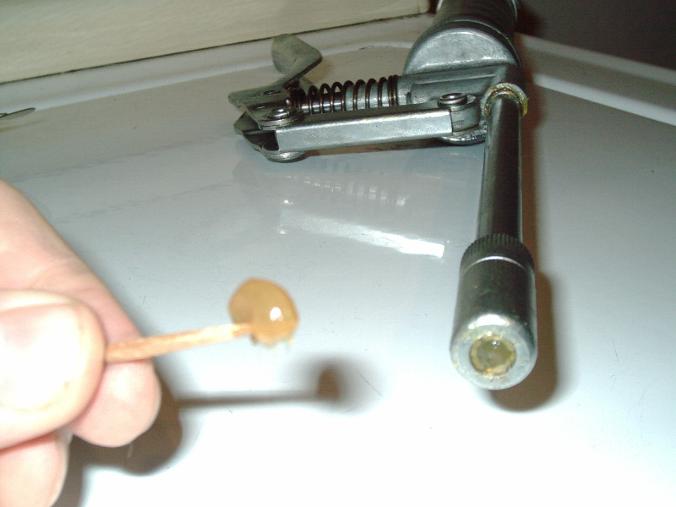
1. Removed the fluid filled capacitor and shook it and then put it back
2.
Ordered a new one from big-auction-site for 10 bucks plus shipping I
paid for priority shipping but it didnt arrive any quicker than first
class. I know this because I ordered 2 capacitors - as I didnt want to
take a chance on a bad seller not sending one. And they both arrived the
same day - one was first class mail and the other was priority mail and
the furthest one away arrived the same day as the Priority.
3. The bad capacitor had a printed label 5micro Farad 370V (written 5uF 370V) and shaped like a metal camping canteen. I measured my old capacitor as 4.339uF with a ESR of .14ohms.
4. The good capacitor was half the size and measured 4.986mF .01ohms ESR This was a brand new one and happens to be the Priority mailed one - I installed this one.
5. The first class mailed capacitor was full size and measured 4.995uF with an esr of .14 which tells me this used capacitor was no good and I paid $4 for it with free shipping and is junk purchased from big-auction-site.
What
I think happened is my old capacitor is borderline pass/fail it has a
4.3 approx uF and a high ESR which causes the motor to have diffoiculty
starting and running. This overheats the motor and makes it run slower
than normal.
If i installed the used capacitor from big-suction-site
it probably work better than my old one but the motor would have a
shorter life than buying a new one. That is because the motor would strt
better and run better but still not as effortlessly as it should be. I
found that no department stores carried this capacitor even though it is
acommon item - most furnaces have one - (check your heater yours may be
a different rating - buy the correct one for your furnace)
When
the furnace would stop and the 43 or 34 code was flashing I needed to
press a thermostat circuit breaker. Think of it as a resettable thermal
fuse. If the inside of teh blower unit gets too hot - this thermal fuse
trips and then your furnace refuses to run. When it is minus 50degrees F
it si super critical that the furnace works. So all I could do was
shake the capacitor and slosh around the liquid inside it and then
reinstall. It would run for a while longer an dthen the same thing would
happen again. I was hoping the replacement capacitors would arrive in 2
days but they both took 3 days.
Amazingly
enough on 1/10/14 the weather just drastically in the other direction
and thems were 37degrees F (so that is a 90degree difference in just 2
days) and the 17inches of snow on my roof melted and my driveway had
slush and huge amounts of water from the melting.
The importance of a furnace in the winter is to keep your pipe from freezing. At the extreme polar cold spell it woul dbe a matter of hours in whic the house temps drops to below freezing. I had 4 additional electric heaters going and a trip to the Menards hardware store revealed a parking lot full of customers many were in the electric heater section and one man bought a dozen heaters. The sales clerk sold me his disply unit because he had no more. I'm lucky I bought it because even with 4 electric ultility heaters and my furnace cutting in / out I was able to maintain reassonable living comnditions and no pipes froze or burst.
In hindsight this is the maintenance I have done to my furnace over the years - the inducer motor is very much like asideways mounted bathroom fan - an open motor design. I replaced the bearings 3 times on the original motor using rollerskate bearings. The vibration of the motor jackhammered the bearings to the point of failure and noise. The curently installed motor costed about $99 from online HVAC seller plus shipping and about 2 years later it is starting to make noise where I feel it can last this season but by next season I need to replace the bearings.
I also bought a replacement used board as a spare this year. Hopefully the seller was honest in saying that it is a used working board. I checked the caps and esr looks fine and there was a little silk cocoon in there so I'm glad I took the cover off and cleaned it immediately when it arrived- otherwise who knows what critters would have emerged from that silk cocoon.
I should mention that when the inducer motor fails and doesnt turn fast enough - it causes one of the thermal breakers to trip. Just like the blower not spinning fast enough causes that break to trip - you need to go through and press the breakers and you will hear a "click" on one of them. That is the one that you just reset by pressing it- because it was tripped. When I replaced the bearings with rollerskate bearings - th emotor ran super great and had no more problems and a quiet sound for over a year each time.
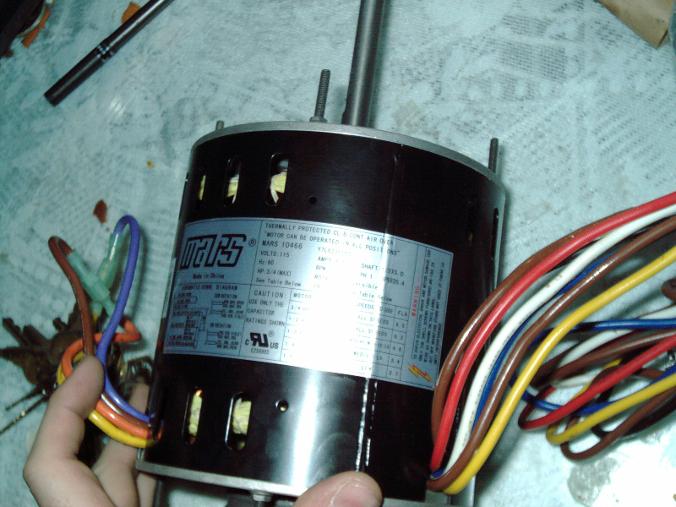
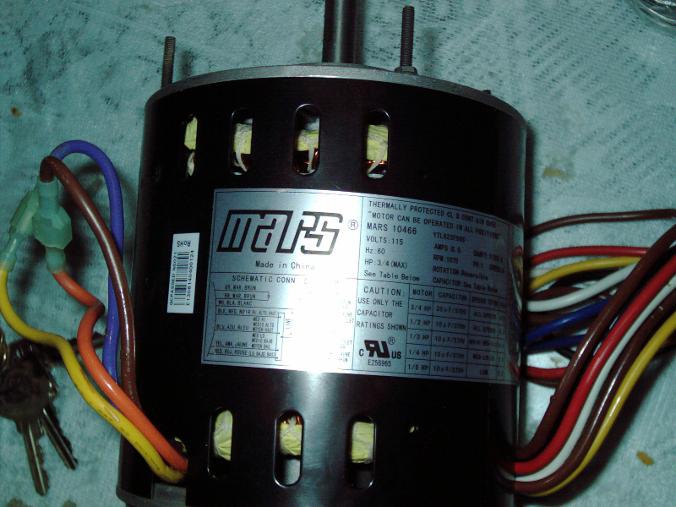
I purchased this brand new in the box motor for $155 cash (no receipt) from a local heater guy who met me at the Sams Club parking lot as he was working out that way and was the only heater repairman who would sell me a motor. I was lucky to buy it even at a $60 markup. All the rest of the heater repairman would not sell me a motor. This is a Mars brand 4-speed motor which uses a 10uF capacitor and is rated from 1/5hp to 1/2hp and is ball bearing. It runs very well and blows alot of air. Much better than my old motor ever was.
In hindsight I killed my old motor by
1. Not changing the filter for 3 months
2. Ductwork pipe which leads to the chimney was full of ash and leaves and I didnt know it was that much stuff in there.
3. Big-auction-site sellers were selling me their old bad capacitors which ruined my motor even more -shameless sellers - I got refunds from some of them. My new motor came with a brand new capacitor inside the box.
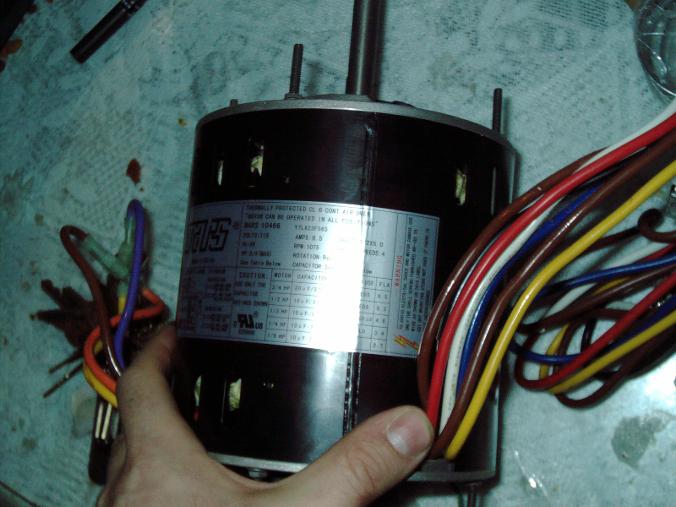
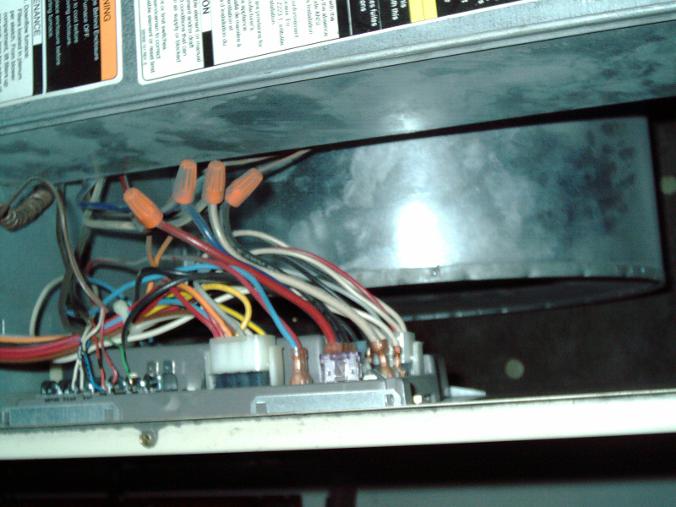
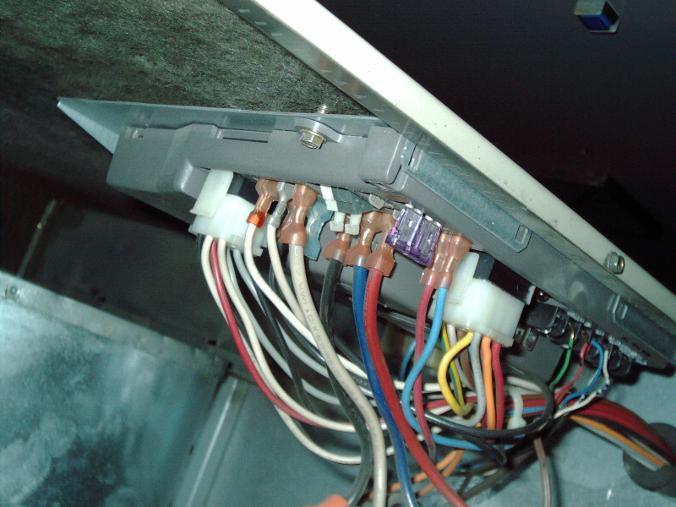
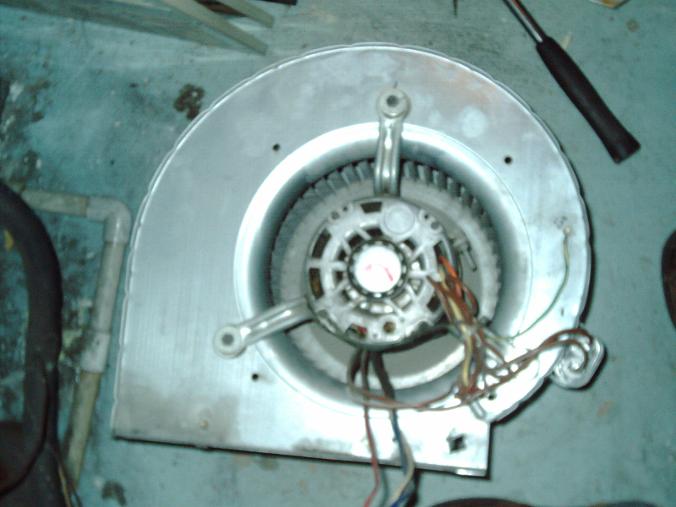
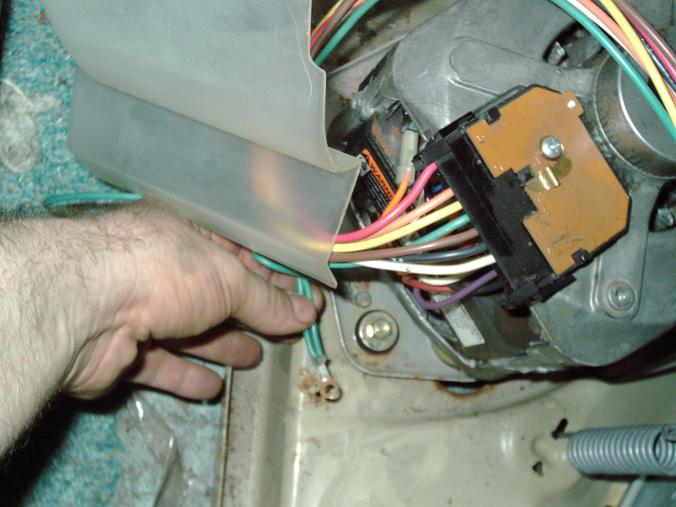
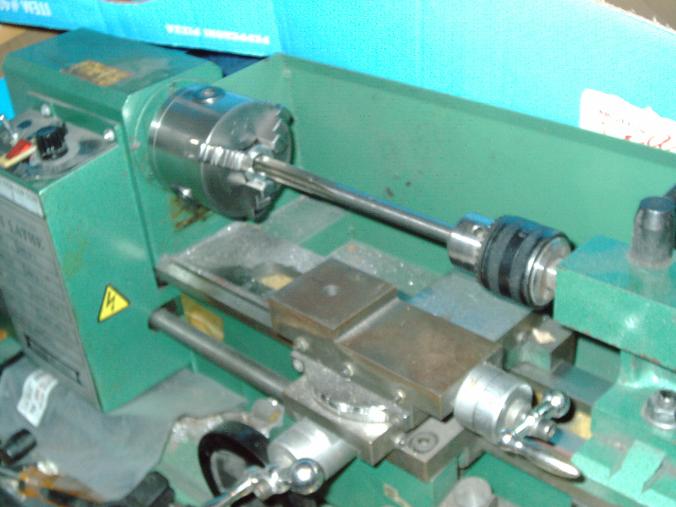
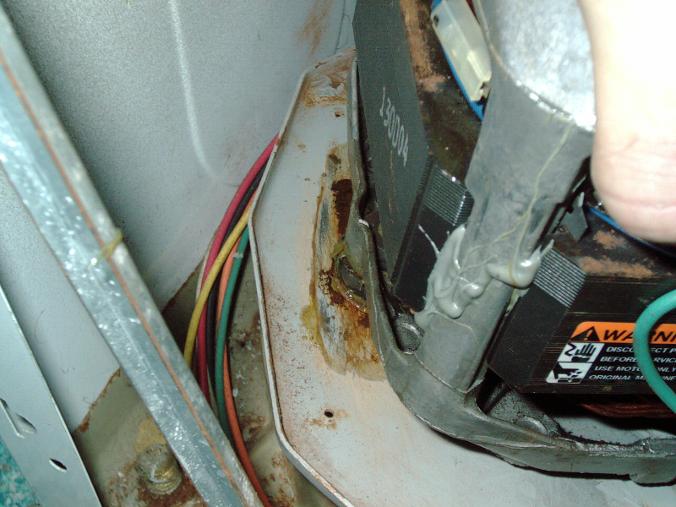
See the purple brown orange and yellow wires on the leftside of this photo? My old motor spiun in the counterclockwise direction (wire side of motor) and I had to connect these wires so it spins counterclockwise. I got this right on the first try without any redos. If you find your motor spins backwards and doesnt blow - you may have the motor spinning the wrong direction - change it by switching the rotation wires as you may have those plugged into each other the opposite way. This universal motor can be sutup to run clockwise or counter-clockwise with those short wires plugged into each other- the sticker on the motor shows. But with the motor mount clamped on the motor - the label wont show - so these wires for clockwise/counterclockwise rotation should be setup before you attach the mptor mount.
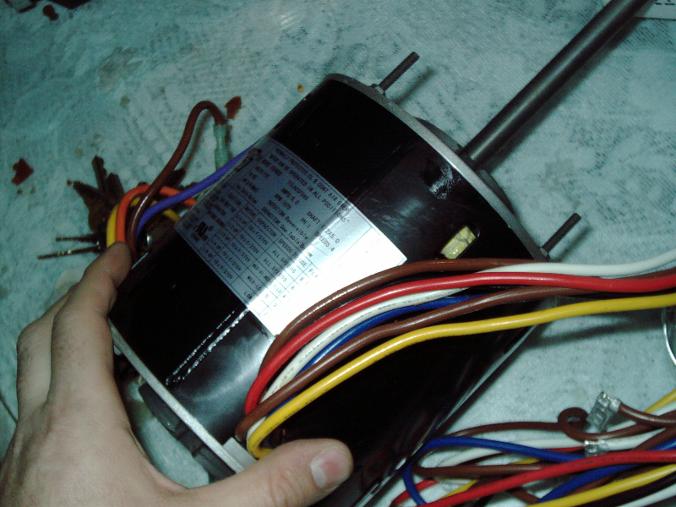
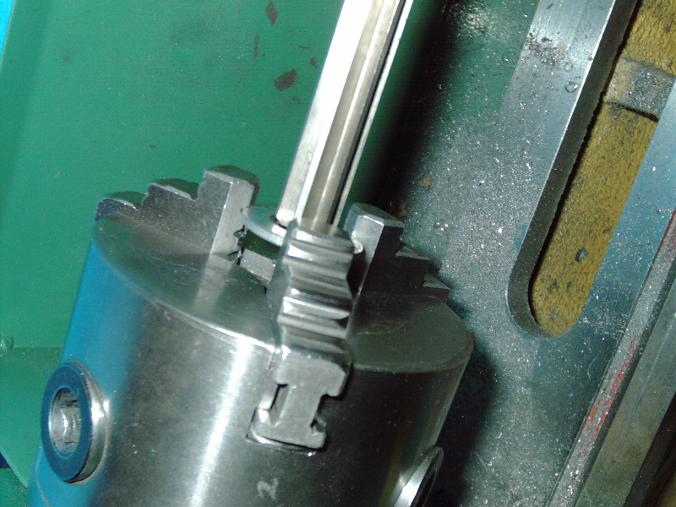
I cut off the threaded ros sticking up all over the motor as that is probably for some other furnace brand. My furnace needs a nice simple motor without anything sticking out. I cut these threaded rods so they only stick out 1/4" past the nuts. If it was any longer then the blower squireel cage would scrape= so I cut them as short as possible but leaving just a little rod left p[ast the nut. The Dremel cutoff wheel did a nice clean neat job using a Multipro 395 variable speed tool at full speed 30000RPM and cuts like butter while using safety glasses for eye protection.
The new motor came with these clamps which go around rubber rings on the motor - that is because it is a universal motor. But my furnace doesnt use these rubber rings or the metal rings which go aroun dthe rubber rings. I removed the rubber rings and didnt use the metal rings. My furnace uses a screwclamp aroun dthe body of the motor and is a press fit. The press fit motor clamp and 3 legs reminds me of a wiggly wobbly Christmas tree stand and took finagling to get it just right on the motor. I removed it and readjusted in several times before it was just right. My new motor is longer than the old one.
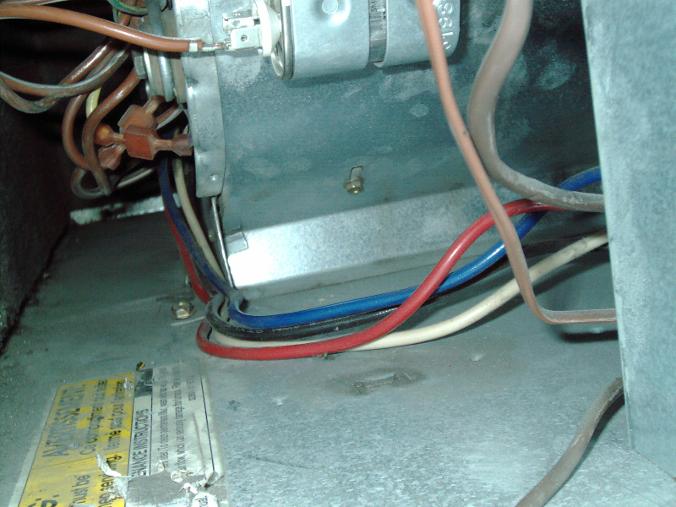
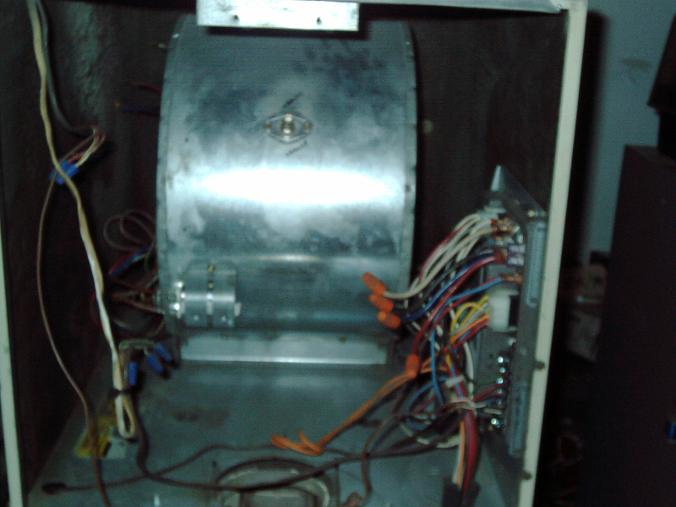
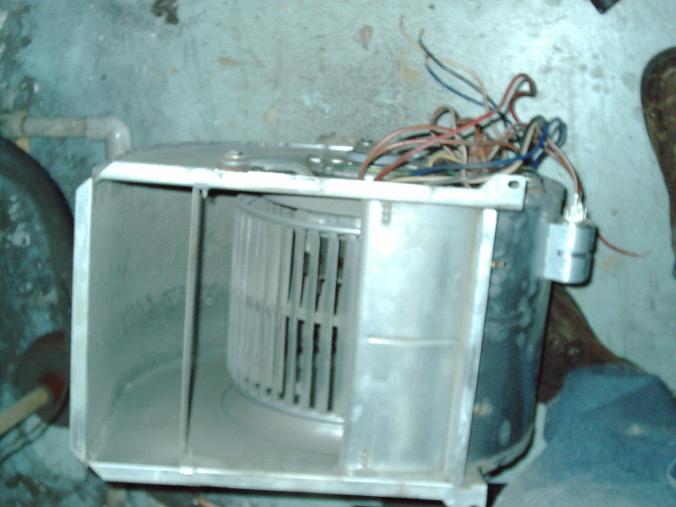
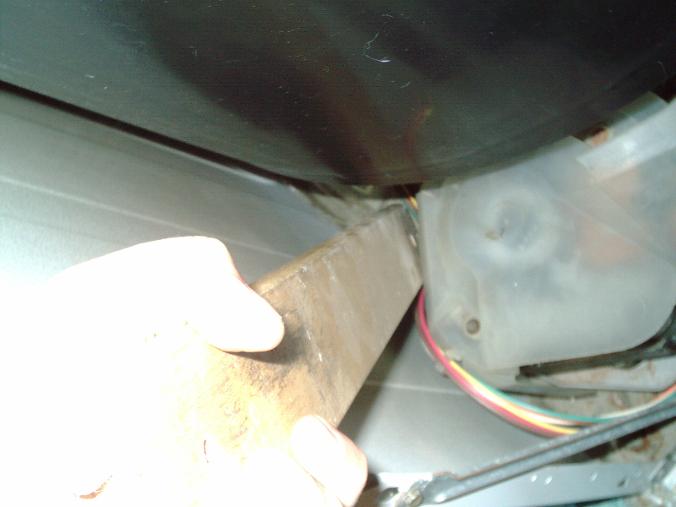
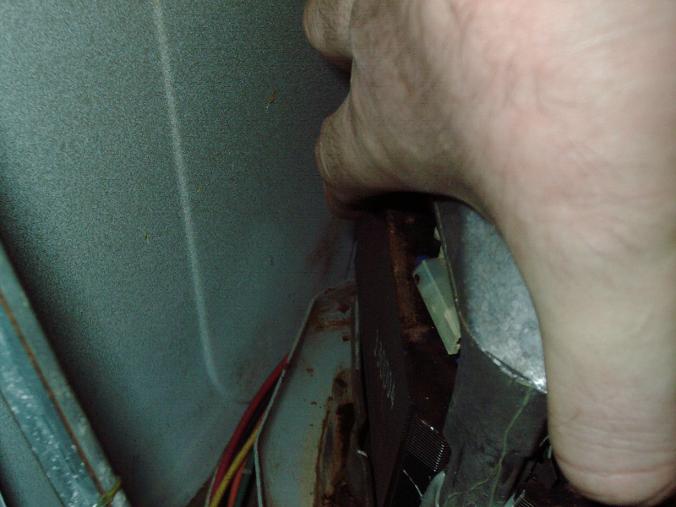
camera tilted to the left for a better shot.Shows column which I had to remove. It was full of soot and leaves and ash and a good half coffee can was filled from the debris. I tapped on the ductwork above while a board was placed over the furnace so the debris came down while I held a vacuum cleaner hose and sucked most of it up. I'm sure that debris contributed to the motor failure as I didnt know there was all of that debris. The tripping of the blower limit switch means the compartment in the furnace was getting too hot and eventually melted the motor. THe reader should plan on cleaning the ductwork above the furnace by disconnecting the pipe ducts and then tapping and vacuumingh it out. I was surprised how much ash and leaves came out. that center culumn is really a duct pipe that is surrounded by a square enclosure- that leads up to the pip ducts above the furnace and up through the roof chimney.
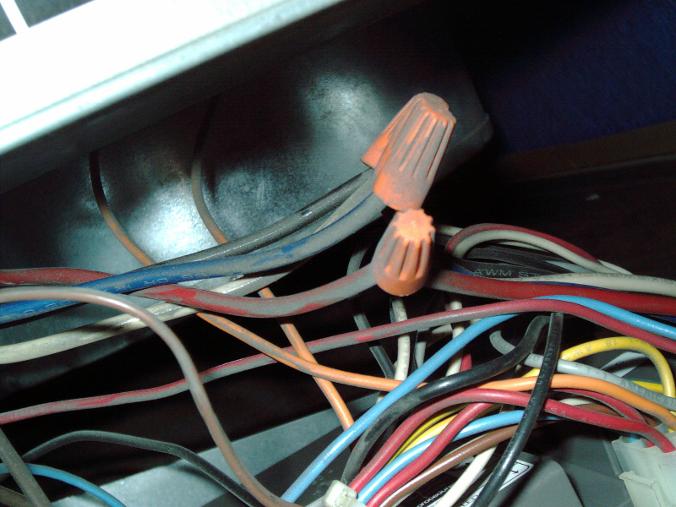
The old motor is connected with wires that are twisted an dthen capped. On the new motor I cut the wires to the same length as th eold motor and then capped it the same way. THe color of the wires was the same. The extra yellow wire was just capped as I didnt need the 4th lowest speed.
One of the two screws which secures the blower housing to the furnace sheetmetal. There is one on each side. The blower was actually quite difficult to pull forward as it had a snag somewhere in the sheetmetal and I carefully finagled it for a good 5 minutes before I finally freed it.
camera tilted to the right for a better shot.
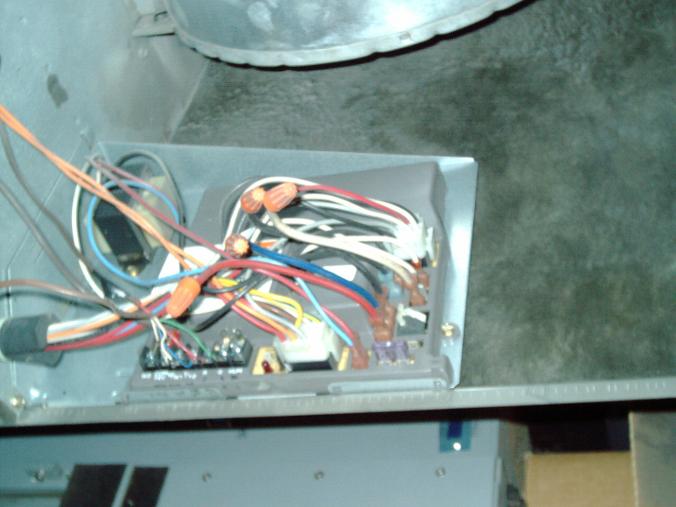
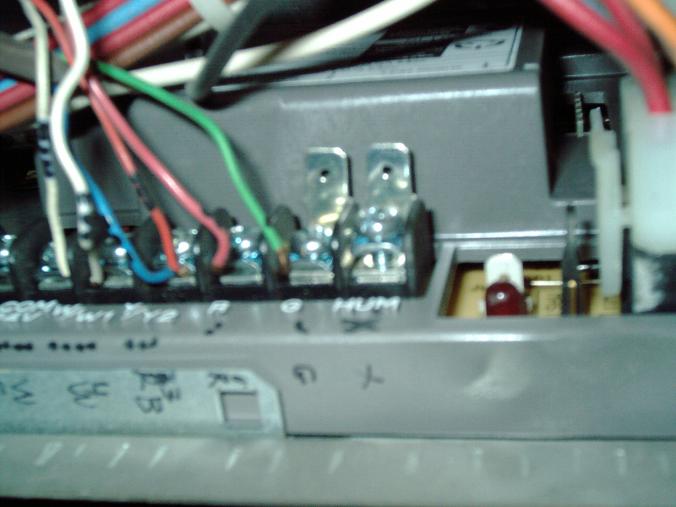
The center column was in the way as the blower housing needs to be unscrewed with the 2 retaining screws and then pulled forward. You would think the MFG would make a side panel so you can remove it without disturbing the rest of the electrics. I marked on the blower housing to show that the 2 orange wires are for the thermal breaker switch. The other brown wires on the left go to the wall and around eventually leading to the thermostat in the living room more than 50ft away.
camera tilted to the left for a better shot.
camera tilted to the left for a better shot.
camera tilted to the left for a better shot.
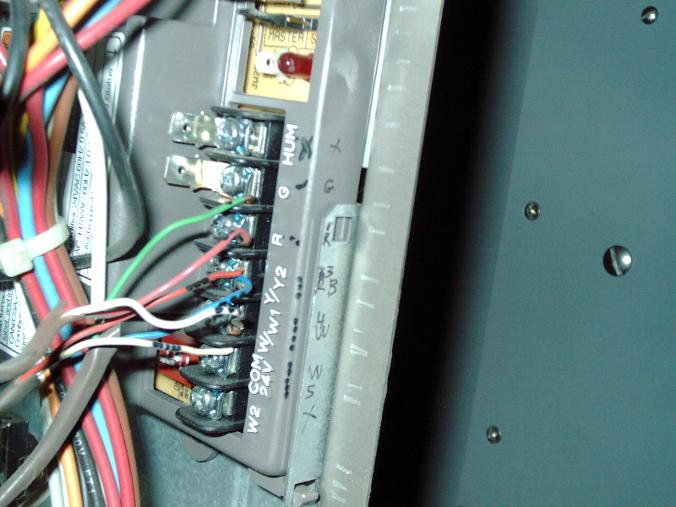
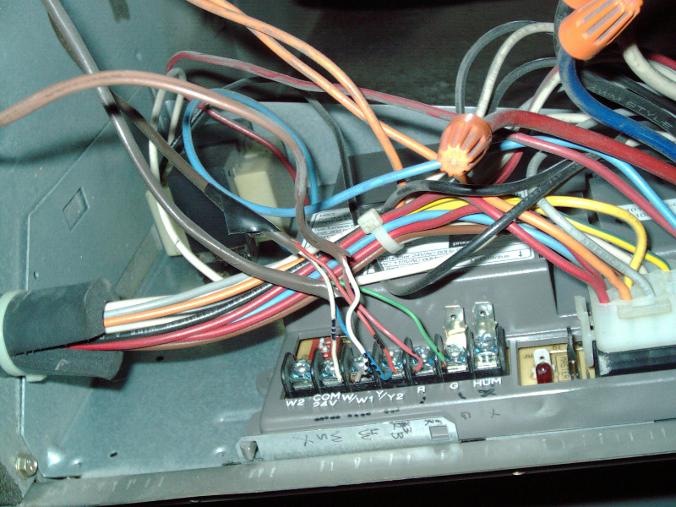
I drew dots on the wires and noted colors of wires on the bracket. So I knoew how to reassemble exactly how it was before.
G=green W=white B=blue R=red. I also put marker dots on each wire since there were several wires the same color I didnt want to mix them up. So you can wsee W5 means the white wire which I put 5 dots on etc. And so on.
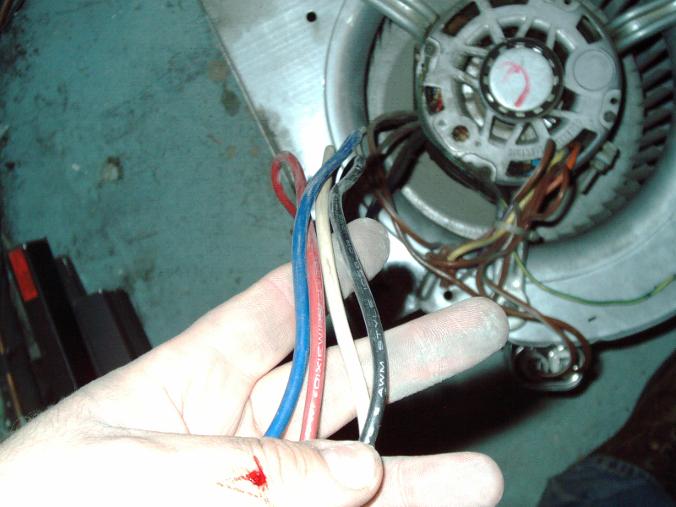
Showing my old 3-speed motor wires - my new motor has a yellow wire which was for the 4th speed which I didnt connect to anything and just capped with an electrical twist-on cap.
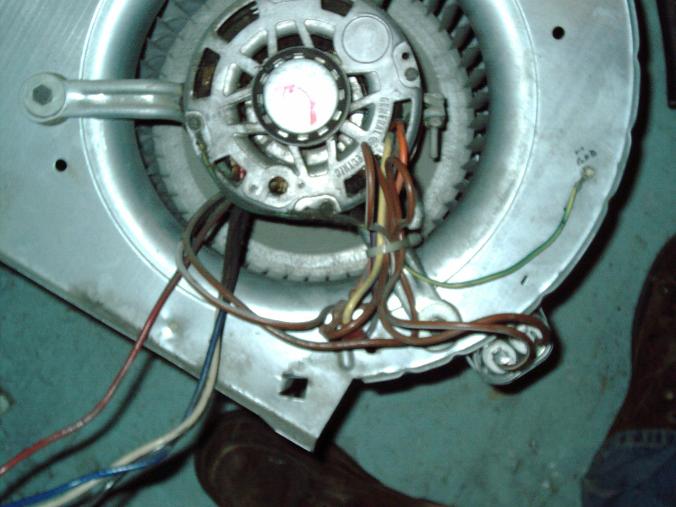
Shows old motor which refused to strat on its own but with a very gentle nudge would start and run for days. The very end came when the motor would hardly turn at all and was probably melted inside.
In the interest of time as the house was cooling off fast - I cleaned and vacuumed the squrirrel cage wih a paintbrush - brushing away the clumps of dust and vacuuming them. I cleaned it while the motor was off but the squirrel cage still trapped by the blower housing. I also brushed the inside of the blower housing and the area by the thermal trip switch located on the blower housing- there was some dust underneath. Much cleaner and I had to do it good-enough rather than perfect because I didnt want my water pipes to freeze in working too slowly.
One more thing - while I was working on the furnace for over 2 hours - I let the shower have a trickle of water and also the ultiliuty sink in the garage a trickle of water. I have a crawlspace and the furnace ductwork runs underneath heating the crawlspace. The crawlspace is always much colder than inside. I would say that the crawlspace is never below 50degrees F even on the coldest days. But with the furnace running I didnt want to take a chance on the crawlspace getting to freezing temps and cracking a waterpipe. So my thoughts were to let the water run a little because city water comes from a warmer place. Wheather that was good thinking on my part or just a waste of maybe 100 gallons of water - I dont know but my water pipes didnt crack and everything turned out ok. Also 4 electric heaters were used and the kitchen oven was set to 175deg on bake with the oven door open every time I went that way. ANd then the oven door was closed when I went back to the furnace to work some more. The opening of the oven door and then closing it- let a puff of warm air into the kitchen.
Incedently I did receive my big-auction-site order for a $60 4-speed motor but there was no moptor in the box. Inside was 2ea controls for something or other - I dont know what. They didnt bother to check the box before they sent it. So again I'm glad that the local heater guy sold me a motor at $155 as with a dead heater and minus 35degF weather it doesnt take long to have your pipes freeze and just a week prior we had record breaking minus 50degF windchill. That heater guy saved me and I gave him an extra tip and thanked him for selling it to me.
The big-auction-site sellers were nothing but awful with bad capacitors and the motor box which contained no motor. they didnt come through for me at all. I was worse off installing their bad capacitors as my motor originally took a nudge to start and after their capacitors my motor was internally melted even before my replacement motor box could arrive. It is odd that the moptorbox contained no motor so I was doomed. If it wasnt for the $155 motor sale I would be in bad shape.
No hardware store sold capacitors or motors and i went through the yellow pages with only one person willing to sell to me.
Good for nothing hardware stores. I'm mad that it is so difficult to obtain vitally needed parts for something as important as a furnace.
I will order a spare motor and I already have a spare electronic board. I purchased a similar model Carrier furnace but 10 year solder from Craigslist for $20 as it has the same blower housing and squirrel cage. And even the inducer motor assembly is the same. I will ready the blower housing with the new motor and the inducer assembly with a new motgor so I have those on hand ready-to-go for next time.
Oh and one more thing I ordered a used inducer motor assembly for $35 and it arrived all rusty rusty rusty from another shameless big-auction-site seller and he gave me a partial refund of $20. See what I mean - I was doomed buying from the wrong set of sellers. The piture was pretty and what I received wat despicable and drastically awful and not useable. Lukcily I didnt need that part and oinly purchased as a spare. The $20 Craigslist furnace was is drastically much better condition so I notw have all the spare pars I need for next time. SHEESH what an ordeal. It is finally nice and warm- I suffered with this old blower motor for a month or more during record breaking Chicago cold and I was chilled to the bone and constantly waking up at odd hours cold or come back from the post office and the temp was dropped by 5 degrees signalling to me the blower stopped again.
As I'm writing this it has been a we4ek since new blower installed and havent had any issues at all. Much warmer even through -35deg wiundchill the furnace keeps up. I even switched the dipswitch back to "normal" rather than "Hi Blower" normal is fine and keeps up just fine now.
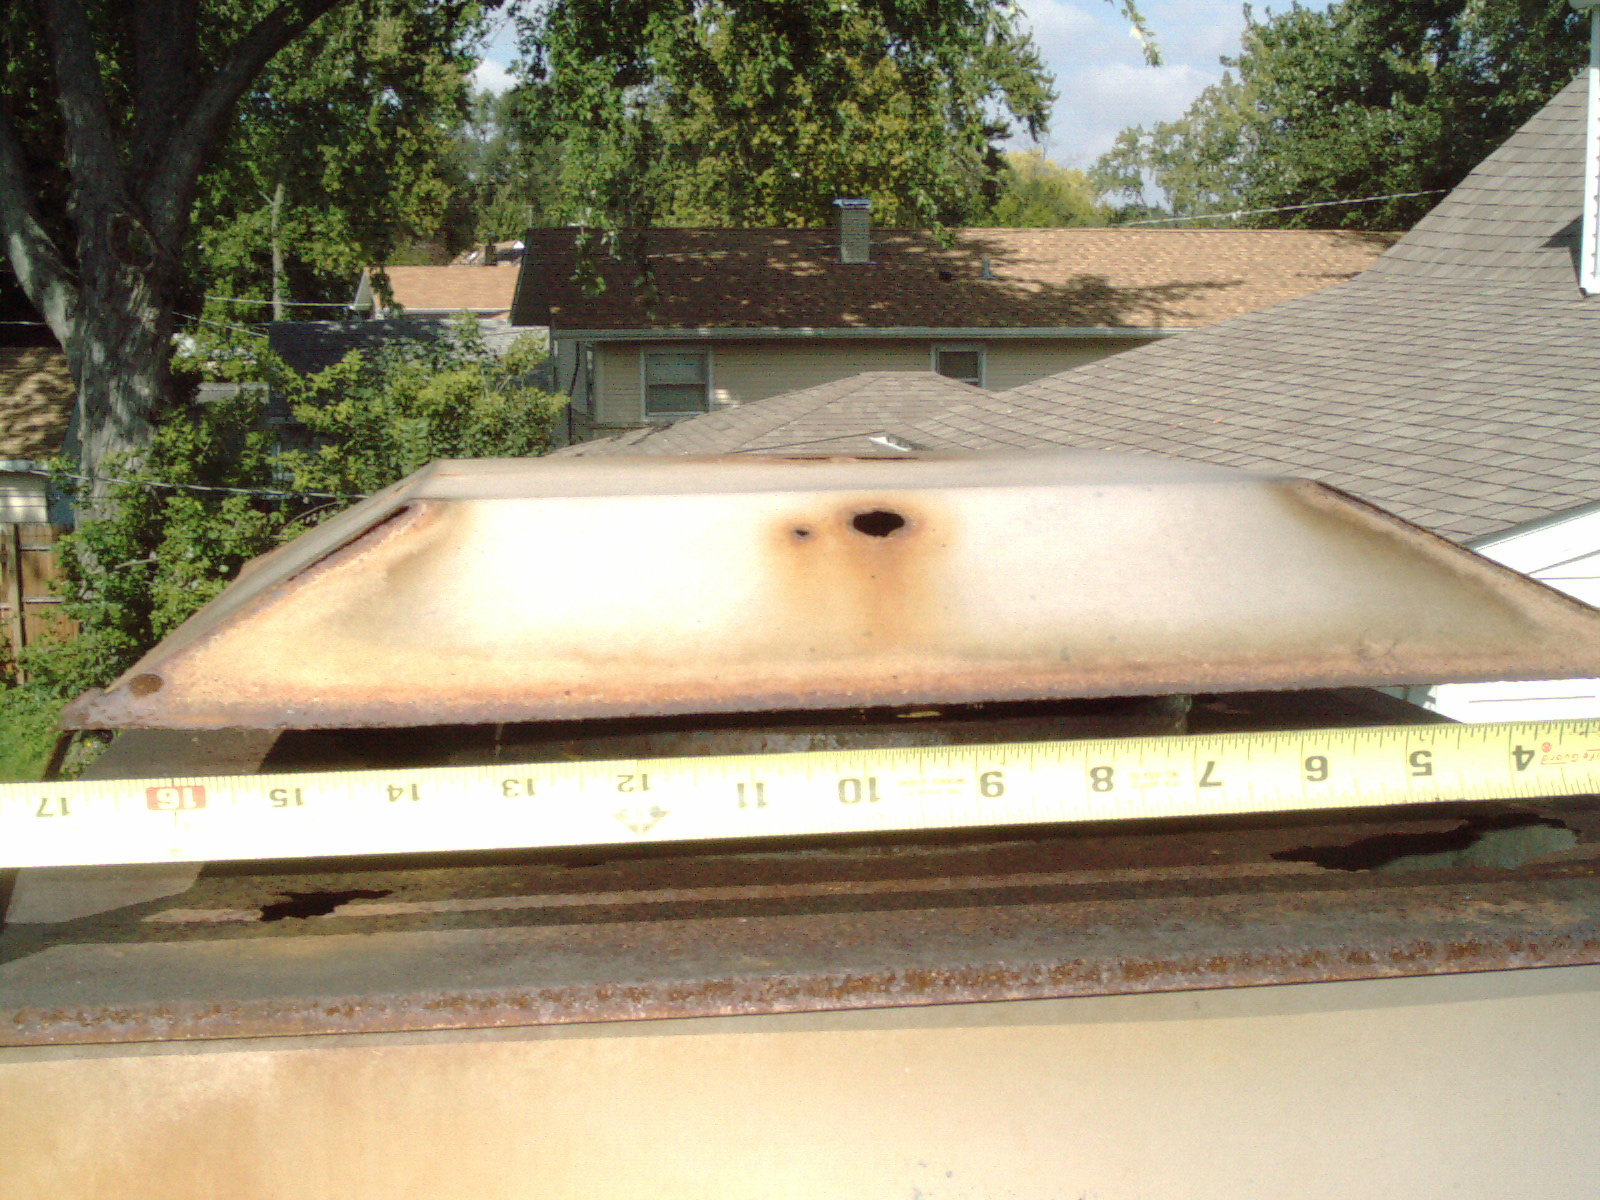
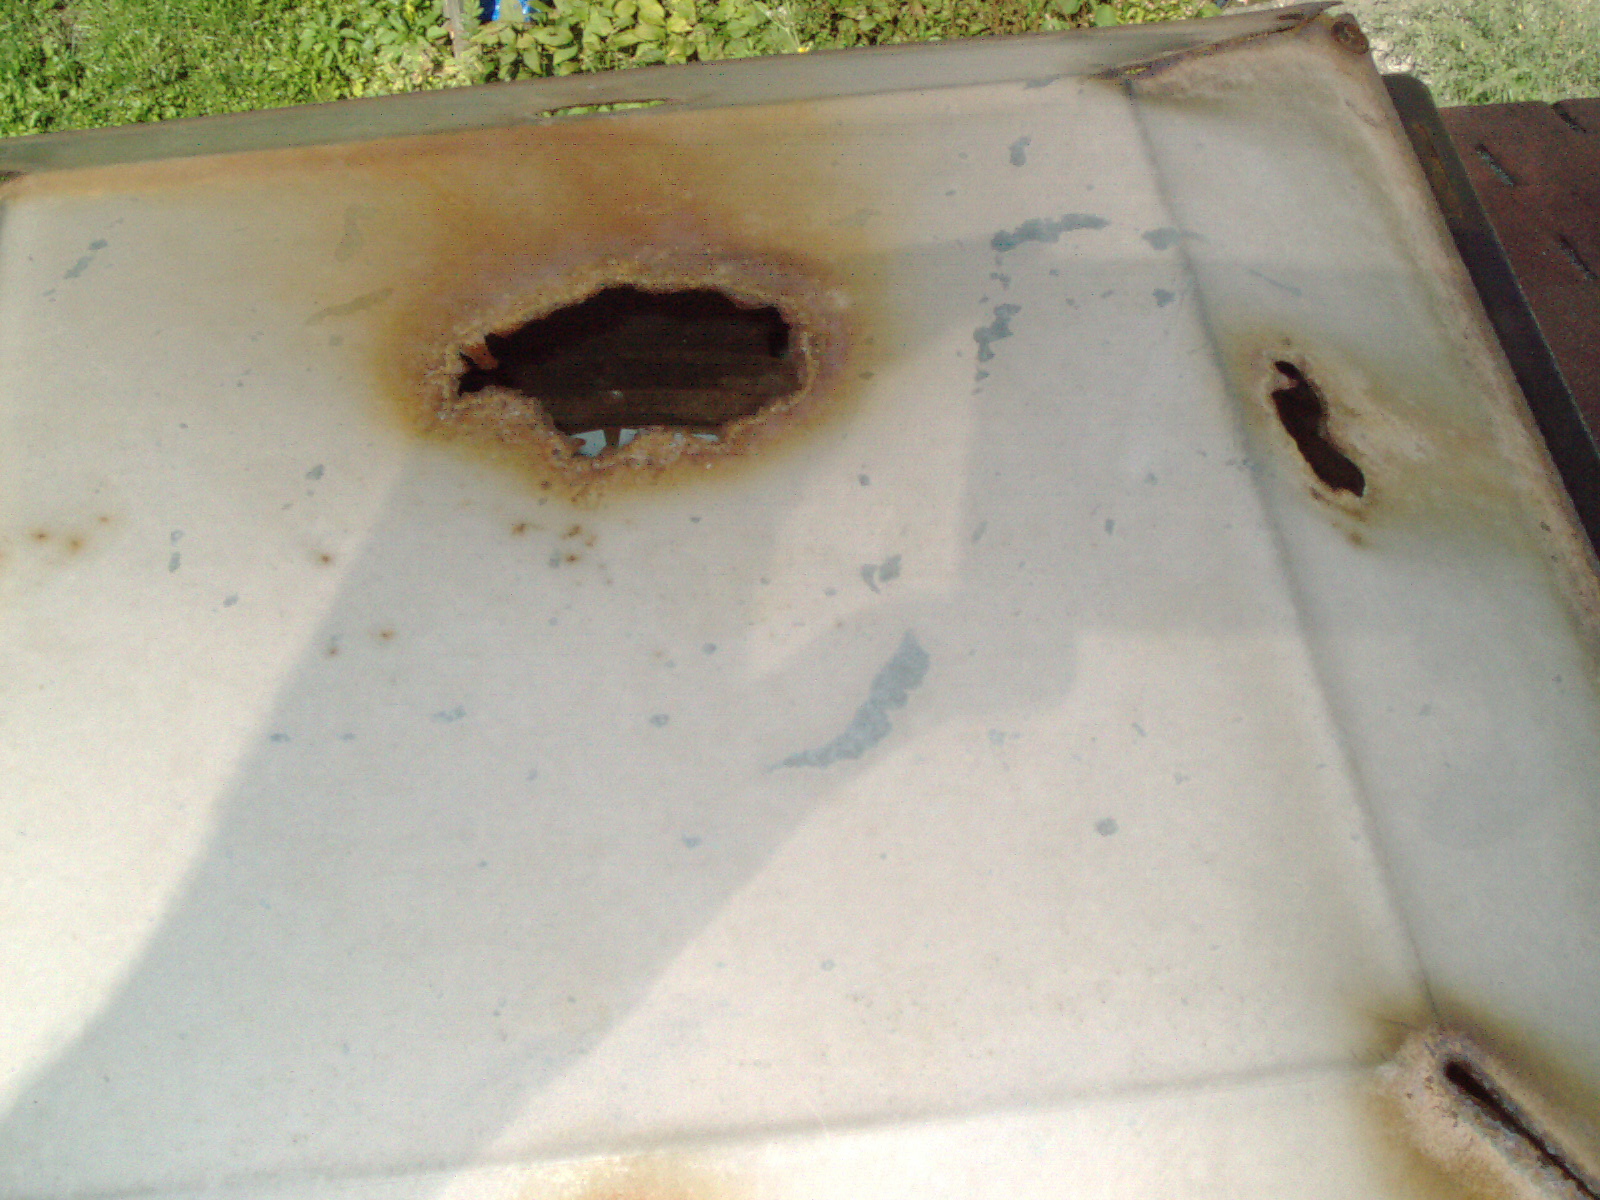
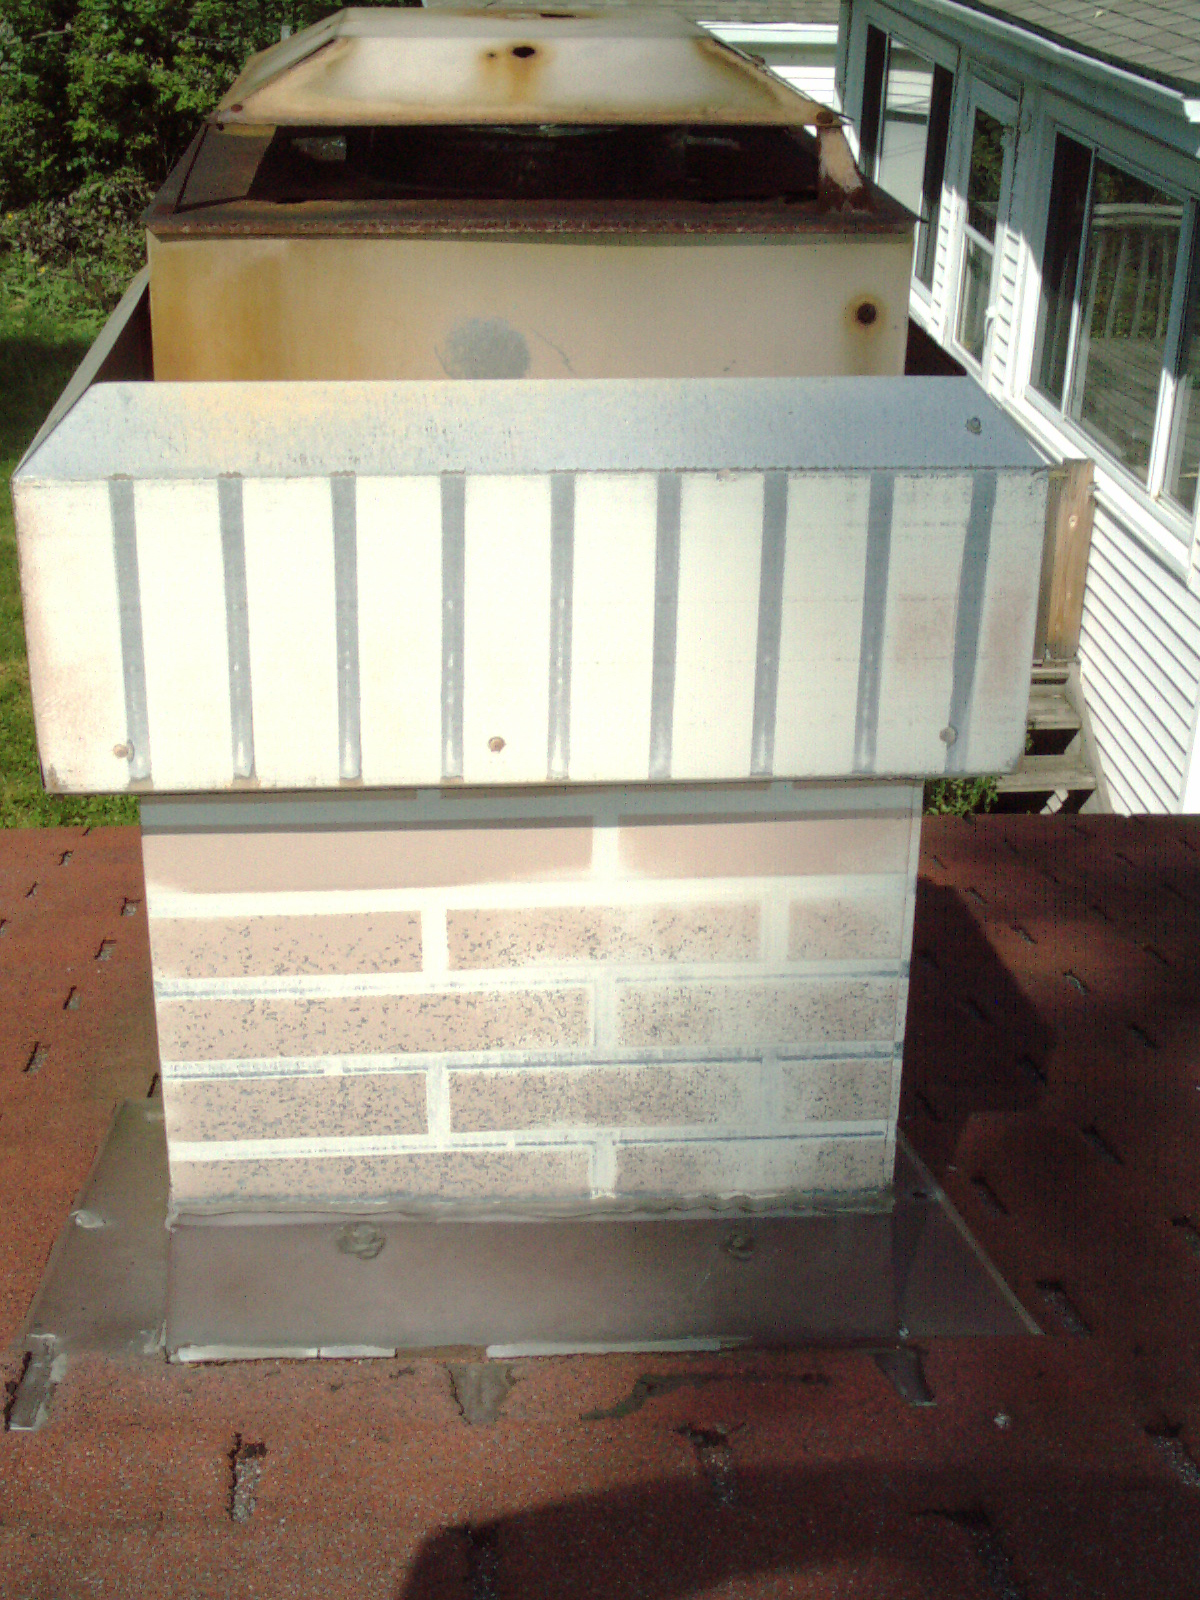
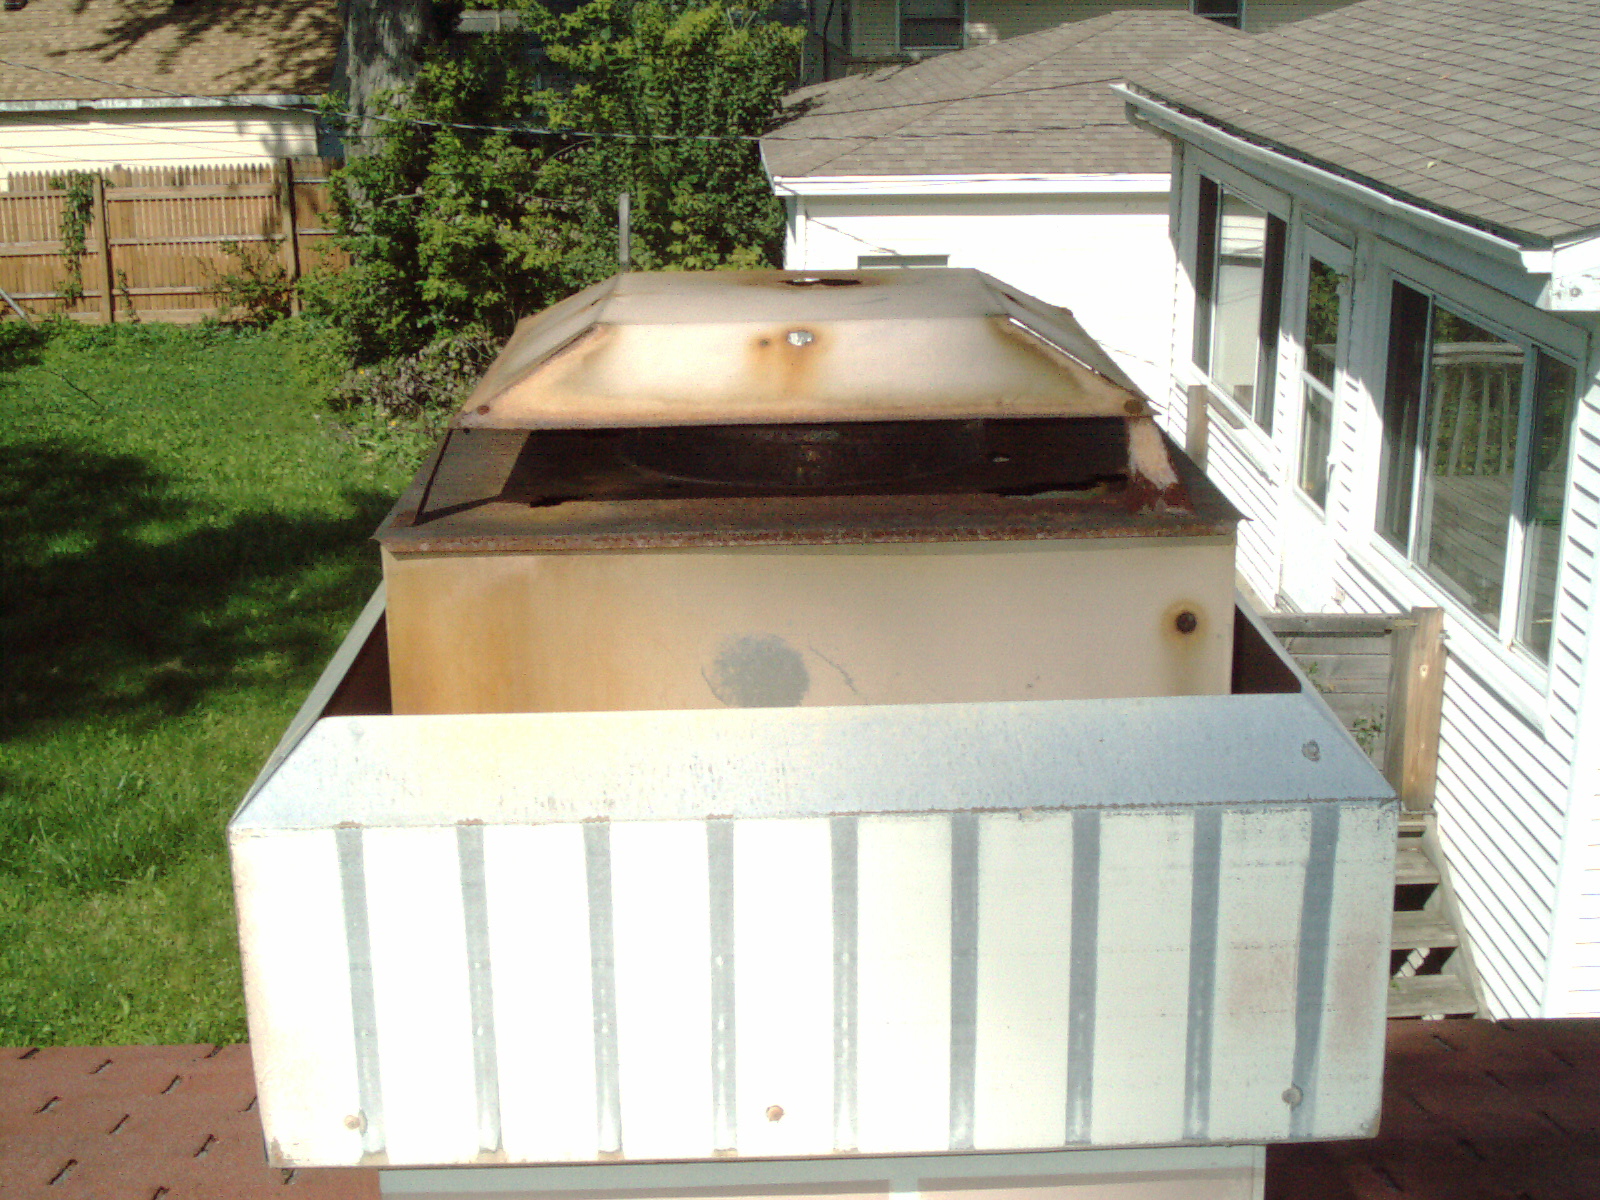
Two days after I repaired a section of my roof (too tired yesterday) I decided to repair some damage to the chimney. My first attempt at fixing it was to bring my spot welder up- on the roof and use galvenized sheetmetal patches- but I found the tongs/prongs wouldnt fit in the small opening.
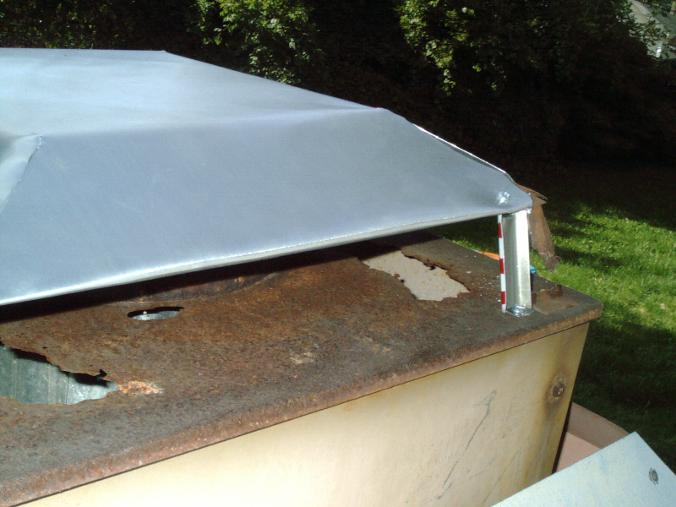
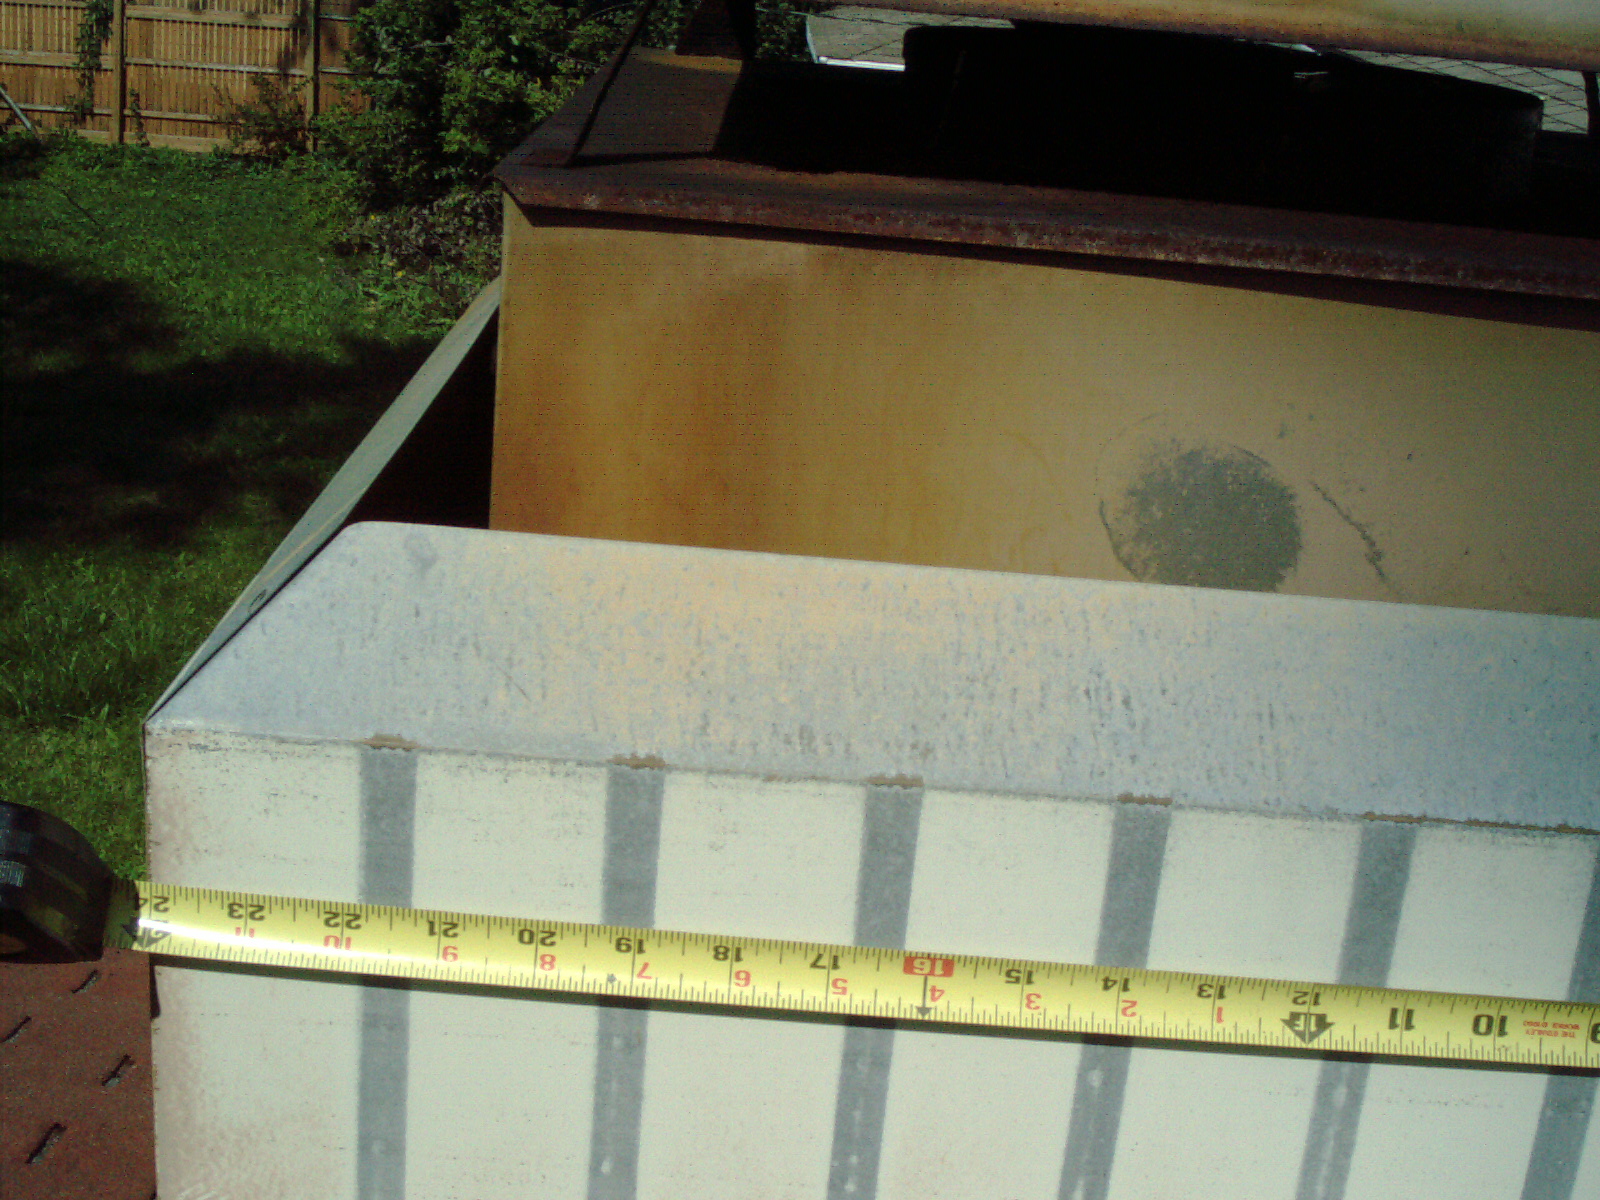
I found a sheet of aluminum in my inventory which is approx 1/64ths thick estimated possibly thinner. I made a paper template by tracing my original chimney cover and tghen cutting out using a sheetmetal shear and also tin snips. I formed the cover right there on the roof (very windy day and the wind stopped after I was done LOL)
I secured the cover by tucking the aluminum around all 4 bottom edges. It is a nicely formed cover cap and fits very very snuggly. So in other words I traced the original cap/cover on my paper template and left about 3/4" extra on all sides- the 3/4" extra gets bent under the original steel cover.
Since I used the original steep cap as a form - I put alot of force on the original steel. One of the rusty legs busted and crumbled as it was very rusty. I used my shear to make a homemade leg from a scrap steel piece from a forsale sign. The piece of steel was approx 3" x 1-1/4" and I cut a square out of each corner about 1/4" Then I formed it on a Diacro Finger Brake Press to make a channel shape. I punched a 1/8" hole in each end. I bent the top and bottom with pliers at 90degrees.
This finished homemade leg was fastened to the aluminum cap and to the steel rusted chimney body - right next to the broken original leg. I used 2ea sheetmetal screws to fasten after drilling 2ea holes.
I need to also fix the steel top of the chimney- climbing on the roof makes me tired - So I will tackle it a little later after I rest. 9/25/15
Here are some photos.
WASHING MACHINE
I own a Maytag Atlantis washing machine model MAV5057AWW which came with my house in 2003 and lasted 10 years trouble free pretty much. The latest problem is a horrendous noise which I purchased a replacement plastic pump and need to install it.
I was looking ay online instructional viodeos and found they tend to think the transmission needs to be replaced more often but I feel that they just want to sell people part aor new machines. Really the issue is there is pulley on the underside of the plastic pump. This pulley is for a belt.
This pulley is attached cheaply and awfully onto the shaft by a corrugated metal ring. This corrugated metal ring is a press fit and comes loose over time and wiggles its way out of place. Then the pulley gets crooked and jams the pump from proper rotation. I cant find anyone else who even mentioned this online.
I can get my washing machine to stop making a horrible noise for 1-2 loads. I can do this by flipping the washing machine on its side and taking ascrewdriver in between the pulley an dthe underside of the pump. Then I work the pulley and press the screwdriver around the circumference of the underside of the pulley. This action works the corrugated metal ring back into place.
But it only lasts 1-2 loads and then it works its way out again. The horrible noise is this corrugated metal ring which is scraping against the bottom of the pump. If you continue to run your washing machine with that drag - this will cause excessive work for your transmission and it will fail. There is a little plastic irr-placeable piece inside your transmission. What I'm trying to say is dont run your washing machine when it is noisey. Buy a pump.
You
can diagnose the problem by pushing the corrugated ring back into
place- then test your washer if it works. I'm not saying run it and use
it. I'm saying it should now temporarily work enough for you to see that
- yes indeed it was the pump at fault. Then stop your washing machine -
order the pump and install the new one.
Dont run your wshing machine with a bad pump - it wil ruin your transmission.
The pump was purchase from big-auction-site for $20 took 1 month to get here and was worth every penny. I have yet to install it as of this writing. But I know my pump is bad because it worked when I pressed the corrugated ring into place. I have never never never heard a more horrendous sound than the washing produced. It sounds like something is very seriously wrong with it. But alas - it is only a $20 part.
2/24/2014
I purchased a big-auction-site
belt to replace my original one which I felt was worn due to the sloppy
fit and didnt seem to be on tight enough. I ordered 22003483 and was
advertised as Genuine EOM Maytag but what I reeceived was a item packed
in a clear plastic bag and was not genuine Maytag at all. (In hindsight I
looked at the original belt number after I had already ordered and
recieved the replacement The original number was "AU MAYTAG 6 2600990"
printed in red with a red box following and then a few inches later
printed in white "0600 B" The size was exactly the same as my old
stretched-out belt. My old stretched out belt had the words Maytag
printed on the belt - the new belt did not have the words Maytag- was
false advertising by the seller. I'm no better off with the new belt. It
is $9.74 with free shipping that was spent for no reason at all.
Another bad seller on big-auction-site. I bet that seller took a worn
belt to an auto parts store and matched the stretched out belt exactly.
SO what I received is a replacement the same size as my stretch out one.
You know these bad sellers are a plague.
I also paid careful attention to the sounds my Atlantis Washing Machine made as I tested the belt out for a few seconds (dont run your machine for a long time or bad things will happen) and I heqard a slight scraping noise - possibly the tub bearing. From what I've seen of the pump - there is always water in there so running it for a few seconds does no harm to the pump in my opinion (for a few seconds to test) as I'm sure there is some water in there as it wont be running dry.
I need to figure out what that scraping noise is - bearing or possibly the pulley and its' bearing are worn. My pulley is a black one and I dont see that one on any website. I wonder if it is original? Remember my washing machine came with my house and they told me it was practically brand new. I purchased my house in 2003. I see other Maytag Atlantis machines and the owner states that they purchased on 2004 so I have no reason to doubt that mine was a practically new one in 2003. Why it has a black pully - I dont know.
I need to check out the brake and
tub bearing and pulley bearing. I want this washer to last another 10
years if possible - because i like it. If I run a load with the scraping noise I might break the transmission.
Some advice for people wondering if their belt is stretched out or not - I dont know. But I can tell you that ordering from big-auction-site seller is not going to answer that question. I suggest looking at your original belt number and ordering the very same one. Otherwise you will replace a sloppy fit belt with a sloppy fit belt and be no better off than from where you started.
Update 8/7/14
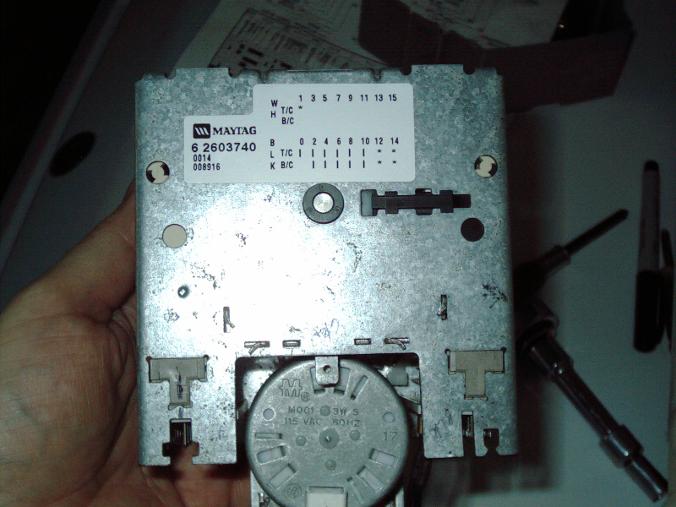
As I continue to use this washing machine while closely babysitting it- being ready at any time to stop it if it makes the humming noise. I am leaning towards the timer being bad - but am not sure yet. I want to keep my expenses down so buying a replacement timer un-necessarily isnt an option.
I think that I will put some cinder blocks or wooden blacks underneath the 4ea legs to lift up the washing machine off the floor. then I can put a mirror underneath it and see if the motor is turning when it hums. This will help me diagnose what is going on.

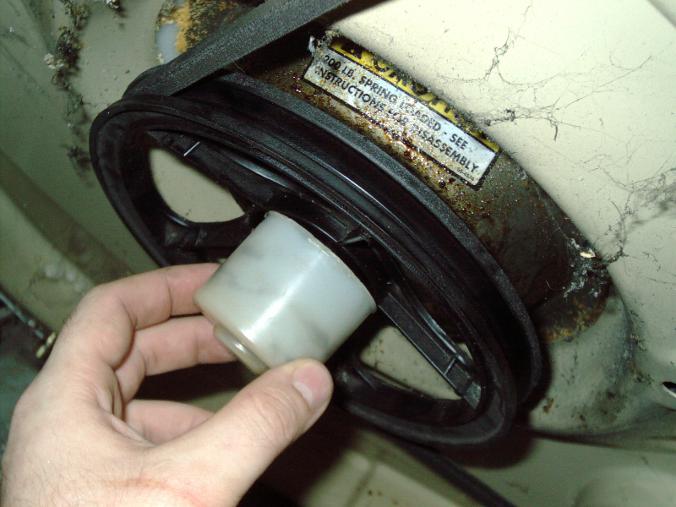
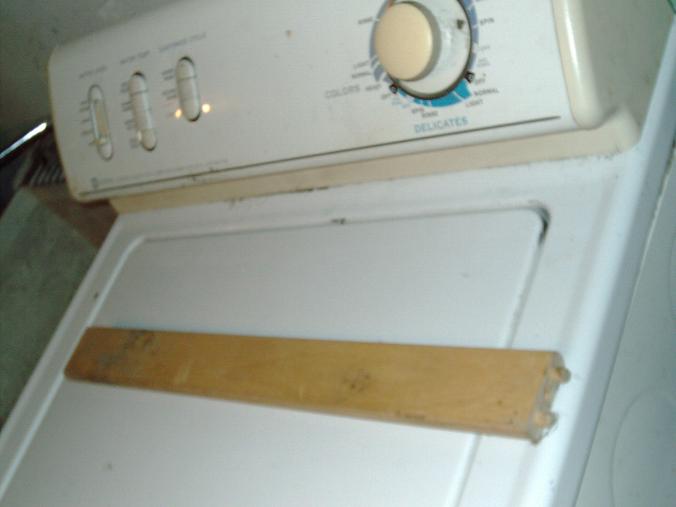
My Atlantis Washing Machine tipped to the right for easy access to underside. The plastic hose was screwed to the sink by the previous owner so that hose was removed so that it doesnt gat damaged during the tipping. Also the length of hose at the back was released from its retainer so that the hoses could move unrestricted while tipping. These hoses were put back once the tipping was done.
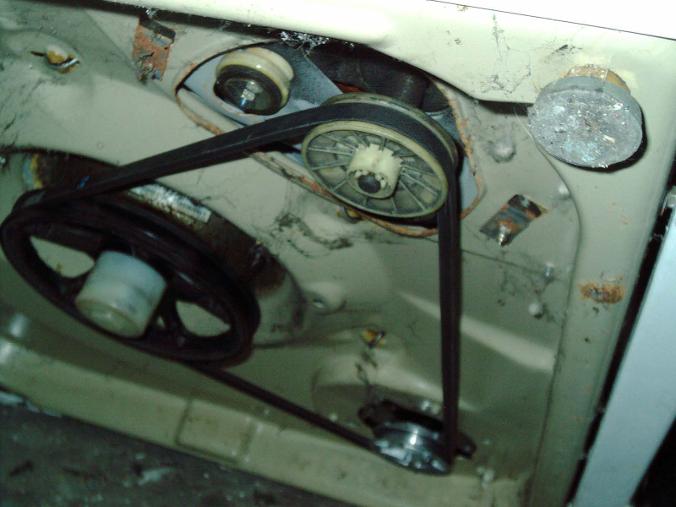
Underside of washer with new belt and new pump installed - see the shiney pump pulley?
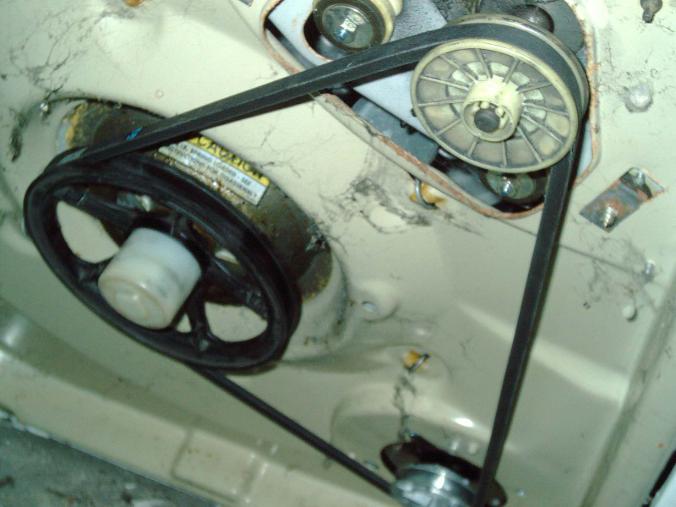
Underside of washer with new belt and new pump installed - see the shiney pump pulley?
For some reason my washer has a black pulley and is a different design than the white ones I see so often in replacement parts ads etc.
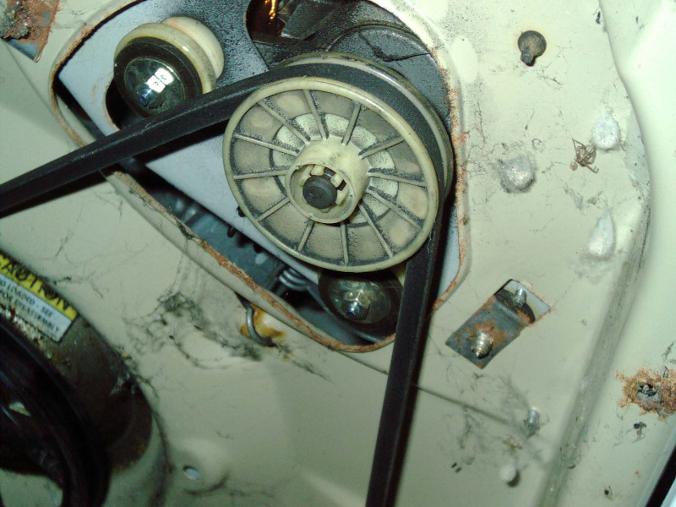
Photo of the motor with new belt installed. The motor has a pivot and I thought the new belt would be smaller and less loose than the original one. The looseness causes the motor to tilt. The washing machine is tilted to the right in all of these shots. I dont feel buying a new belt from big-auction-site is worthwhile. I expected the belt to be a little smaller - but is no change from the old one.
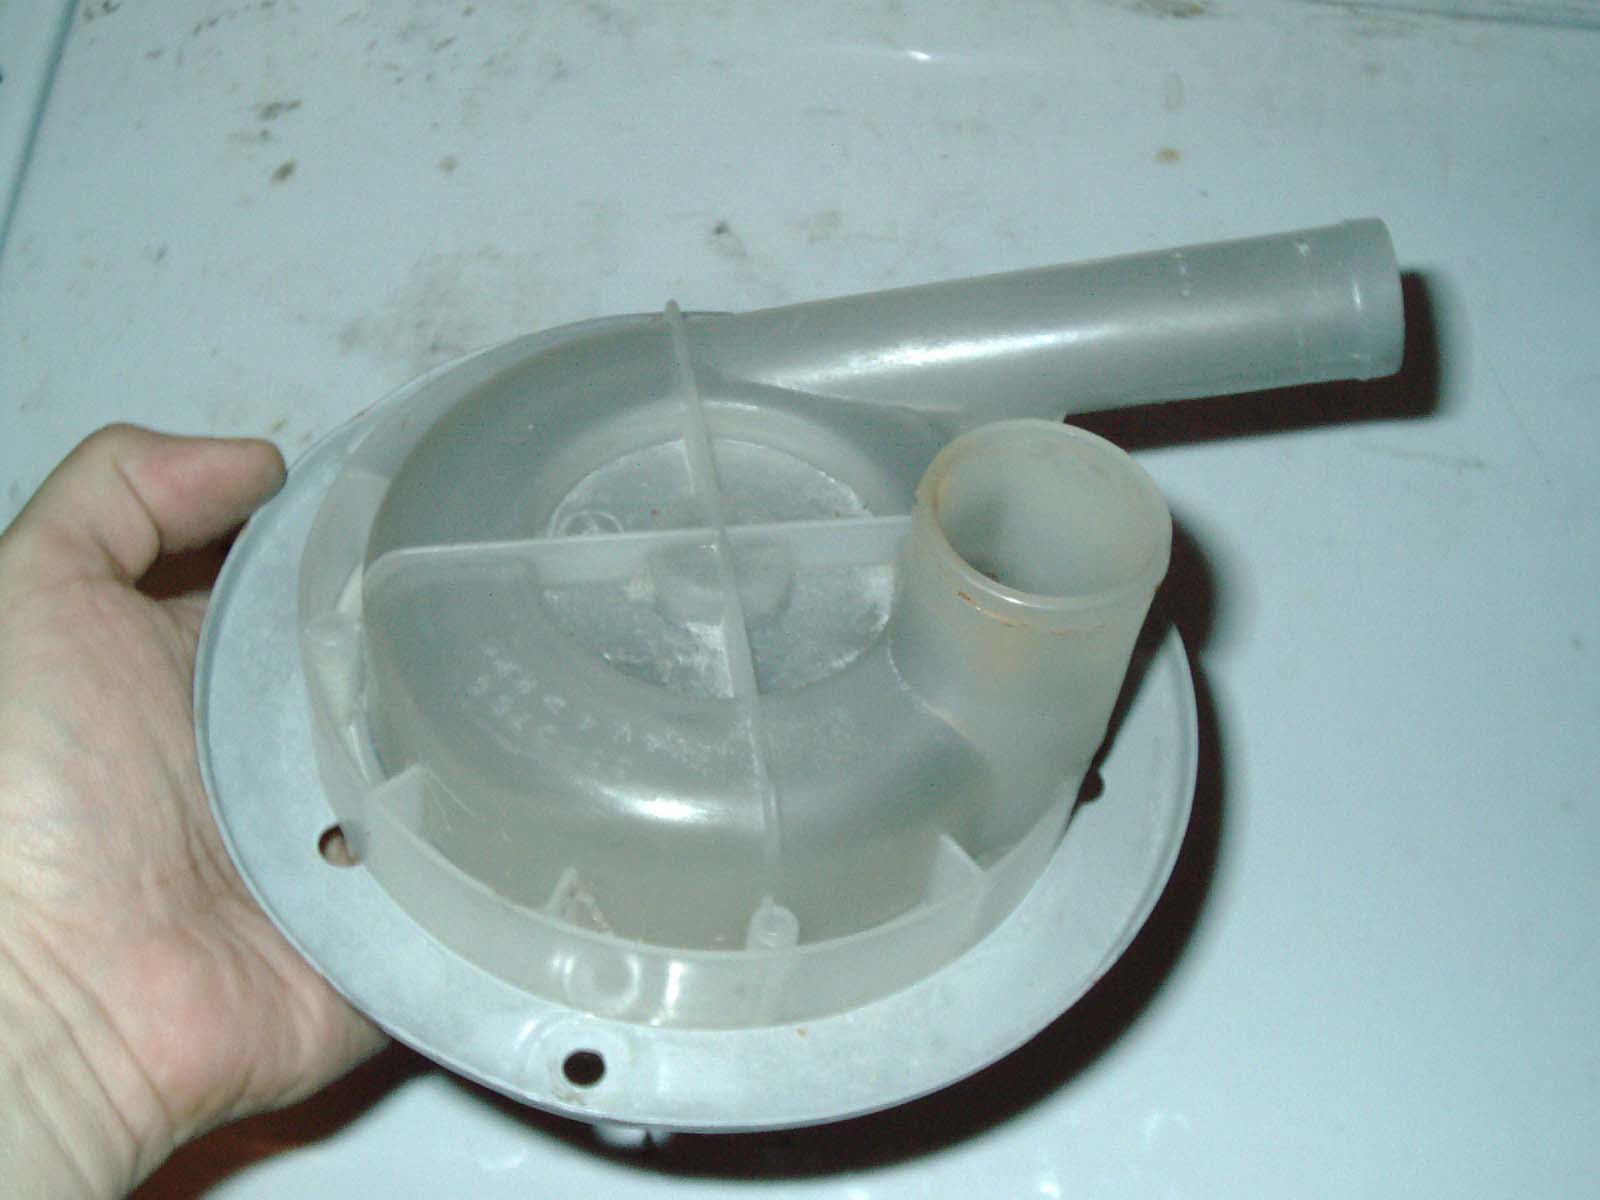
My old pump topside (new one is exact the same except metal ring is black not grey)

My old pump
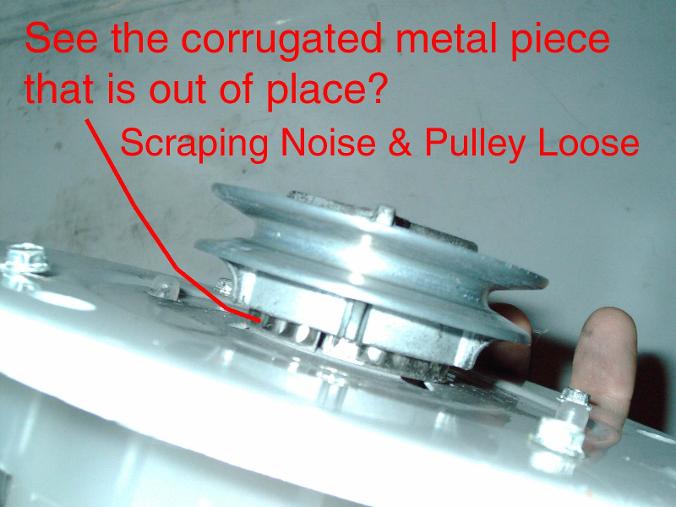
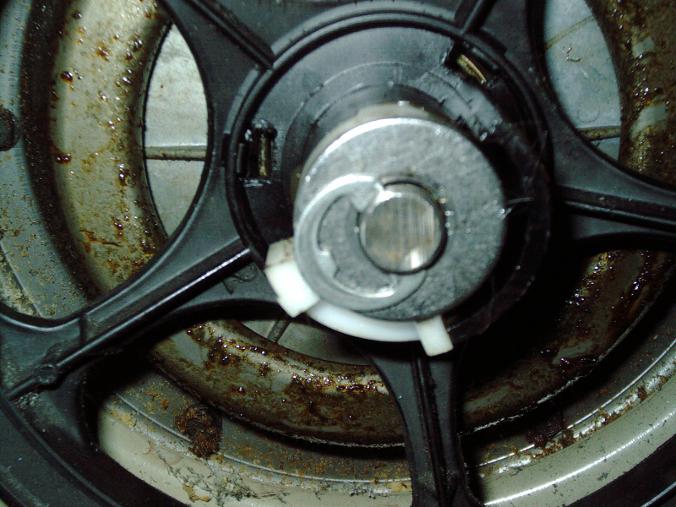
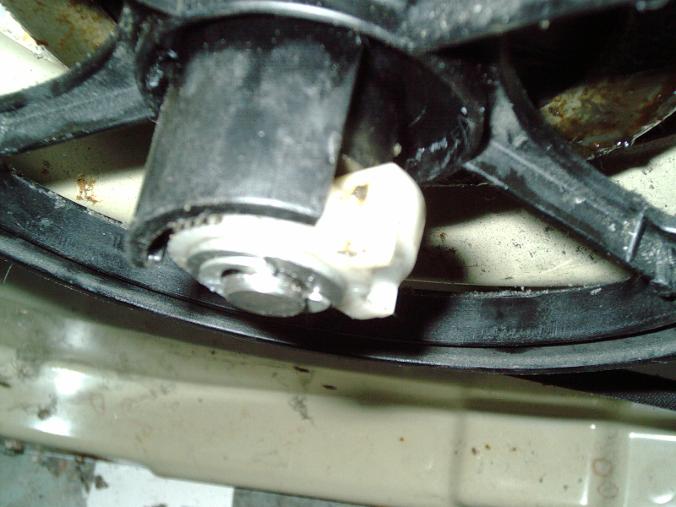
The pulley was making a horrible noise which sounded like the end-of-the-world for this washer. I pushed up corrugated retainer with a flatblade screwdriver so the underside of the pulley had a nice open space. This corrugated retainer works its way down and scrapes- making a horrible noise which is hard to determine where the noise is coming from. Also the retainer keeps the pulley on tight so with the retainer down - the pulley is loose. You could do alot oif dmaage to your washing machine if you try to run a load with this corrugated retainer out-of-place. You will wreck your transmission and burnout your motor. Buy a new pump if your retainer is down like this. Go to the laudromat until your new pump arrives. Dont run your washer with the retainer out-of-place like this.
I was able to push the retainer back up and run 1 load nice and quietly. It worked its way down again. But this helped me determine that the pump was the problem. The new pump costed me $20 approx and took a month to arrive.
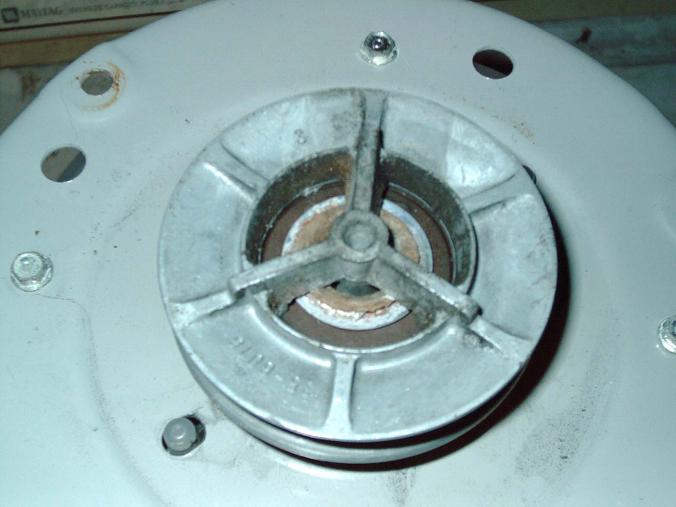
Rusted pump pulley and it wiggles due to corrugated retainer worked its way down. The new pump has no wiggle in the pulley and the clip is nowhere to be seen and the new pump has nothing in between pulley and pump to cause scraping noise - there is a space gap between pump and pulley as it should be.
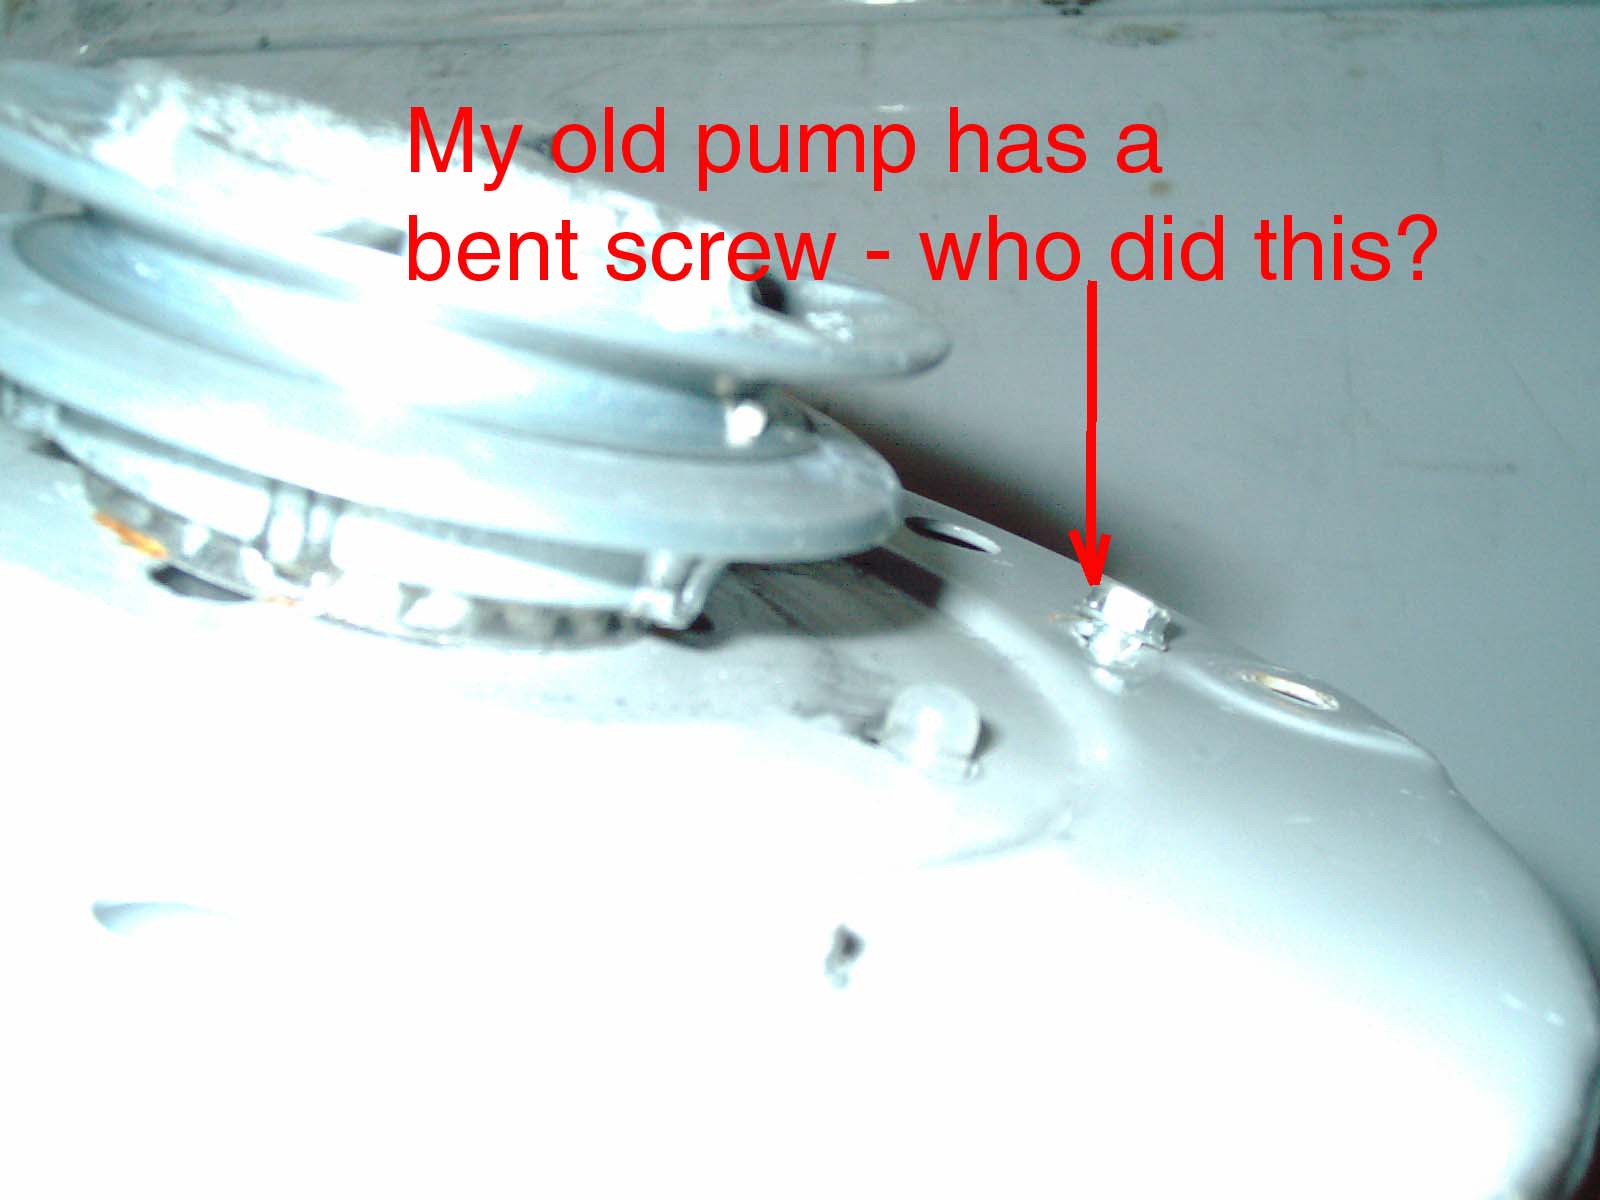
I noticed the pump has a bent screw and I dont know who did this - the previous owner or the factory? I never bumped or banged my washer. The plastic wasn't broken so the pump was fully functional with a bent screw. The bent screw didnt cause any issues in my opinion. I'm just including that as an FYI (For Your Infornation = FYI)
Update 6/18/14
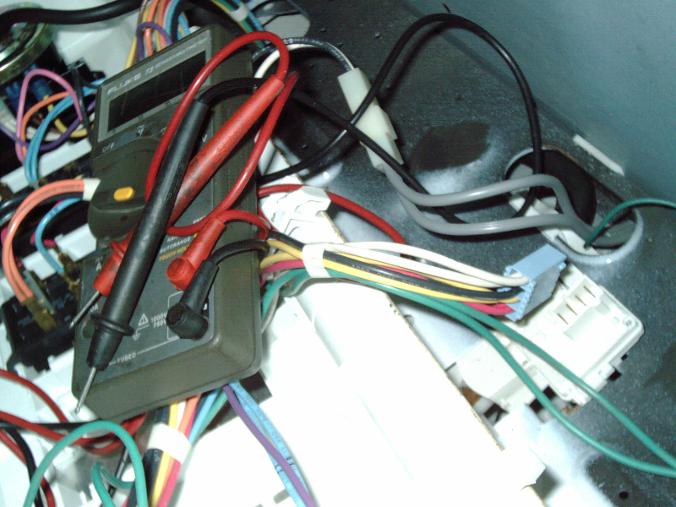
I unplugged the washer and dryer from AC power by disconnecting the AC plugs from the outlet. My work area is clean and dry.
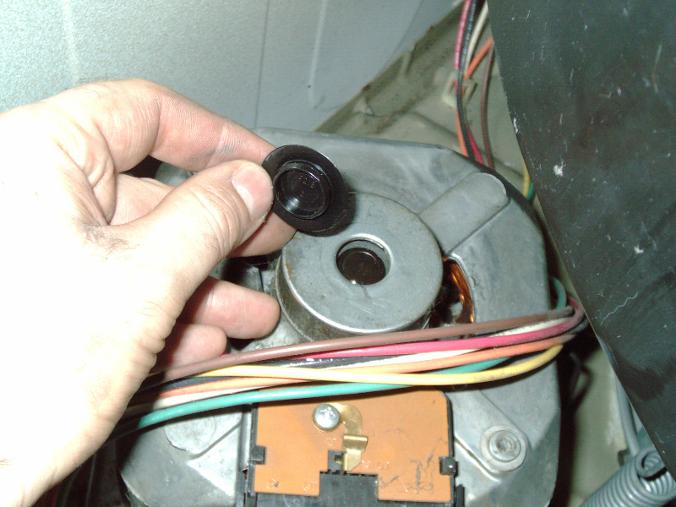
The top of the motor has a black plastic round cap. It looks similar to a "piggy bank" cork/stopper. I pryed this up carefully with a flat blade screwdriver and it went flying inside the washing machine- which I found with the use of a flashlight. I didnt expect it to jump like it did.

I added 10 drops of hydraulic motor oil to the motor shaft - (located under the plastic black cap.) Made no difference - still has issues with SPIN and Drain (If I stop the machine or lift lid up then it works afterwards) I thought my issue with hesitation to go into spin cycle/begin draining water might have to do with a motor that needs oil - but that wasnt the issue. After addiing oil - I see no difference - the issue is still present.
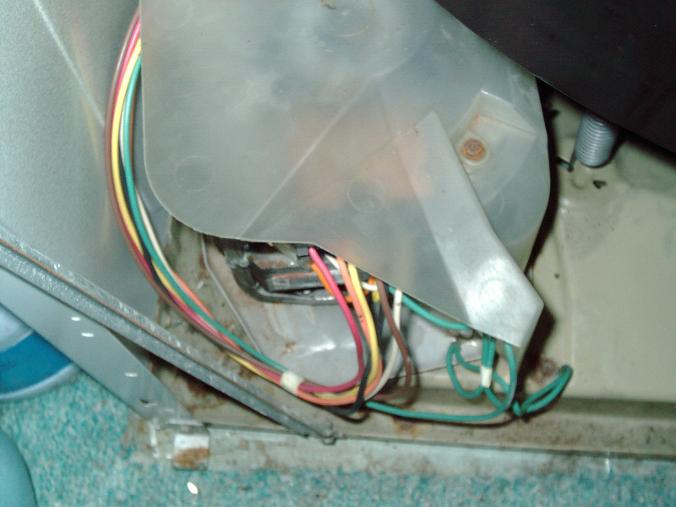
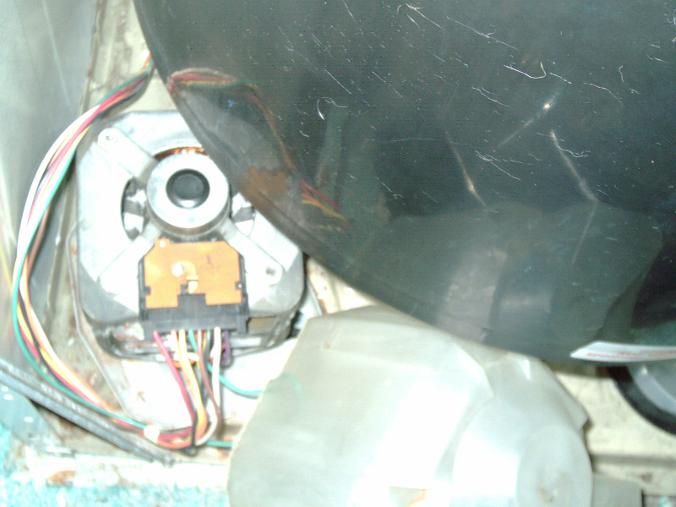
The white plastic cover over the motor was removed by unscrewing 2ea screws on top of this white cover. The white color of this motor cover - reminds me of a gallon milk jug (pictured upper left). I would imagine the purpose of this white cover is to protect th emotor from water drips. I didnt see anything wet or damp inside.
See one of the 2ea Green ground Wires and lug. I wire brushed the lug to make it nice and shiny clean. I used a flat blade screwdriver to scratch around the threaded hole to make it shiny clean and bare metal. I did this to ensure a a nice clean contact. Made no difference - still has issues with SPIN and Drain (If I stop the machine or lift lid up then it works afterwards)

I sandblasted the 2ea Screws which go to the Green ground wires close to the Motor. After sandblasting the threads are clean and the copper star washer is clean. I did this to ensure a good connection. It made no difference - still has issues with SPIN and Drain (If I stop the machine or lift lid up then it works afterwards)
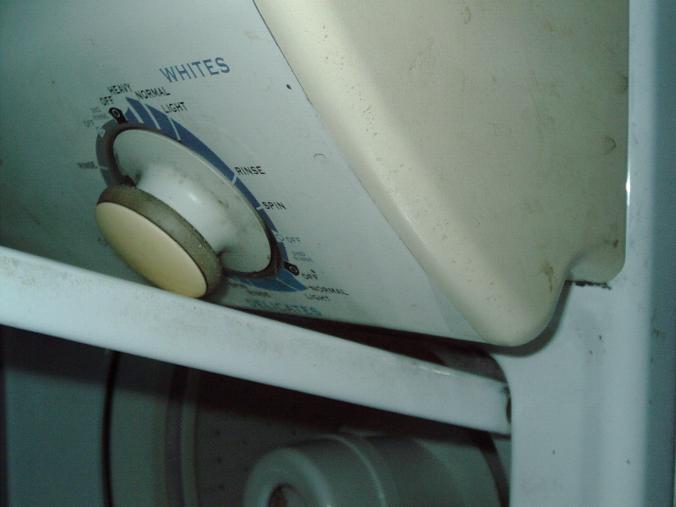
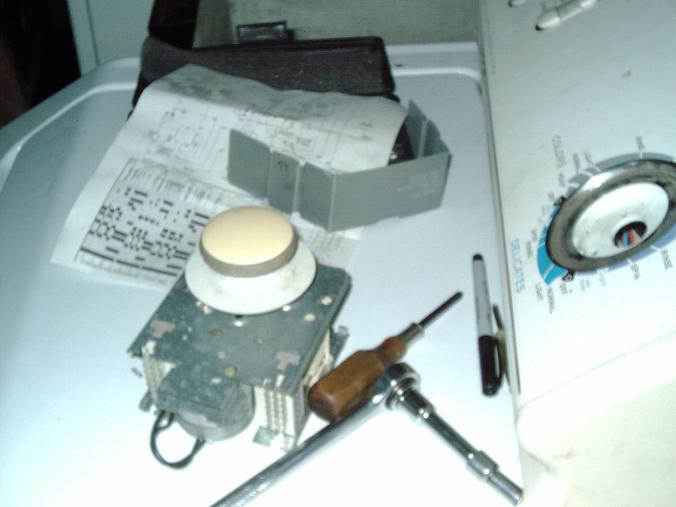
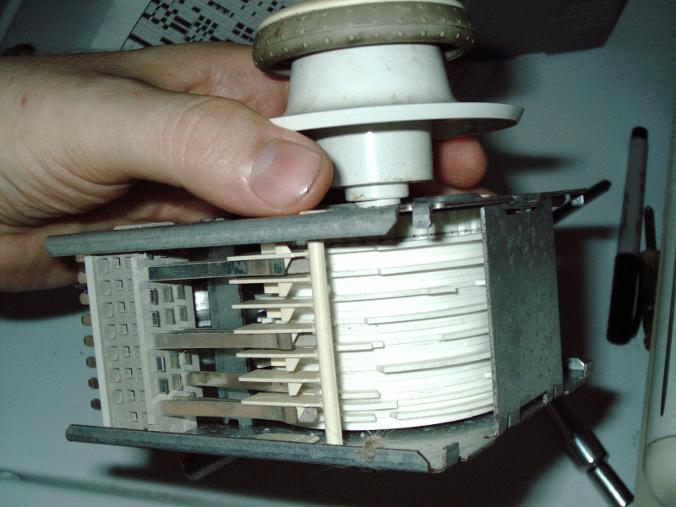
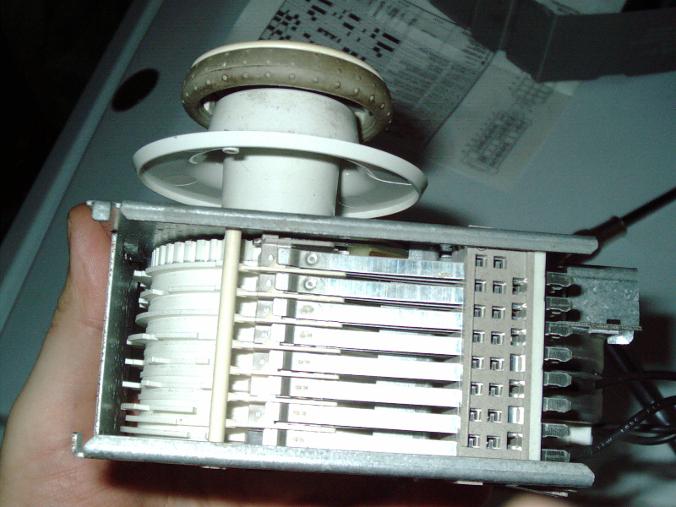
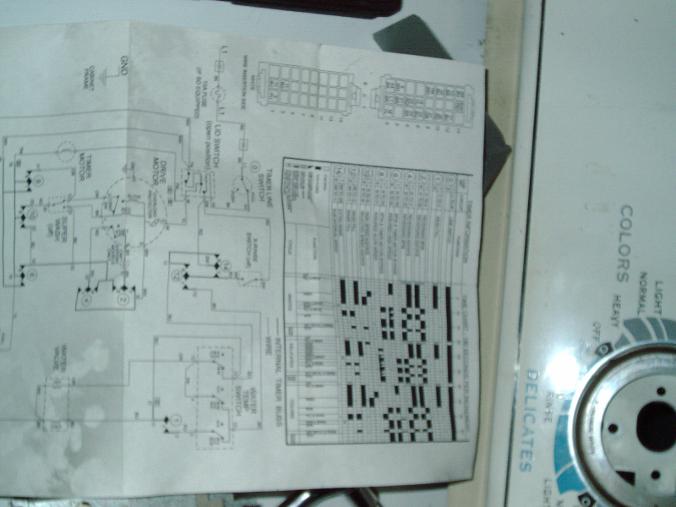
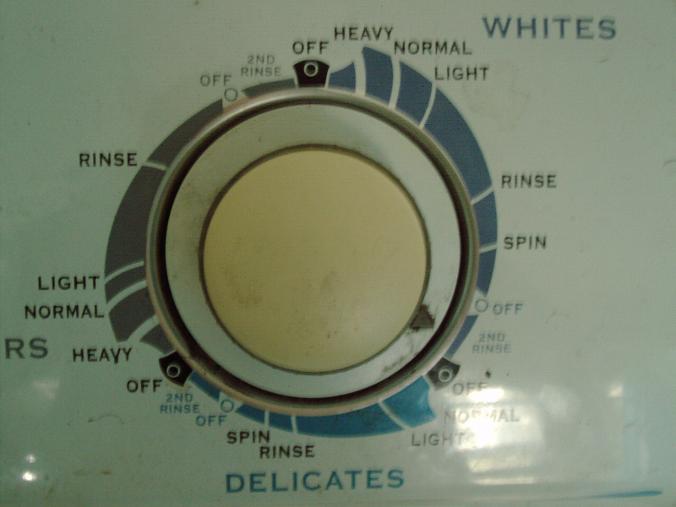
I have been doing my laundry by being present during the whole cycle. When the timer gets to the spot where it SPINs and drains water- I usually hear a HUMMM (if left too long smells like smoke from motor???) and in that split second (I'm standing right there) I lift the lid up and then close it down again and then it continues the rest of the cycle (I still stay present just in case). So adding oil to the motor did nothing to improve it. Although I'm glad I added oil to it as I plan on keeping this washer dryer as I like the Atlantis machines. I did notice that my timer was taking too long during the SPIN dry portion a few loads back. It seems that the more I manually watch the machine - and lift lid up - the more quickly/normalized the timer becomes during spin portion. I am starting to think the timer is running intermittantly or may be binding. In the future - when I have time - I may disassemble the timer to see if anything is worn or cracked in there.
The new pump seems to be working fine and I see no leaks (never was leaking ever).
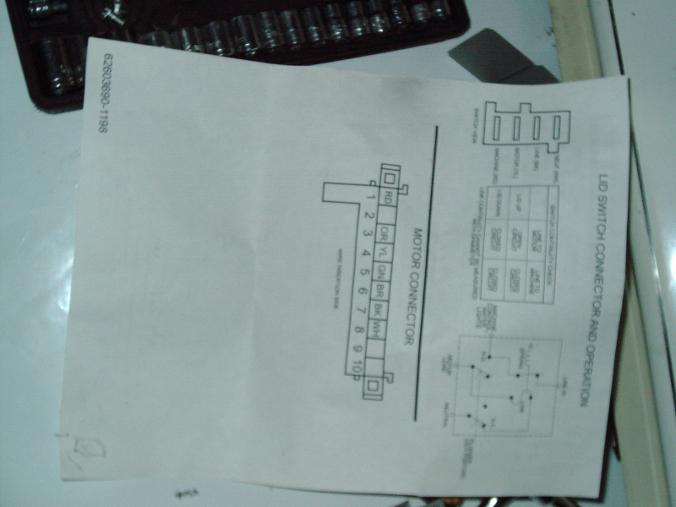
I'm also wondering where the run start capacitor is as I cant find one anywhere. Other washing machines have a round D-Battery shaped capacitor either next to the motor or on the inside back panel (I researched online). But on the Atlantis machine I have - I see no capacitor. That is really the reason I took it off - I was looking fo rtha capacitor. But when I saw no capacitor - I decided to see if it I could add oil to it. I wonder if the capacitor is inside the motor? I looked online to see if anyone took apart a motor to rebuild it and I dont see anyone tackling that issue. I think my next step is to check the timer as the SPIN allotted amount of time seems to be inconsistent and lately running better and better - maybe the timer mechanism needs grease or contacts dirty - who knows. That will be the next step in this repair.
I read online in forums where people are asking for help on their washing machine and have similar symptoms - the forum replies they get say to change the run-start capacitor and they describe its location as being next to the motor or on the inside back panel. But I can tell that the replies are coming from generic answers. On this model of Washer there is no capacitor next to the motor and there is no capacitor on the back panel. It seems like a problem that I have to figure out myself as there is no answer for it online.
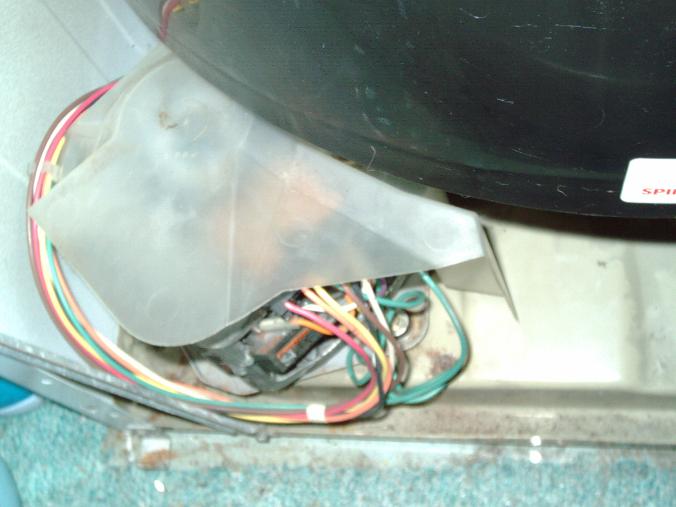
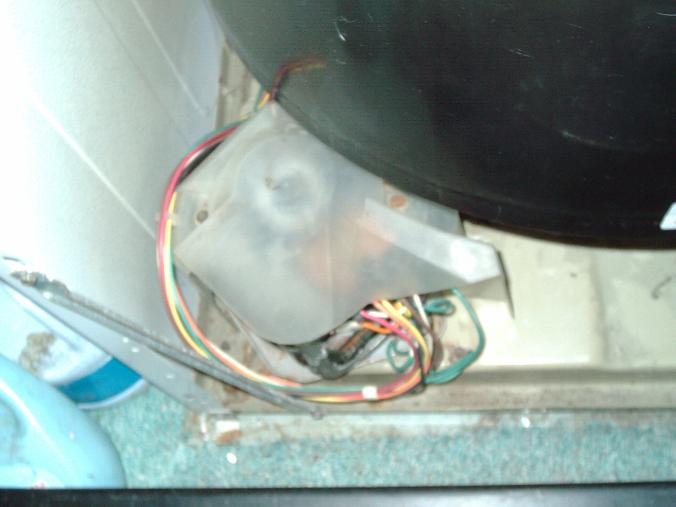
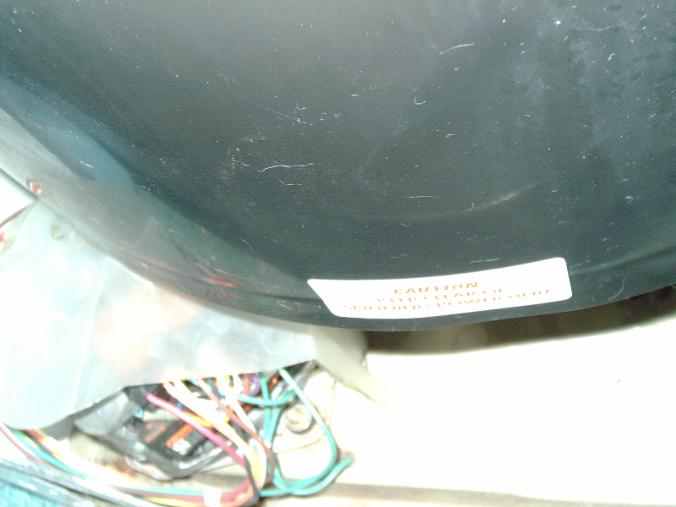
Another observation is that the motor has a Swivel Skate mechanism (I made up that terminology just now) which is very strange in that the whole motor moves side-to-side on a plate and short leg. I checked to make sure nothing was wedged underneath or dirty and it looked fine to me. I didnt see anything that would be interfering with its side to side movement. It has some sloppiness but without anything to compare it to - I figured it was "normal" - If I check the timer and dont see anything or I check the motor for a capcitor inside and I dont find anything - I may revisit this "Swivel Skate" mechanism later.
For clarity sake - I will give more detail on the Lifting the lid to solve the humming when it gets to SPIN. I also tried pushing the timer knob to stop the machine and then pulling on it to restart the machine. That does exactly the same as lifting the lid up. Either one gives the same result - lifting lid and then down or pressing and then lifting the timer knob. Both gets the machine out of its humming and onto draiing and spinning without any lag of time or hesistation.
I suspected (incorrectly) that my brake/clutch was not releasing correctly and my hunch was that the motor was fighting while th ebrake was on. That was incorrect. I tipped the washing machine on its side - leaning it against a plastic toolbox. I removed the cap from the pulley.
Once my machine is working - I need to make some type of bumper - so that the open lid doesnt lean up against the timer knob.

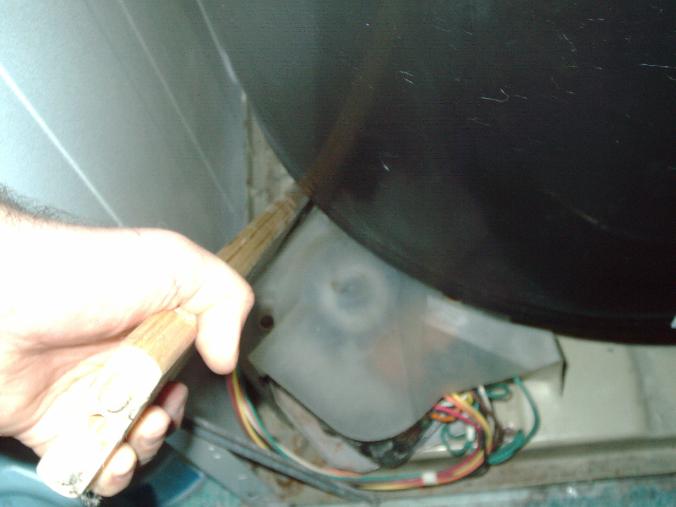
The symptoms of a rusty or binding skate mechanism - it may lead you to think it is a lid switch issue or a timer control issue or a bearing issue or a motor issue. It was hard to diagnose - with the machine panels on. With the front panel removed - I can clearly see what the issue was - and the use of a piece of wood prodding the motor forward when it HUMMMED - removed the Humming and got the machine to continue normally. I betcha ALOT of un-necessary parts were purchased by owners and utimately maybe many washers were scrapped because they could not figure it out. When you have to go to work or have-ready baby diapers or other day-to-day need - that owner needs to solve it quickly and cost effectively. This skate design can lead to hastily-made false dead-end diagnostics that only benefits the sellers of parts.
I didnt want to frivoulously spend money on this repair. So I strategically tested each part methodically. I couldnt find any solutions online that lead me to believe they had the solution. Reading in forums - one person says its this issue or another issue or another issue. Basically a wild goose chase trying to find some reasonable diagnostic conversation online. My conclusion is that no-one has posted a solution or comprehensive explanation of this issue and my diagnstics procedure and future solution is unique and unlike what other people have posted.
The youtube videos show you how to install their parts and one guy yells at you do this .. do that ... flip this ... unclip this - like a boot camp drill sargent telling you to go to his website and buy parts. I'm not following that bad advice. I'm sure he profits when someone un-necessarily buys a control timer or motor or other part.
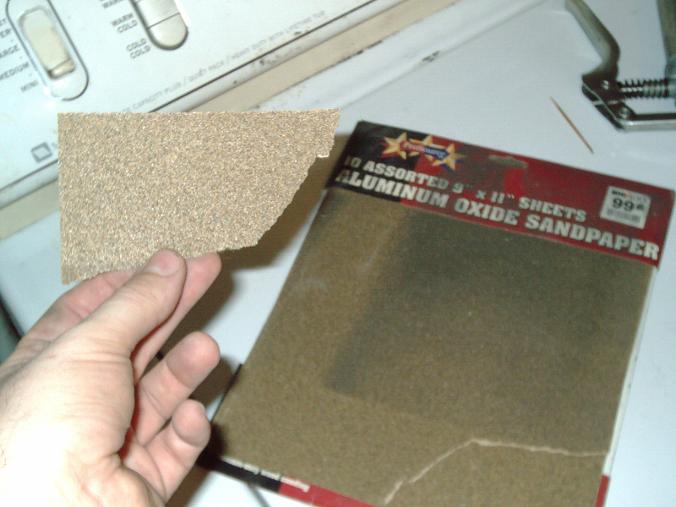
What parts are needed to fix this - probably little or none. Maybe some sandpaper to clean off the rust and some paint to protect the bare metal after sanding. Maybe some grease for the swivel joint. I have those materials already on my workshop shelf - cans of paint in various colors, sandpaper and files, grease gun and tube of grease.
Ultimately the thing that caused this is rust - and where did it come from? My old roomate who was careless and would flood my garage floor by not cleaning the lint trap in the sink and then leaving while the wash was underway. Some roomates can wreck your stuff and is better not to have a roomate - if possible. I remember on at least 2 occasions I had to wetvac with a wet/dry shopvac the garage floor from all of the water. I vacuumed up at least 5 gallons of water both times. One of those times was in the winter time and - you cant open the window in the winter - so it is a real problem to have a wet floor in the winter. That is where the rust came from - a careless old roomate. When that flooding was cleaned up I sprayed my tools with WD40 so they wouldnt rust and what did rust was the inside of my washing machine - the exposed non-painted parts. The skate mechanism has some edges that plastic glides glide against and those edges rusted and are now binding. I need to get rid of that rust and make it smoooth painted and greased.
I suppose the reader with a similar problem - may have also had a flood or humid conditions - this causing rusty swivel skate mechanism.
1. Control Timer
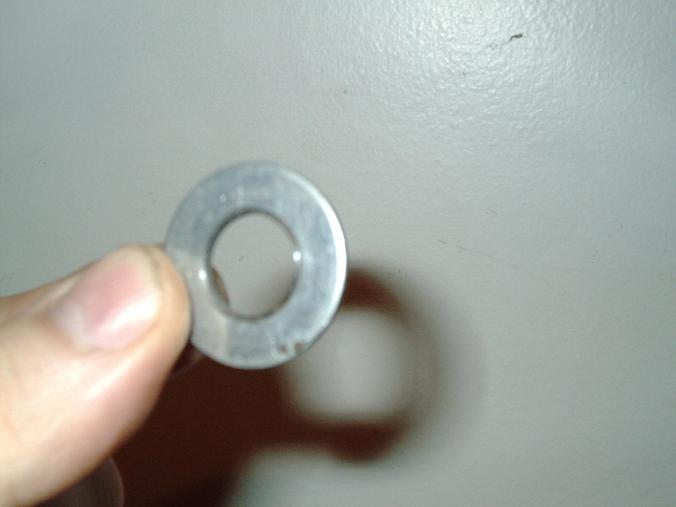
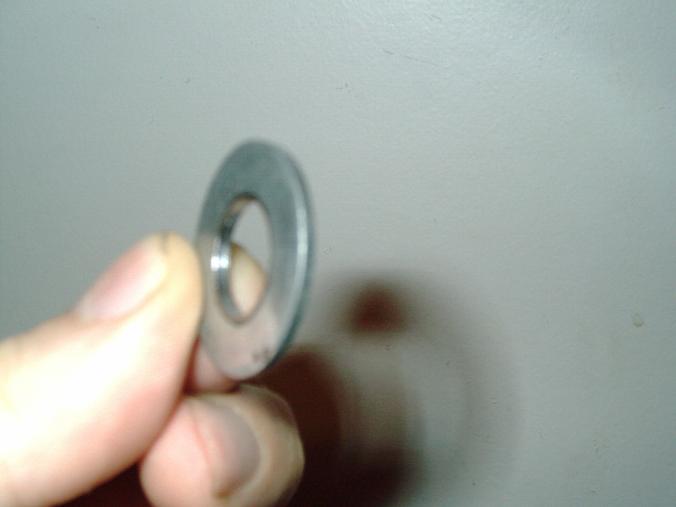
2. Washer for pulley
3. Cleaned ground wires
4. Centered the tImer knob
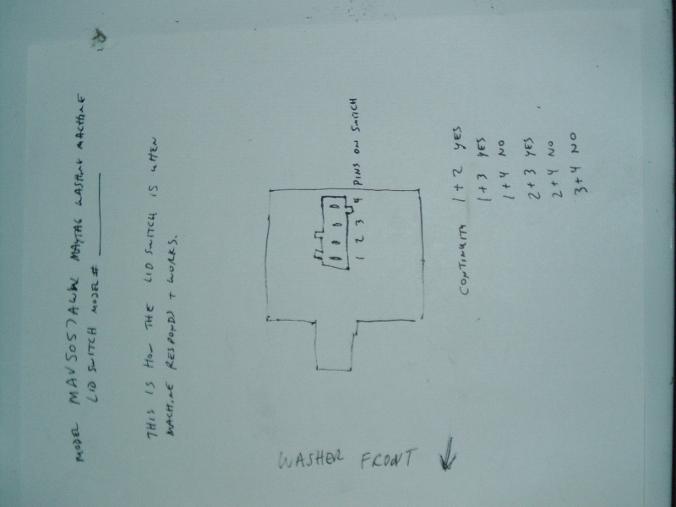
5. Tested the lid switch
None of the above solved or addressed the symptoms in any way.
I now see the motor flings itself forward or flings itself backwards and sometimes it doesnt fling itself far enough.
I dont know how to solve that at this time - but I feel like I have isolated what the issue is.
Now when I do my laundry - I have the front panel open and a wooden stick handy - so I can push the motor forward quickly.
I will solve this issue - but for now I will use a wooden stick. I will need to disassemble the motor "skate" mechanism as I call it and sand down any rusty areas and then repaint it. Also if there are any rolling or swivel parts I will need to lubricate them. I may need to come up with a better design but for now I will use a wooden stick as I have laundry to catch up on.
8/25/14
- no purchase of any parts required.
Sanding of "motor skate plate" to remove rust and light grease applied. This allows motor to swivel freely.
Washing - motor swivels towards back of machine
Spin and Drain - motor swivels to front of machine.
Any obstruction or rust below motor and it doesnt allow full travel - this produces HMMMMM as motor switch isnt tripped due to unsufficient travel of motor.
Summary
Solved on 8/28/14 more than 6 months of grief trying to figure out the solution to this double problem.
1. Bad pump - Purchased a brand new one for $20 from big auction site - YES THE SOLUTION
2. Replaced belt - not needed and was a waste of $10
3. Hardware store Metal steel washer - I modified this - but was not a solution - didnt work.
4. Disassembled and inspected Timer & tested Lid Switch - not the issue
5. Sanded the rusty steel "motor Skate Plate" and added grease lightly - YES THE SOLUTION
Now works reliably and unattended - my life is so much easier now that it works and I dont have to babysit the washing machine. Total cost approx $20 *
Note * (I had toothpicks and grease and tools and sandpaper in inventory & other supplies etc.)
Still left to do -
I need to make a bumper - so that when the lid opens - the lid wont lean againt the timer knob. So far the timer hasnt been damaged by this - but I dont want to push my luck. I need to make a bumper.
Gas Stove
Whirlpool - gives a PF "power failure and loses the time and if in the middle of baking something - the baking will cease and then you dont know how much remaining baking needs to be done.
I have read articles about putting a ferrite bead around the wires as the electronic spark ignition wires next to other wires causes and EMP like spike. The articles say that re-routing the wires so they are not close to the ignition wires and installing ferrite beads around the wires will elliminate the issue.
I have had this PF failure even when not baking so I feel that the issue is the circuit board and since I am a troubleshooter by nature - I suspect the zener diodes to be going bad on the board. I have enough test equipment to test them one by one.
I will update this as I perform this troubleshooting and post my findings. There is only so many hours in a day ...
This webpage updated on 6/18/14
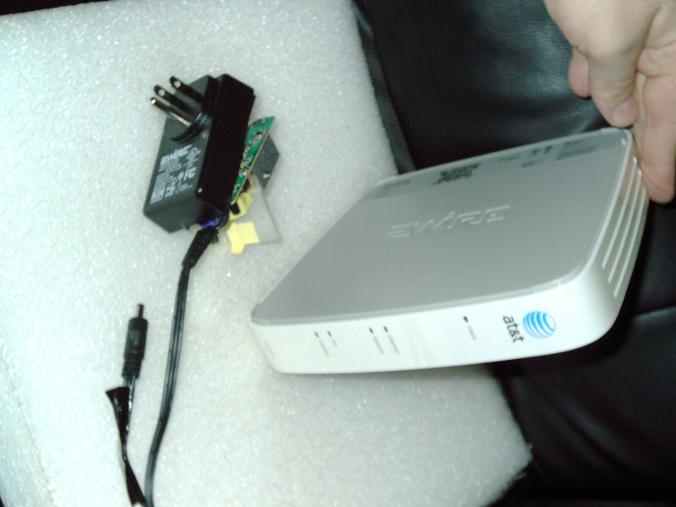
I have had 3ea DSL outages in my area in the last 30days. I am writing this article on 8/7/14. I phoned the phone company which I get my DSL service through and each time they told me that there was an internet outage in the Chicago Heights IL region - which I am located about 8 miles from - and that affects my DSL service. So for 3 days in the last 30 days - my internet has been down and at odd hours in the morning or at night when I check on it - then the modem has regained its connection wth the internet.
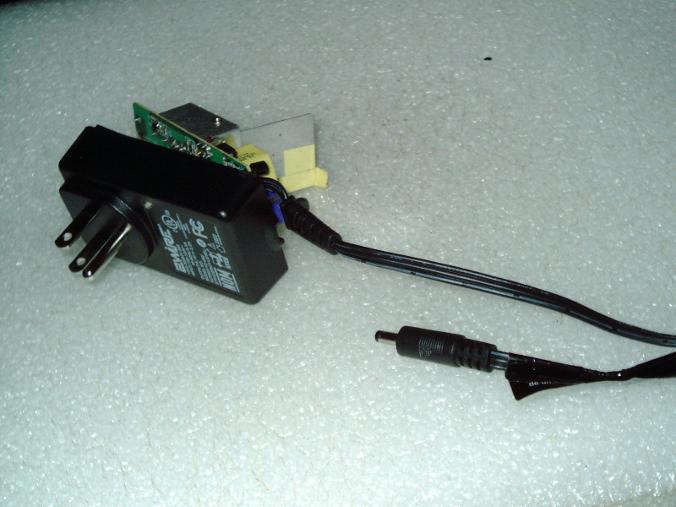
The last 2 outages resulted in regaining of the internet connection - and the first outage also resulted in my replacing the power adapter with one that I bought at a local Thrift store - my spare DSL modem which was a lucky find at $3.99 and happens to be the same model as my unit that use daily. Well today 8/7/14 my spare power adapter also went out and even though it checks 5vdc on my multimeter - it barely had enough power to intermittantly light the modems LEDs. I tried swapping my spare thrift store model and this power adapter could not light that one either -so I know that the power adapter was at fault- I had previous weeks tested both DSL modems so I knew as of several weeks ago my spare modem was a working one.
So - what to do - without internet access - I couldnt order a new power adapter from ebay. I have seen this power adapter for sale for about $10 depending on the seller.
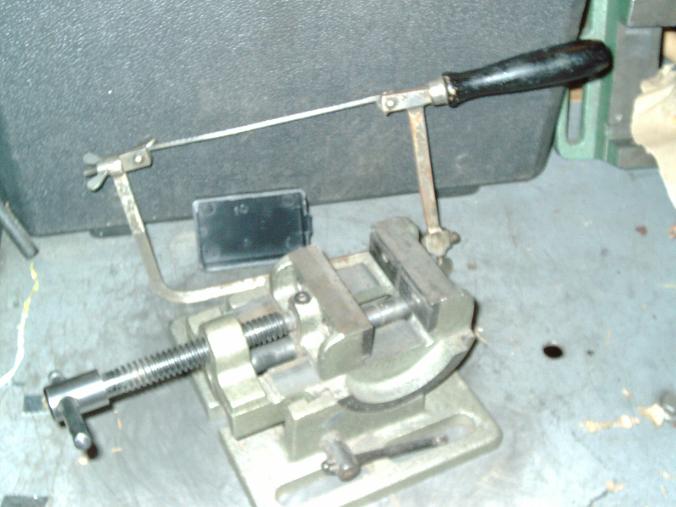
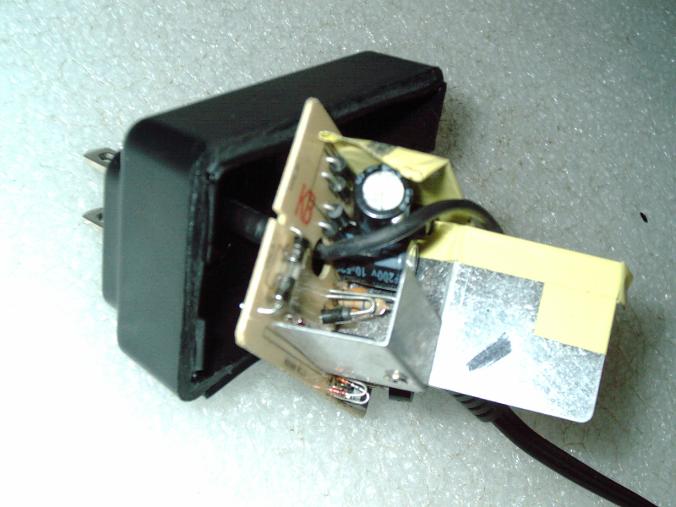
I decided to carefully open the case on my 2nd power adapter (the one that most recently failed) and I opened the case by sawing it with a very thin blade coping saw. This is a jewelers coping saw meant for gold and has a very fine thin cut. I bought this used in a box of stuff from a local seller who sold me a used table saw many years ago - it was leftover from a relative of the seller who was a craftsman. I'm glad to have the jewelry saw and many spare blades and parts for this coping saw.
I held the power adapter in a Craftsman angle vise and (1) cut the sides and then (2) cut the end without the cable. I knew that I couldnt cut the end with the cable - so I was hoping that I could just crack it open carefully. I was surprised to see this unit is a non-glued and non-fused plastic case. There probably is a way to crack it open carefully with minimal boogering - but my cut was so clean and thin that it took off very minimal material and looks great.
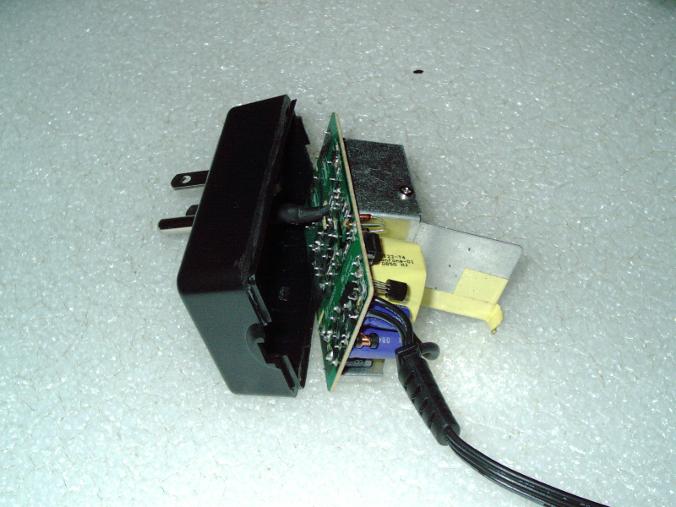
I see 2 side tabs which hold the printed circuit board in place- gently pulling the side of the case away from the PCB board - makes the board jump over the retaining tab. Then doing this to the other side (gently prying it away from pcb) makes the board jump over the tab located on the case. The case side closest to the 3-prong ac outlet has a very delicate tab in the case. Be careful not to break this plastic tab as it holds the PCB in the right spot so it makes contact with the 2ea AC prongs. I did not break my plastic tabs as I was very careful. By lifting the opposite end of the board then sliding it out of under the tab - then the board was out.
I didnt remove the black wire - instead I just worked with it still connected. I also slightly bent the metal shield so I could have better access and - let the wire not be so tight.
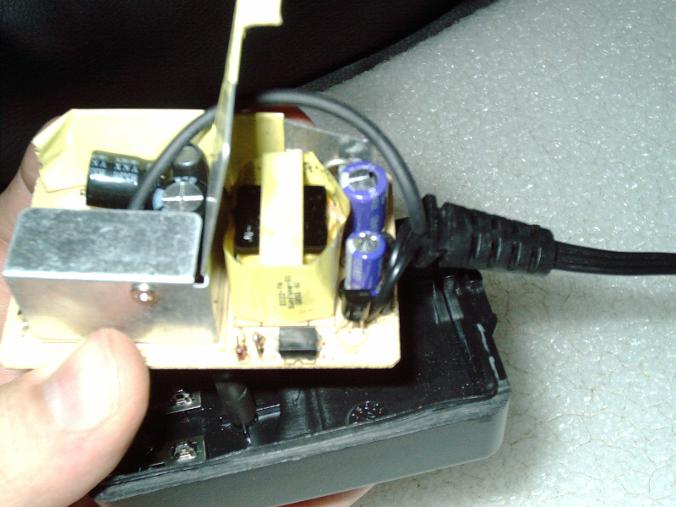
I checked the capacitors in-circuit with my Capanalyzer 88IIA ESR tester and all of the capacitors tested fine for esr. My power adapter was working but very weak in amps. This weakness was caused by 2ea purple capacitors which were bulged and swollen. Even though the ESR was fine - the actual measured capacitance was low approx 150mF on both as measured with my BK Precision Parts Tester model 815.
1. 1000uF 25v (replaced with 1000uF 25V same physical size)
2. 470uF 10v (replaced with 470uF 25V same physical size)
I used a q-tip cotton swab to clean the flux after soldering - this swab was dipped in Kmart paint thinner (1 gallon plastic jug - Kmart closed down last year in my town) and then cleaned off with Isopropyl Alcohol for a no residue clean dry good as new appearance.
I have a large inventory of electronic parts and I replaced them with 2ea capacitors I bought on big-auction-site from China about 2 years ago. I have about a dozen tiny ziplock bags containing electrolytic capacitors which I bought in that listing for about $15 and was quite a bargain. I have fixed many items with that lot of electrolytic capacitors. It was an assorted lot of capacitors of various ratings- all of these capacitors in this lot were tiny and just the right size for modern electronics repair. Some of my other capacitors in my inventory are larger or much larger for the same rating. The larger size capacitors wouldnt have fit inside the power adapter case.
The 2ea swollen electrolytic capacitors were the only issue I saw with my power adapter. The remaining parts tested good and I am now writing to you an hour after my repair is complete. I have temporarily held the case in place with a piece of cellophane tape to test (doing that right now as i write this). After I get done writing this article - I will apply a thin bead of 2-part epoxy to form a permanent adhere of the two case halves.
I think what caused my 2ea power adapters to go bad is that when the internet is down - the DSL modem clicks every few seconds as it is searching for a valid internet connection. When it doesnt find one - it cycles over and over and over every few seconds - all day long. This overstresses the power adapter and one of the biggest drains is the internal relay clicking as relays consume alot of power. Also cycling on and off and rebooting and whatever that modem is doing every few seconds - caused 2 of my adapters to go bad. I suggest unplugging your power adapter from the wall during internet outages. What I did is - I unplugged the adapter from the modem - but I didnt unplug it from the wall. I think that this power adapter needs a load. If there is no load - it has a much shorter life-
I suggest that during Internet outages
1. Unplug your power adapter from the wall
2. Never unplug your power adapter from the modem for a long period of time - the power adapter needs a load
3. Dont let your DSL modem power cycle all day long
It took my expertise to fix it - but this power outage caused it and in hindsight I should have just unplugged my power adapter.
I noticed that this power adapter has a fuse in it. So my other power adapter which has no output at all - I may someday open it up andsee if the internal fuse is blown. It is strange but good that this power adapter has a fuse. Mose small wall adapters dont have any fuse inside. For most people opening up a power adpter isnt possible. This case can be snapped open and shut but I didnt know that until I cut it open. It is possible to pry it open and then snap it shut - so replacing a fuse may be all that is needed on the other 2-Wire power adapter I have that doesnt work.


After just having resolved a large issue with my DSL Internet a few hours ago- I wanted to document it while still fresh in my memory.
At the end of January I received an email that my DSL price is increasing by $3 per month so I called to complain about it (since I got it it started out at $19.99, then 24.95, then 30, now $33) and the numerous people who answer the phones and transfer you from person to person and department to department shut off my DSL and signed me up for service I didnt want and promised me prices of $54.95 for a 2-phone line plus 4mb internet - and the installer who called prior to installation and I told him no thats not what I want but came anyways.
To make a long story short they wanted to trick me into $120 per month but told me verbally $54.99 per month and after taxes would be approx $65 - but not so. They wanted to switch my phone number to some unknown phone number and not keep my present numbers (I fought so hard to get rid of incessant telemarketers and people scamming trying to collect on behalf of police and fireman etc Scammers claiming to be from ATT but wanting to know my phone bill - you know the telemrketers) and those type of calls are VERY INTENSE and bothersome especially when you have a new phone number.
I rejected the installation unless the installer would correct that oversight about the phone number change (even so I wasnt aware of the $120 price which I found out about later) so basically the phonecompany people handled me a lemon and I knew from experience that if I allow anything installed with errors - those errors whoul NEVER be corrected and I would be stuck with it.
So the installer who caught the error shows up at my door with his truck 5 minutes after I told him that isnt correct and he told me he cant change the order and the only solution is to cancel it and place a new order. And I was on the phone with AT&T (the installer handed me his phone) and the person assured me that everything would be cancelled and that my existing phone numbers would not be cancelled (they had orders to cancel my existing phone numbers due to new phone numbers from incorrect installation)
So I have been fighting since Monday 2/2/15 until 2/6/15 to get this straightened out and this is what I learned that will help someone reading it
1. If you have DSL with AT&T dont cancel it or change it because DSL is not offered anymore.
2. The Uverse package would not be $54.99 as quoted - the representative told me "he could not find ny $54.99 cancellation - he only sees a $120 cancellation"
3. There is a term the phone company uses called "revert" and that is to put back your original phone status and internet status as of a certain date - which for me was 1 week ago. The solution was to "revert" back to how my acount was. Since DSL is not offered as a new service - the only way to get back what I had was that way.
4. The ATT department phone number that worked well for me was (888) 340-1270 and also (888) 443-2430 and these daprtments are called DSL Tech Support
5. There is alot of hoopla and misguiding and misinformation by misinformed people there who transfer me to Uverse sales or billing or other departments and make strange requests and obervations like an account "hold" or an "error" or other things which prevent resoolution. This is due to talking to the wrong person or department.
6. The phone bill does not show the correct phone number for DSL matters and is a sinkhole for my time and I wasted 5 days of my life talking to the wrong people and hearing their agonizingly patronizing and yet accomplishing nothing and waiting for hours and days sometimes for something to be resolved that they supposedly had done to correct - but in fact they were not "doing somthing" but instead were just observing their screen and contributing nothing to the solution.
7. What did help was having a person make a "Case" for me and my writing down the "case number" sometimes called a "form" when this form was filled out - this was viewable by any person in the department and made my life of explaining things over and over much simpler. Once a case or form was entered - this was sent to a person in another department who actually does the work of "revert" everyone else I spoke to had no authority to make changes. The key to getting this resolved was the "case number" and calling the correct phone number and speaking to the correct department.
8. Uverse is being pushed incessantly right now. Everyone in sales and billing and most phone numbers there are geared towards handling Uverse - which for me would be substantially more money and I was blatently lied to and tricked. I dont suggest you cancel your DSL even if the rates increase slightly or substantially. Stick with it.
9. I checked on the internet alternatives in my area
a. 56k modem for $19.99 for 3 months then would become $24.99 per month plus it ties up your phone and my phone bill for calls is additional (gotta be kidding me - no thanks - it should be much much chaper than that)
b. 6mb Comcast $19.99 for 1 year plus you have to pay $50 downpayment over the phone plus $100 installation then after one year who know what the price is????
C. Wireless must be line-of-sight with the tower and was $40 per month at 4mb rate or $35 at 1mb rate this was my next option and if unresolved with AT7T I would have done this)
D. Uverse quoted at $54.99 per month including 2 phone lines at 4mb rate and they would have to come and install lines because standard twisted pair phone lines which carry DSL would supposedly not work. This turned out to be a crock as the person who viewed my cancelled installation saw $120 as the monthly rate. The mistake of new phone numbers was probably just a simple typo on the part of the sales rep. The large rate difference was not a simple typo.
10. After the one person who could help called me at 4pm I saw my DSL light turn on and turn green so I knew he did something to help my connection. Then I received an automated/prerecorded message an hour later telling me that my internet was working and it gave me an incorrect phone number in that recorded message - I knew to ONLY call the above 2 phone numbers at that point - so I disregarded the phone number the pre-recorded message told me to call.
11. The tech support woman had me open my web browser and enter a number xxx.xxx.xxx.xxx (I'm not listing it here beacuse I dont know if it is a generic number of a number exclusive to my DSL modem - the same number is found in your instruction manual for the modem) followed by periods and this accessed the internals of my DSL modem model 2701HG-B. Then she had me choose a password and give my email address because the box "forgot" all of that information when she told me to reset it. After I followed her instructions I was taken to a page on the internet to setup my DSL account and she told me not to choose new installation. At th etop of the page in small letters it basicall said for "existing user" or somthing to that effect. SO when I clicked there - I entered my email address and my old information was mostly present there with the exception of my password secret answer. SHe said to type it in again since the new system doesnt allow spaces between words and their old system allows spaces. So for example "favorite actor would nowadays be "firstnamelastname" rather than "firstname lastname"
12. ok well it all works now but I still have to check my bill which is more than 30 days away - my next bill will arrive beginning of March so I may still have to fight for the correct amount at that time.
13. The helpful person who wrote the "case" also gave me a $50 credit which he called a "goodwill credit" I didnt ask for it and I didnt argue with someone giving me a credit. I just spent 5 days on the phone and got very little else done. I'm pnly back to square one and have nothing gained by any of this.
14. I was concerned about losing all the history of my AT&T of emails etc for several years. I have come to realize that it is dumb of me to use their email for important communications. One they yank away service - I would lose emails after 30 days. I need to sign up for some other email system and use that and some email systems have the ability to transfer all of my email history. I need to do that as I feel these internet providers can go belly up or change or cancel service at any time.
I hope that this helps someone by reading it.
My phone bill summary
2 phones $56 basic local no long distance (I use 1010502 number to dial out which saves money per call but is a $5 charge per month)
Internet DSL 768K has burst rates up to 19mb but on average according to speed test online is abut 3-4mb $30 plus $3 new fee hike
$89/month
I checked my emails which I had a bunch after 4 days of no internet. Luckily my phones werent down. It apears that the
online speed test results for my 768k DSL modem service (youtube is very choppy and stutters)
http://www.scanmyspeed.com/
http://home.mcafee.com/speedometer/results.aspx
Here is a bunch of screen shots showing multiples tests online and the results. Always a diffrent number but clearly on average much higher than 768k The burst rate can last only a fraction of a second or can last several minutes. See the 48mb rate which lasted only a microsecond and the end test score result was about 2mb. I also saw onw which showed 90mb but I wasnt able to do a screen capture quick enough to catch it- again the end test score was just a couple of mb. This high burst may be an anomaly of the test website - but you can see that Mcaffe also shows over 2mb rate. The actual rate is unknown and varies substantally every time you test. The Mcaffee screen is always the same - over 2mb.

|
speedtest 1.JPG Size : 1240.447 Kb Type : JPG |
12/31/14
Running a Windows XP Computer in 2014/2015
Since I use Ebay and Youtube and ATT.net Email - I have made effort to keep an updated Windows XP computer with the following specifications
1. Pentium 4 1.7GHZ processor
2. 384 Megabytes Ram
3. Rendition 2000 graphics card
4. 120Gigabyte Hard Drive IDE
5. DSL internet
The Service pack 2 installed for Windows XP was made because Flash required certain things that the early version of XP CD-ROM I had - didnt have. So I had to upgrade to Service Pack 2 by downloading from Microsoft website. One of the things I needed was "Windows Installer 3.1" which required Service Pack 2.
All of this hoopla was because basic websites like ebay and ATT.net insert things on the screen that run on Shockwave and my computer would crash. It doesnt currently crash because I was able to install Firefox 30 (before I had a much earlier version which was much faster and used less memory) but for compatibiility I installed Firefox 30 which required service pack 2 for Windows XP and also the installer program.
The level of difficulty in getting it all to work was quite high. It runs but is not fast. For example youtube videos used to play very fast - but now are about 10-15 frames per second - depending on the video. But at least it all is compatible and plays. Ebay loads fine too. But in the last 4 months I have had glitches on ebay. For example when viewing listings - the description would disapear after a few seconds and then get replaced my a search summary screen - by clicking "refresh Uturn icon" or "refresh" in the menu - then the screen would reload and then it would be fine and stable. So viewing a eba page required loading it twice.
Firefox 30 makes a virtual memory file of 300mb and really bogs the computer down with multiple windows and stays memory resident at times. I have seen a drastic improvement in how my system runs by deleting UNWANTED saved information that websites store within the Flash Player. Like deleting "Cookies" - deleting FLASH PLAYER website data stored on my hard drive is a big help and I have never heard of anyone mentioning this.
All this hoopla has a simple solution and here it is
1. Start Menu - click with left mouse button
2. Control panel - click with left mouse button
3. Flash Player - click with RIGHT mouse (be sure to click this one with your RIGHT mouse button)
A. Open - click with left mouse button
B. Advanced Tab - click with left mouse button
C. "delete all" - click with left mouse button
D. "Delete all site data and settings" make sure a check mark is here
E. Delete Data - click with left mouse button
(This will delete all saved data which websites put on my computer which caused me alot of issues and grief.)
Note
I always select settings for No Updates and to ASK me if a website wants to install something or load or download - otherwise some websites try to modify or harm my system.
Update 2/8/15
Choppy Stuttering Stalling Youtube Videos in Firefox 30 on Windows XP in 2015
1. Open Firefox 30
2. Firefox menu at top of screen
A. Tools/Add-ons
B. Get Extension called "Greasemonkey 2.3" which runs scripts for Firefox
C. Get script for use with Greasemonkey called "Youtube Center 2.1.7"
D. When you visit Youtube.com for the first time after installing - go to settings and make sure a check mark next to "dash player" is removed.
E. Now my youtube videos play at a much much much faster framerate and 80% less stutterinng and loading and lagging.
F. I also went into Youtube Center 2.1.7 script setting and selected the resolution size and other settings for playback. I seleected a mid-grade video resolution for playback and other settings which best fit my basic computer and basic internet connection.
The culprit is the new "dash player" found on youtube since approx 2013 and it trips up many web browsers and puts them into a cunfused state. Running the above script causes the browser to avoid the potential pitfall of "dash player" and allows buffering in a more normal manner.
Update 2/15/15
Speed up Internet on Windows XP and DSL Internet
I did this a long time ago and since then I have a new operating system install and hard drive and need to do this again to this system. Basically AT&Ts internet has alot of lag - possibly because of everyone else using Uverse or possibly the servers they use are just slow.
THe following is to point my internet connection through the Google public servers which have less of a lag time and stalls less. With the AT&T servers there was a several second lag to several minute lag intermittantly and sometimes the websites and videos and downloads would crash due to this extreme lag.
THis is what I did to fix it (I have DSL Internet with AT&T) and am using a 2-wire DSL modem
1. Control Panel
2. LAN or High SPeed INternet
A. Local Area Connection 3 Connected
B. General Tab
C. Properties
D. Internet Protocol (TCP/IP)
E. Properties
F. Use the Following DNS Server Adresses
Preferred DNS Server 68 94 156 1
Alternate DNS Server 68 94 157 1 (Use the right arrow between numbers)
G. Click OK
3. Close all WIndows
I would say this is a substantial improvement in speed with a lot less lag idle time. There is still some lag and dropout times when the DSL light turns from green to orange. But it is substantially better.
I tried other DNS public servers like Google and Open DNS just to9 name a few of many that I tested. But the above worked the most smooth and was the most compatible with the websites that I regularly use. There was some tradeoffs - some DNS were faster on one website but not on another. For me the factory stock DNS was the best. I think that somehow my DNS got wiped out or over-ridden by some previous ancient DNS which no longer worked well. SO replacing it with a currntly supported DNS from AT&T fixed the issues I was having. I now feel that it is working decent - but still has some dropouts and lags which are tolerable.
Changed from DSL to CABLE Modem
Changed from Landline Phone to Internet Based Phone
Update 10/14/16
I have changed my internet to Cablemodem ONLY because the big-phone-company was charging excessively and decided to take advantage of a competitors introductary rate for 1 year. My DSL modem and fixed power adapter worked well. I decided toget rid of my landline phone and get Magicjack Go which is an internet-based phone. And after a day of figuring out how to hook it all up on my own. It all works just like before- except now Im using Wifi and my phone is internet based. BUT it feels just exactly as before. I see no difference - except the cost is much lower per month.
I will put away my DSL modem as I may PING PONG back and forth among the internet providers - taking them up on intruductary offers where possible - in future years. I may need my DSL modem or it may be obsolete. I was told by the phone company representative that my old DSL service was being phased out and if I ever switch - they would no longer offer DSL to new customers. Because I never switched over teh years - I was "grandfathered in" and allowed to continue my DSL service.
But the bills became SO HORRENDOUS and ERRORS and rate changes every month - that I spent more time fixing my bills and calling them - where I just had it with their tactics and the grief they were causing me was TOO MUCH.
Im happy with my new setup
1. Motorola SB5100 cable modem ($5 from thrift store - NEW sealed in original plastic, purchased used disc separately and New compatible power adapter for $15 from big-auction-site)
2. MagicJack Go includes 1 year phone $35 (purchased from big-auction-site-seller sealed in box unused)
3. WF2414 wireless router (a bit difficult to setup even for me- but works good once setup manually)
4 My old landline phone plugs into Magicjack Go unit.
5. Wireless dongle fits into USB port of my older laptop (Wireless WIFI dongle $3 from big-auction-site)
I was told a LIE by cable installer who said he has to sell me a modem because mine is not going to work. I refused to have the "barbed hook" of equipment rental for an additional $10 per month. I used my own equipment and is FULLY compatible and saved $120 for the coming year on bogus equipment rental.
Some of the things were acquired over the course of a month because shipped from other countries and takes time to arrive. I mistakenly bought this equipment thinking it would work for E-vergent local internet provider but there are lots of trees and hills and prevent line-of-site internet. Evergent installers came but couldnt get any wireless radio frequency reception from the top of my roof to the water tower where they have their transmitter mounted. So they cancelled my contract due to no-reception. I was SO counting on that.
Over that month of collecting equipment (e-vergent doesnt use cable modem) I had a backup plan of switching to cable internet if that should fall through.
I had some expenses with purchasing equipment upfront- so this month and next month - I cant say I came out ahead. But in future months - I will see a $50 savings on month #3, #4 .... all the way to Month 12 - about $500 saved this year - just by dumping my phone company's excessive charges. Next year I will either have to pay $50 per month internet or PING PONG to another internet provider (there is only the phone company, cable company and E-vergent doesnt work for my area) so my excessive internet FEEs troubles are not over. But since my phone charges are now negligible and my phone service is based on internet - now I can PING PONG between intriductary internet rates and my phone will just tag-along.
The phone was a real can-of-worms being landline based because the big companies played games with PLANS, Bundles, Rates, line charges, taxes, fees and now that is pretty much over except a YEARLY $10 use of 911 fee which MagicJack charged as required by law. This is substantially less than I was paying from the BIGphone company for this tax and 911.
This Webpage Last Updated 3/2/18
**********************************************************************************************************************
PEOPLE PHONE ME AND EMAIL ME FOR CIRCUIT BOARD REPAIR SERVICES ON THEIR APPLIANCES LIKE REFRIGERATOR, NATURAL GAS OR ELECTRIC OR PROPANE STOVES/OVENS/RANGES, FURNACE, WASHER/DRYER, EQUIPMENT, OR OTHER GEAR. I typically charge $25 to $50 per board to diagnose the bad component. I reserve the right to charge more is it is overly complex.
Please limit the conversation to just the circuit board please - as circuit board diagnostics and repair etc is what Im talking about here.
Electronic parts is what I check and test. You know the very same components re-arranged on a different board - fits a different purpose. Really its just the same set of parts and components - just rearranged differently. I check components- all of them. I have that set of skills and IM NOT LAZY. I dont need a schematic. I check all components on a board and mark the bad ones in RED. Now there are some custom/proprietary parts which I cant check - but those rarely fail. I can diagnose 99% of all issues. Dont get mad at me if you have a proprietary component on your board. You cant win them all. Ill do my best for you.
See my webpage for all of the test equipment I have which I use daily to troubleshoot and repair circuitboards.
No I dont do On Site repairs. You will need to remove the circuitboard and mail it to me. Cost of shipping is high - so bear that in mind that you will have 2 shipping costs - one to ship it to me and return shipping. Thats is 2 shipping costs that the buyer will need to pay. Plus my diagnostics fee. Many people are handy DIYers and can solder in their own parts. The issue is that they dont know which part is the bad one. Thats where I come in- most of my buyers need me to point out which component went bad- that is what my diagnostics fee is for.
$10 quote consultation fee on circuit boards
Pete
(847) 454-7858 between
11am and 7pm daily
Illinois, USA
drviragopete@att.net
I charge $10 for technical support by phone which covers my time in emailing and downloading photos etc and or phone conversation time. This $10 tends to screen out non-buyers as I have to cover my time and costs. After all life isnt free and isnt everyone charged for everything constantly?
Got an appliance circuit board you need troubleshooted? Willing to pay $10 quote consultation fee? Willing to pay shipping both ways? Willing to pay my diagnostics fee $25 to $50 typical (my be more if overly complex)? Willing to pay my repair cost (varies)? Great then you are a potential buyer.
here is my webpage which shows my diagnostics equipment
http://www.drviragopete.com/electronic-parts-testing-service.php
I dont know of ANYONE else in the world who does what I do. I think electronic repair down to the component level and offering a diagnostics service is a very RARE thing. Check out all of my links at the top of the page. The range of my skills is very wide. Let me know what I can do for you. Yes I do charge for my time.
At the point in time when you have paid- then you are my customer. I reserve customer service for
actual paid buyers. In my line of work - I have to do this otherwise I get swamped with non-buyers asking questions.
**********************************************************************************************************************
Here is a paypal button for $10 quote consultation fee for electronic item troubleshooting.
Plan on sending me email photos showing the actual circuit board AFTER you have paid the $10 fee. This $10 is not applicable towards any products or services or parts. This covers my time in communication such as email and or telephone conversation.